
In this post, we are going to learn about the Golang slices in detail.
Previously we have learned all about the arrays in the Go language but there is one major limitation to the arrays, they cannot grow or shrink in size as per our needs. To overcome this limitation of the arrays, Go provides us with another data structure called a slice. Like arrays, Golang slices are made up of multiple elements, all of the same type but unlike arrays, we will be able to add the elements at the end of the slices using some inbuilt functions.
In this post, we are going to look at the below points
- How to create slices in golang
- Slice literals
- Slice operator
- Appending a new element into the slice
- Multi-Dimensional Slices
- Looping over slices
Creating Golang slices
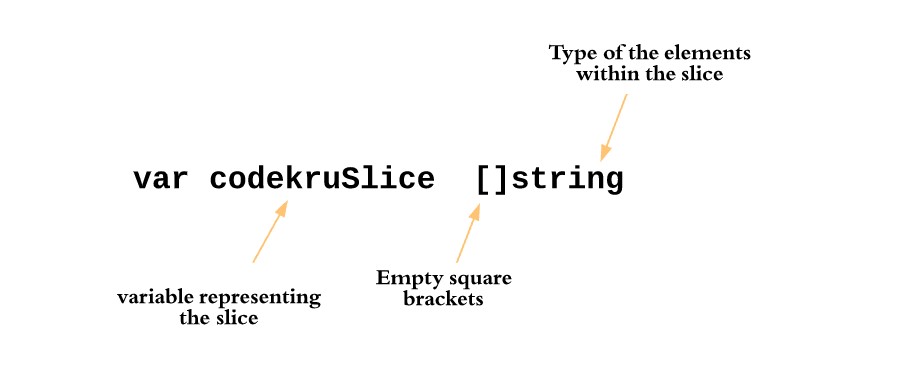
To declare the type of variable that will hold a slice, we can use an empty pair of square brackets, followed by the type of elements that the slice will hold.
var codekruSlice []string
This declaration is almost similar to that of arrays, except that we are not specifying the size of the slice in its declaration. But unlike arrays, declaring a slice doesn’t automatically create it. So, we have to explicitly create it and this can be done in many ways –
- Using make() function
- Using new() function
make() function – make() function accepts at least two parameters, one is the type of the elements that the slice will hold and another one is the length of the slice. If we make a slice by just using these two arguments, then the capacity of the slice will be equal to the length of the slice. But if we also pass a third argument, then that would be treated as a capacity of the slice.
Note: The length of the slice can be found by using the len() function while the capacity of the slice can be found by using the cap() function.
package main

import "fmt"

func main() {

	var codekruSlice []string        // declaring the slice
	codekruSlice = make([]string, 2) // actually creating a slice

	fmt.Println("len:", len(codekruSlice), ", cap:", cap(codekruSlice))

	var slice2 []string           // declaring a second slice
	slice2 = make([]string, 2, 5) // creating a slice with len 2 and cap 5

	fmt.Println("len:", len(slice2), ", cap:", cap(slice2))

}
Output –
len: 2 , cap: 2
len: 2 , cap: 5
new() function – We can also create slices using the new function as shown below.
package main

import "fmt"

func main() {

	var codekruSlice []string          // declaring the slice
	codekruSlice = new([5]string)[0:2] // creating slice of len 2 and cap 5

	fmt.Println("len:", len(codekruSlice), ", cap:", cap(codekruSlice))

}
Output –
len: 2 , cap: 5Don’t worry if you don’t get what [0:2] is here? We are going to look at this later in our post.
And now, once the slice is created, then we can easily access its elements using the same syntax as that of the arrays.
package main

import "fmt"

func main() {

	var codekruSlice []string
	codekruSlice = make([]string, 2)

	codekruSlice[0] = "hello"
	codekruSlice[1] = "codekru"

	fmt.Println(codekruSlice[0], codekruSlice[1])

}
Output –
hello codekruDeclaring and creating slices in a single line using shorthand declaration
We can also declare and create a slice in a single line using shorthand declaration as illustrated in the below program.
package main

import "fmt"

func main() {

	codekruSlice := make([]string, 2) // using shorthand declaration

	codekruSlice[0] = "hello"
	codekruSlice[1] = "codekru"

	fmt.Println(codekruSlice[0], codekruSlice[1])

}
Output –
hello codekruSlice literals
Just like the arrays, if we know what values we will be putting in the slice, then we can initialize the slice with those values using the slice literal. A slice literal looks a lot like the array literal with just an exception that we don’t write the length of the array in the square brackets.
Syntax
sliceName := []type_of_elements{element1,element2,....,elementn}

package main

import "fmt"

func main() {

	codekruSlice := []string{"hello", "codekru"}

	fmt.Println(codekruSlice[0], codekruSlice[1])

}
Output –
hello codekruSlice operator
Every slice is built on top of an underlying array. It’s the underlying array that holds the slice data. So, it’s safe to say that slice is merely a view into some or all of the array’s elements.
When we use the make function or slice literal to create a slice, then the underlying array is automatically created for us, which we can access only through the slice. But we can create the array ourselves, and then create a slice on it with the slice operator.
Syntax
codekruSlice := codekruArray[i:j]
Here, codekruSlice will have a view of the codekruArray starting from the ith index or start index ( inclusive ) and ending at jth index or stop index ( exclusive ). Remember the indexing here starts from 0, so, the 1st element of the array has an index of 0 while the 2nd element has an index of 1.
package main

import "fmt"

func main() {

	codekruArray := [5]int{3, 213, 42, 64, 63}
	codekruSlice := codekruArray[1:4]

	fmt.Println("slice values:", codekruSlice)

}
Output –
slice values: [213 42 64]Make sure not to go outside of the bounds of arrays while specifying views for the slices.
The Slice operator has defaults for start and stop indexes. If we omit the start index, then a value of 0 will be considered as the start index, and if we omit the stop index, then everything from the start index till the end of the array will be considered.
package main

import "fmt"

func main() {

	codekruArray := [5]int{3, 213, 42, 64, 63}

	codekruSlice1 := codekruArray[:4] // omitting the start index
	fmt.Println("slice1 values:", codekruSlice1)

	codekruSlice2 := codekruArray[1:] // omitting the stop index
	fmt.Println("slice2 values:", codekruSlice2)

	codekruSlice3 := codekruArray[:] // omitting both the start and stop indexes
	fmt.Println("slice3 values:", codekruSlice3)
}
Output –
slice1 values: [3 213 42 64]
slice2 values: [213 42 64 63]
slice3 values: [3 213 42 64 63]
Underlying arrays
As we have discussed, a slice doesn’t hold any data itself, it is merely a view into the elements of an underlying array. We can create multiple views to a single array and hence a single array can be represented by multiple slices. But we have to be careful of one thing here, changing the array will change the slices too, as slices are merely a view of the elements of an array.
package main

import "fmt"

func main() {

	codekruArray := [5]int{3, 213, 42, 64, 63}

	codekruSlice := codekruArray[0:4]
	fmt.Println("slice values:", codekruSlice)

	codekruArray[1] = 98

	fmt.Println("slice values:", codekruSlice)

}
Output –
slice values: [3 213 42 64]
slice values: [3 98 42 64]
Appending a new element
We can add a new element at the end of the slice by using the append function. append() function takes a slice, followed by one or more values that we want to append at the end of the slice, and returns a new, larger slice with all of the elements as the original slice, plus the appended elements.
package main

import "fmt"

func main() {

	codekruSlice := []int{12, 62}
	fmt.Println("slice values:", codekruSlice)

	codekruSlice = append(codekruSlice, 43, 21)

	fmt.Println("slice values:", codekruSlice)

}
Output –
slice values: [12 62]
slice values: [12 62 43 21]
Multi-Dimensional Slices
Just like the multi-dimensional arrays, we have the multi-dimensional slices as well with just a minor difference that we don’t have to write the size of the rows and columns while declaring and defining the multi-dimensional slices.
Below is an example of a two-dimensional slice.
package main

import "fmt"

func main() {

    // a 2-D slice
	slice := [][]int{{12, 45}, {23, 11}, {12, 43}}

	fmt.Println("Value at index row 2 and column 1 is:", slice[1][0])

}
Output –
Value at index row 2 and column 1 is: 23Looping over slices
We can easily loop over slices using a simple for loop as illustrated below.
package main

import "fmt"

func main() {

	// declaring an array
	codekruSlice := []int{12, 43, 23}

	for i := 0; i <= 2; i++ {
		fmt.Println("Value at index", i, "is:", codekruSlice[i])
	}

}
Output –
Value at index 0 is: 12
Value at index 1 is: 43
Value at index 2 is: 23
We can loop over slice more easily and effortlessly using the for..range loop.
package main

import "fmt"

func main() {

	// declaring an array
	codekruSlice := []int{12, 43, 23}

	for index, value := range codekruSlice {
		fmt.Println("Value at index:", index, "is:", value)
	}

}
Output –
Value at index: 0 is: 12
Value at index: 1 is: 43
Value at index: 2 is: 23
Hope you liked the article. If you have any doubts or concerns, please feel free to write us in the comments or mail us at admin@codekru.com.