
Maven is more than just a build tool. It’s a project management tool that encompasses a project object model ( POM ), a set of standards, a dependency management system, and many more. This post will look at how to create and run a simple Maven project from the command line.
Note: We have also attached a video at the end of this article. In case you are more comfortable with the video version, then please feel free to have a look
Creating the Maven project
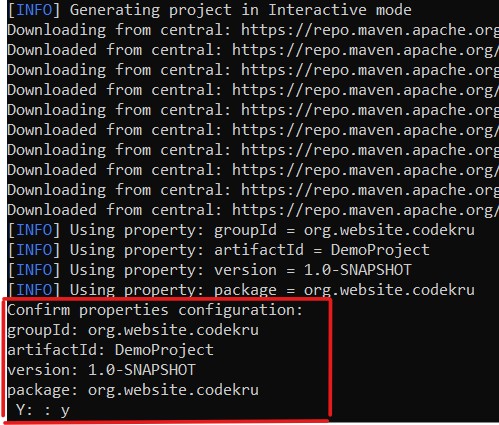
Run the below command in your command line tool to create a new Maven project.
mvn archetype:generate -DgroupId=org.website.codekru -DartifactId=DemoProject -DpackageName=org.website.codekru -Dversion=1.0-SNAPSHOT -DarchetypeArtifactId=maven-archetype-quickstart -DinteractiveMode=false
So, let’s understand the components used in the above command to create a new Maven project.
- mvn is the Maven2 command, and archetype:generate is a Maven goal. The -Dname=value pairs are the arguments passed to the goal, similar to what we do while passing system property options to the JVM via the command line
- archetype:generate helps create a project from an archetype we have defined using -DarchetypeArtifactId=maven-archetype-quickstart. In case, we do not define the archetype, the command will prompt us to choose one from a list of available archetypes. Maven offers a wide range of archetypes for various purposes, including creating web applications.
- Maven archetype plugin will create a folder/directory named DemoProject (the name that we passed in the artifactId argument in our command )
- -DinteractiveMode=false argument will disable the interactive mode. If we don’t use this argument, then the interactive mode will be enabled, and it will ask us to confirm the project settings before creating our project. The project will only be created after we give our confirmation
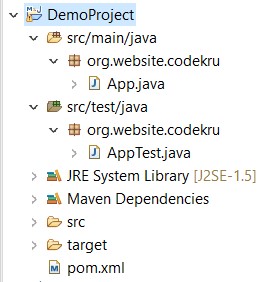
The project has some default project structures, as shown in the screenshot below.
Note: In earlier versions, we could have used the archetype:create instead of archetype:generate, but now the archetype plugin has removed the support for the create goal.
Now. Let’s try to understand the project structure created using the command.
- Every project will have a pom.xml( Project Object Model ) file. This file describes the project, declares dependencies, etc.
- Java classes are placed under the src/main/java directory, and the resources files are placed under the src/main/resources directory.
- The test cases are located in the src/test/java directory, and the resources for the test are placed under the src/test/resources directory.
Run the Maven project
We will now change the App class located in the src/main/java directory to print the message “Our first Maven program“.
package org.website.codekru;

public class App {
	public static void main(String[] args) {
		System.out.println("Our first maven program");
	}
}
Build the maven project
We can quickly build our project using mvn install command from the directory containing the pom.xml file. The output of this command will be something as shown below.
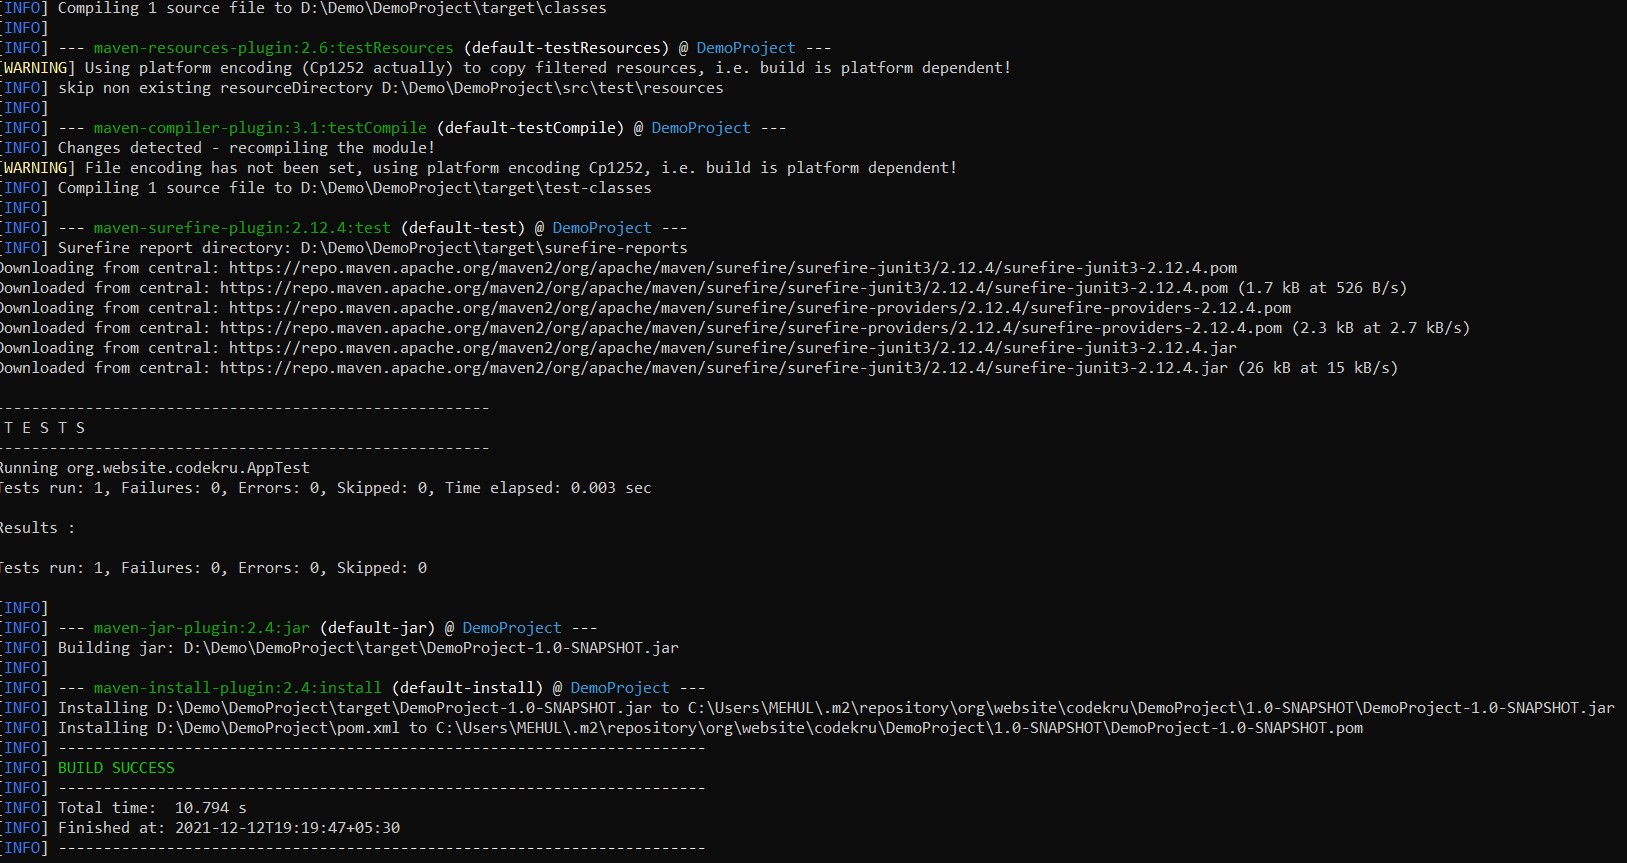
This just created, compiled, tested, packaged, and installed the most straightforward maven project.
Getting an error after running “mvn install” command?
You might get the below error after running the “mvn install” command.
[ERROR] COMPILATION ERROR :
[INFO] -------------------------------------------------------------
[ERROR] Source option 5 is no longer supported. Use 7 or later.
[ERROR] Target option 5 is no longer supported. Use 7 or later.
Add the below properties in your pom.xml file.
   	<properties>
		<maven.compiler.source>1.8</maven.compiler.source>
		<maven.compiler.target>1.8</maven.compiler.target>
	</properties>
So, your pom.xml will look like this now –
<project xmlns="http://maven.apache.org/POM/4.0.0" xmlns:xsi="http://www.w3.org/2001/XMLSchema-instance" xsi:schemaLocation="http://maven.apache.org/POM/4.0.0 http://maven.apache.org/maven-v4_0_0.xsd">
	<modelVersion>4.0.0</modelVersion>
	<groupId>org.website.codekru</groupId>
	<artifactId>DemoProject</artifactId>
	<packaging>jar</packaging>
	<version>1.0-SNAPSHOT</version>
	<name>DemoProject</name>
	<url>http://maven.apache.org</url>
	<properties>
		<maven.compiler.source>1.8</maven.compiler.source>
		<maven.compiler.target>1.8</maven.compiler.target>
	</properties>
	<dependencies>
		<dependency>
			<groupId>junit</groupId>
			<artifactId>junit</artifactId>
			<version>3.8.1</version>
			<scope>test</scope>
		</dependency>
	</dependencies>
</project>
Now, run the same “mvn install“, and the error shouldn’t come anymore.
Run the program
We can quickly run our program using the below command.
java -cp target/DemoProject-1.0-SNAPSHOT.jar org.website.codekru.AppIt will produce “Our first maven program” as the output on the command prompt screen.

We have created a video demonstrating how to create and run a Maven project using the command line.
Video Tutorial
Related Article – Maven build Lifecycle, Phases, goals, and Plugins
Github link for this article’s project – https://github.com/CodekruTeam/RunMavenProjectFromCommandLine
We hope that you have liked the article. If you have any doubts or concerns, please feel free to write us in the comments or mail us at admin@codekru.com.