
In this post, we will look at how to Install the TestNG plugin in Eclipse IDE and we have also placed a video at the end of the article explaining how to install the TestNG plugin.
Let’s look at both of the methods one by one.
Installing TestNG plugin using Eclipse Marketplace
- Go to “Eclipse Marketplace“.

2. Type TestNG in the input box and click on Install.
Note: There might be a scenario, where TestNG for Eclipse might not be shown in your eclipse. In that case, you could install TestNG using this method.

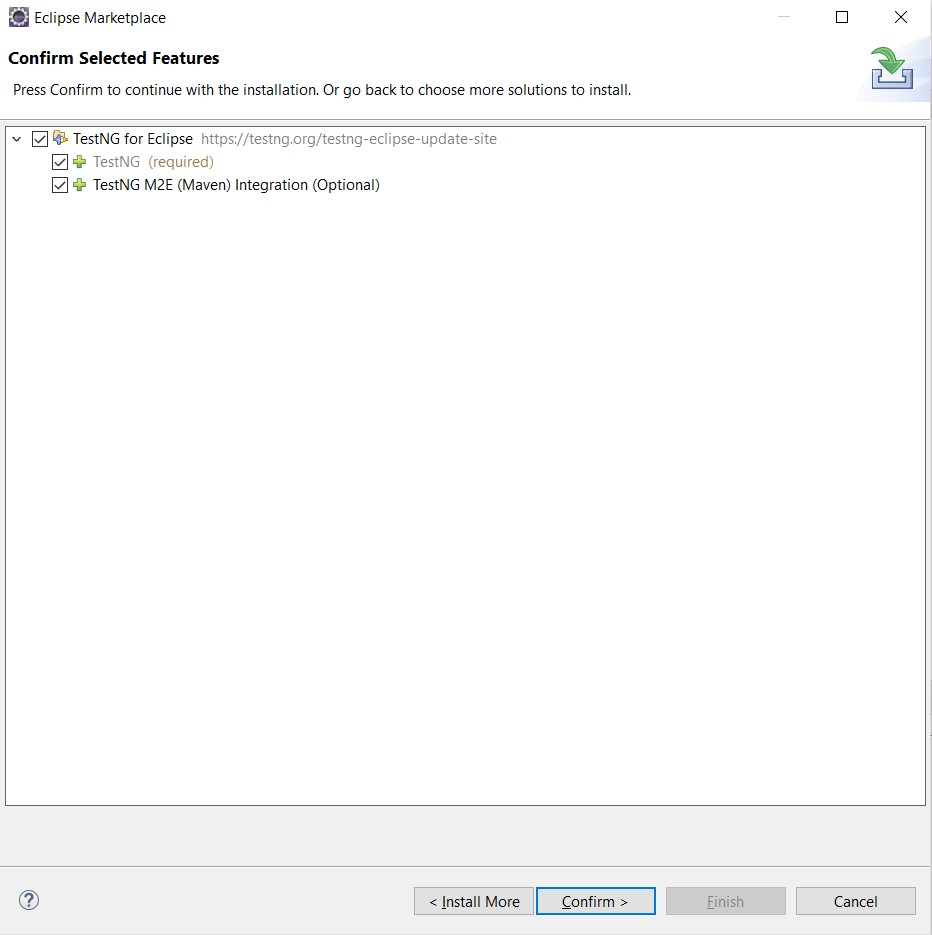
3. Click on Confirm button
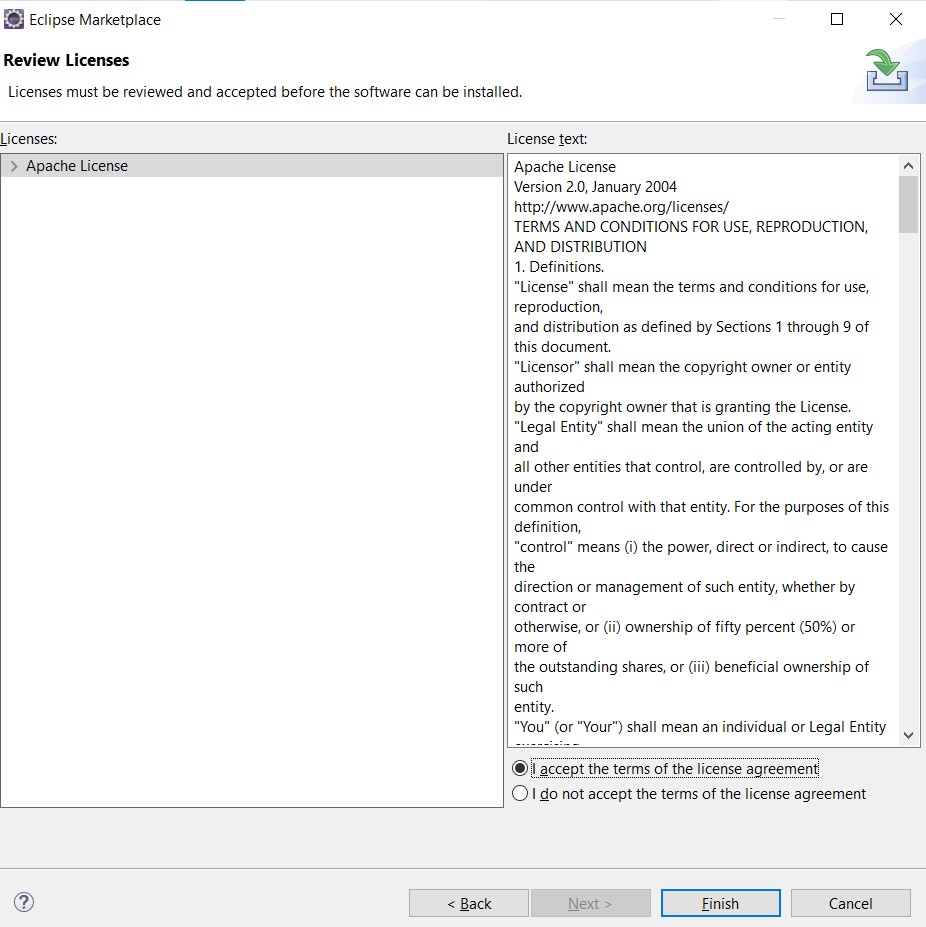
4. After that, select the radio button “I accept the terms of the license agreement” and then click on Finish
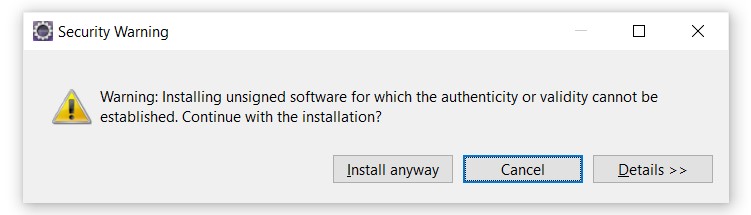
5. It will start installing the TestNG and click on “Install anyway“
6. And then restart the eclipse by clicking on the “Restart now” button of the prompt.

After restarting the eclipse, the TestNG should be installed on your machine.
Installing TestNG using by entering the URL
1. Click on Install New Software
- In the eclipse menu bar, click on the Help option
- Now, click on the Install New Software option as shown below in the image

2. Enter URL to install TestNG
- Now, in Work With input field, enter https://testng.org/testng-eclipse-update-site
- Click on Add Button

- Now, a pop up will appear, enter TestNG in the Name field
- And click on Add button again

3. Follow the normal installation process
- Now, tick the checkbox and then click on Next

- After clicking Next, it will show you a list of items that will be installed
- So, again click on Next

- After that, select the radio button- I accept the terms of the license agreement
- And click on Finish

- Now, a pop-up will appear, and then click on Install Anyway.

4. Restart the eclipse
Now, restart the eclipse by clicking on Restart Now or you can do it manually also.

Well, this is it. TestNG should be installed in your eclipse IDE. And if you faced any issues while installing the TestNG, then you can also refer to the below video.
Video of Installing the TestNG plugin in Eclipse
Hope you have liked the article. If you have any doubts or concerns, please feel free to write us in the comments or mail us at admin@codekru.com.