
Response Assertion is a powerful tool that ensures the accuracy of response parameters during load testing. It allows you to verify response codes, data, and other variables, ensuring that your application is functioning properly under heavy loads. By using Response Assertion, you can identify potential issues before they become critical problems, helping you to deliver a high-quality product to your customers.
This article will discuss the Response Assertion in detail, along with examples.
We will execute an API and then assert its response and other fields using Response Assertion. This process will allow us to gain a better understanding of how Response Assertion works. To accomplish this task, we will follow a set of steps that are outlined below.
Let’s look at the steps one by one.
Executing the API
Set Up a Test Plan
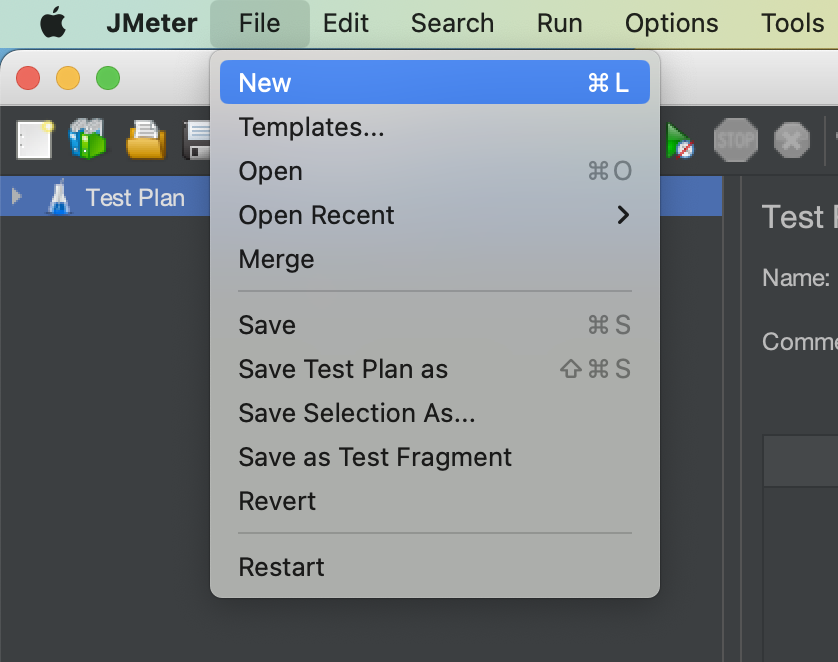
- Launch JMeter.
- Go to the “File” Menu and select “New”.
- This will create a new test plan to be used in our example.
Create a Thread Group
- Right-click on the Test Plan.
- To create a Thread group, simply go to “Add > Threads (Users) > Thread Groups”.

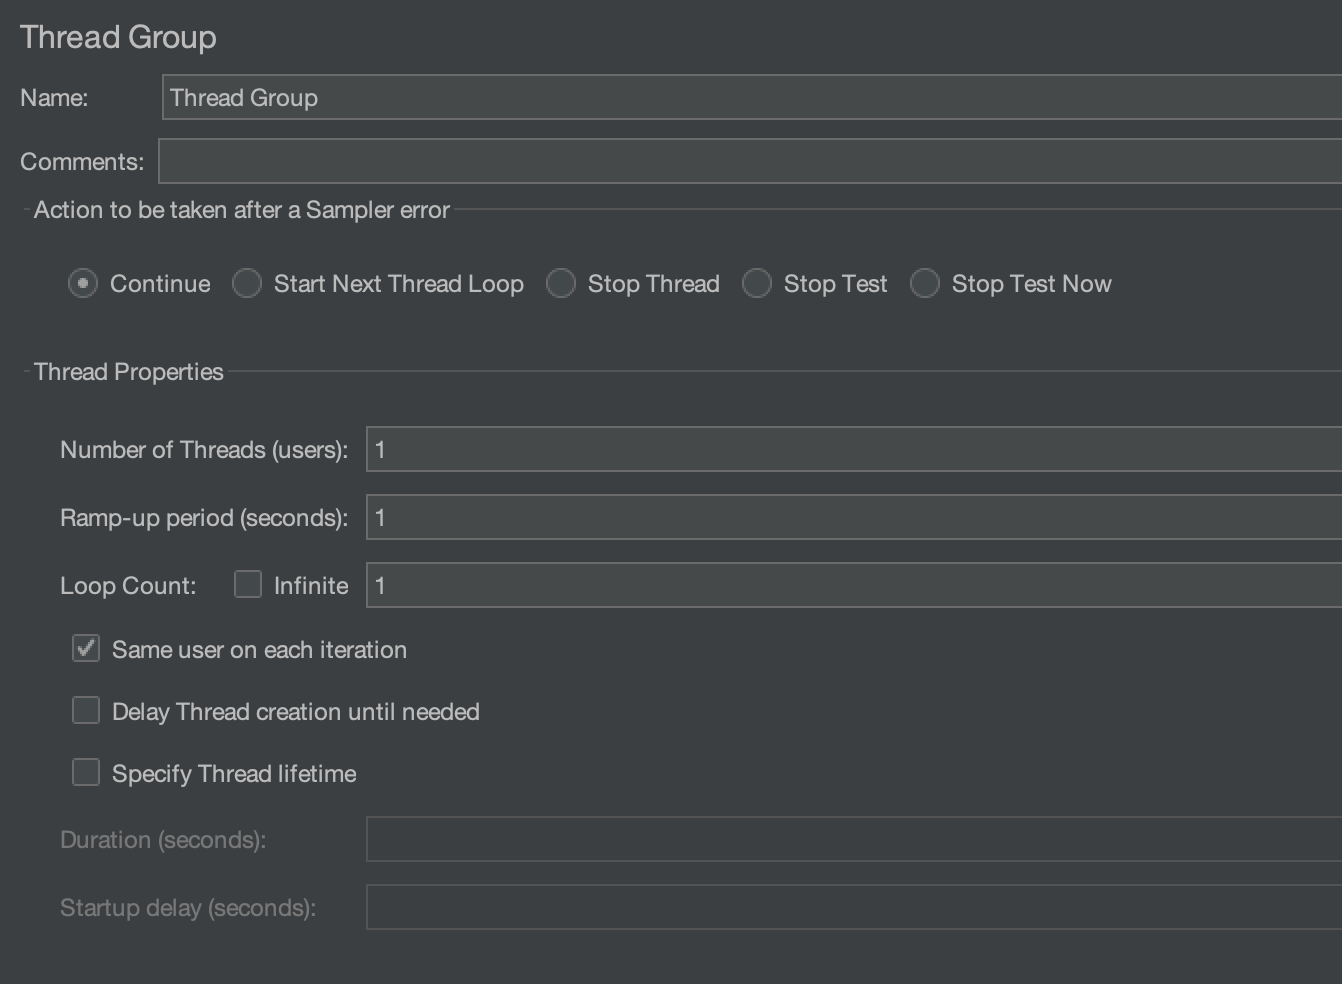
The Thread Group is used to execute a specific number of tests. For simplicity, we will keep it set at 1. Please refer to the image below for configurations.
Add an HTTP sampler
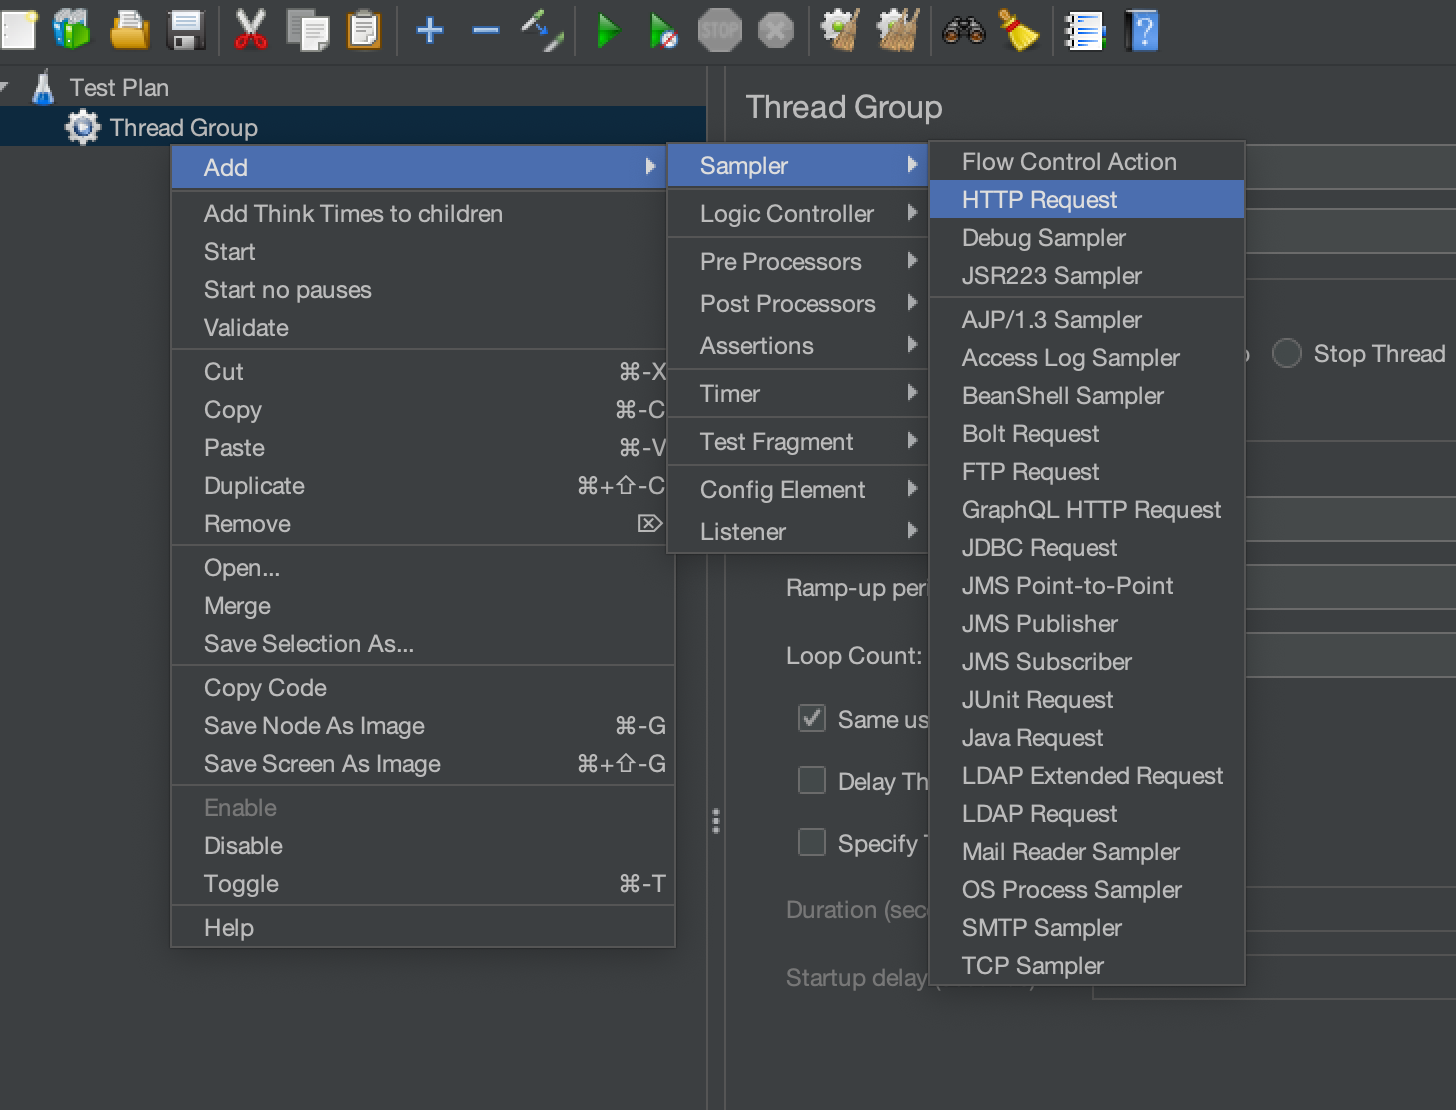
We will use an HTTP sampler to execute a dummy API (https://jsonplaceholder.typicode.com/posts/1). Create an HTTP sampler by right-clicking on the Thread Group and selecting “Add” > “Sampler” > “HTTP Request”.
We will hit the GET request on the “https://jsonplaceholder.typicode.com/posts/1” API. So, we will add it to the HTTP sampler by following the below steps.
- Please enter “https” in the input box that is labelled “Protocol[https]:“.
- Enter “jsonplaceholder.typicode.com” in the input box labelled “Server Name or IP”.
- By default, the HTTP request value is set to GET. Since we are only executing a GET request, we won’t be changing it.
- Set the Path to “/posts/1“.

Add “View Results Tree” listener
View Results Tree listener is one of the most used listeners in Jmeter. It provides detailed information about server responses during performance testing.
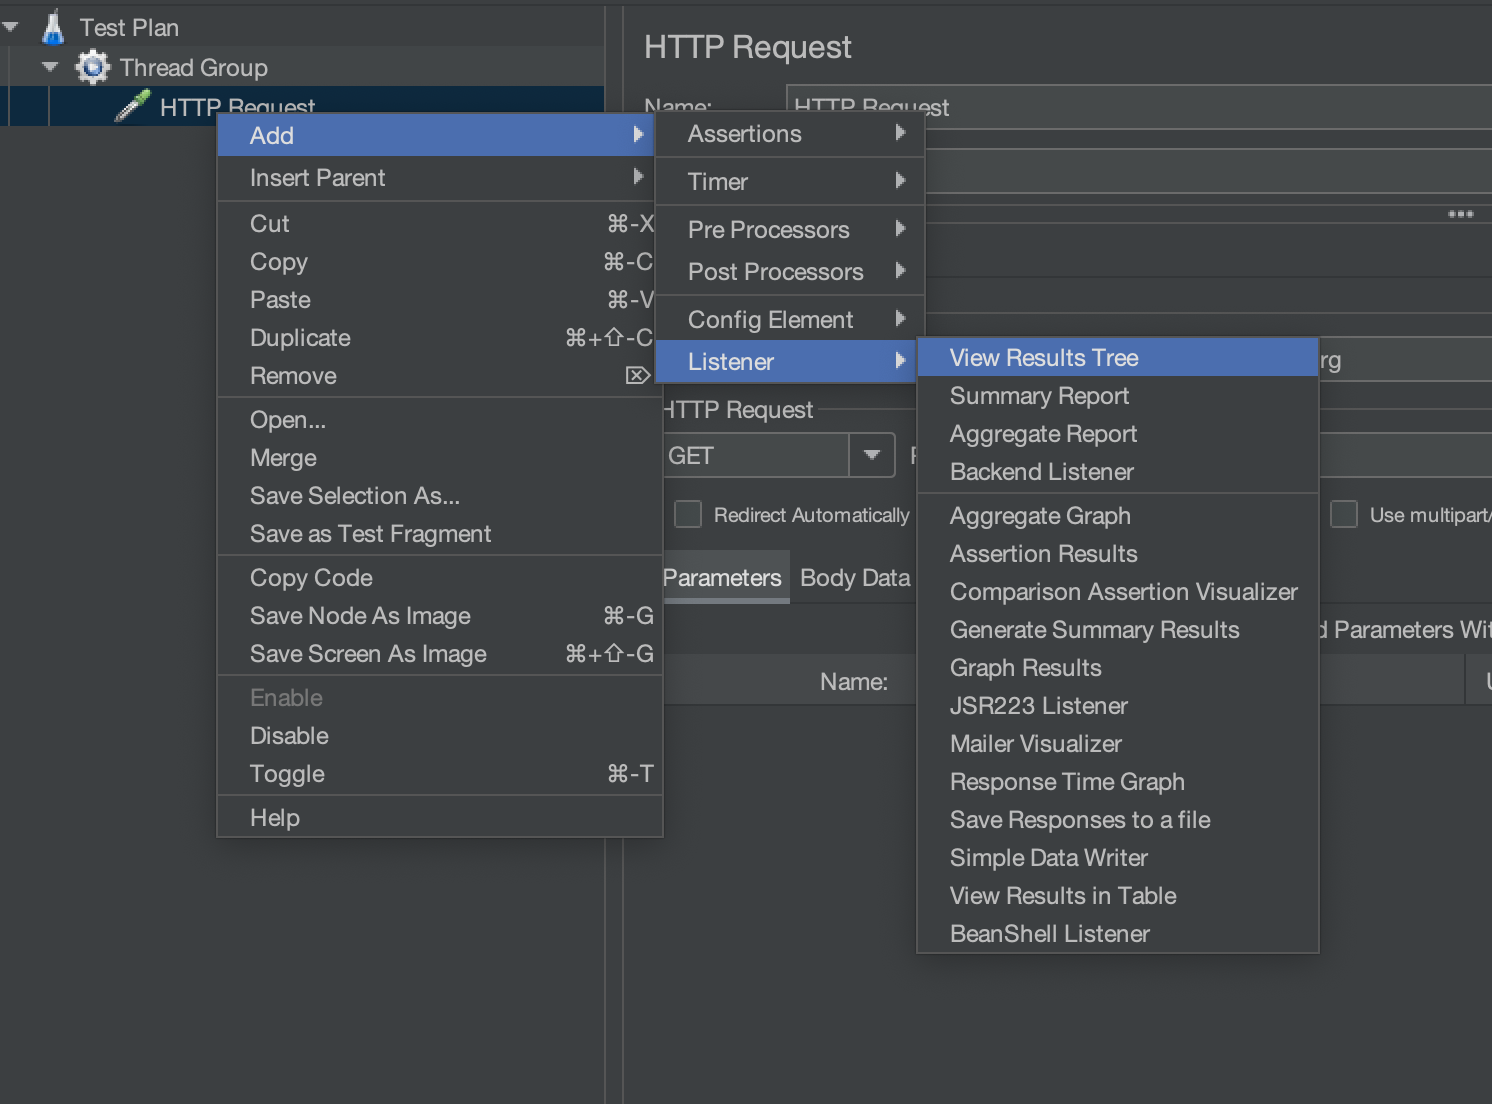
Add the “View Results Tree” listener by right-clicking on the HTTP request and selecting “Add” > “Listener” > “View Result Tree”.
Run Test and monitor results
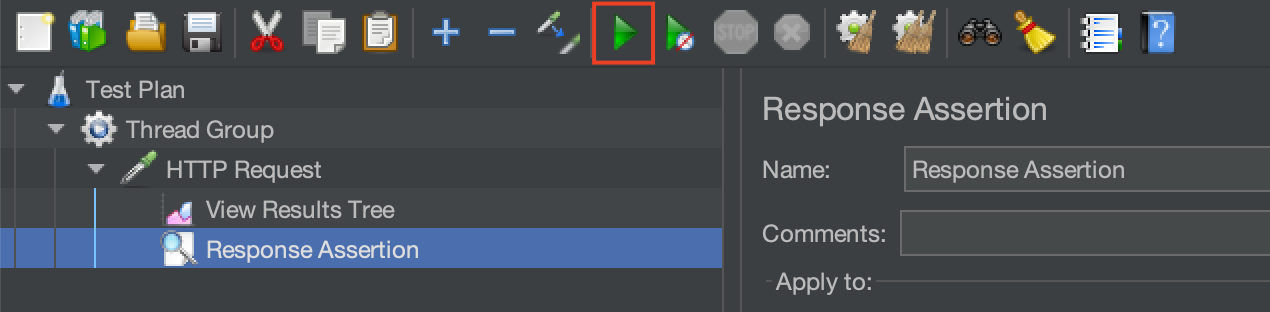
Run the test case by clicking on the green start button and analyze the results in the “view result tree” listener.
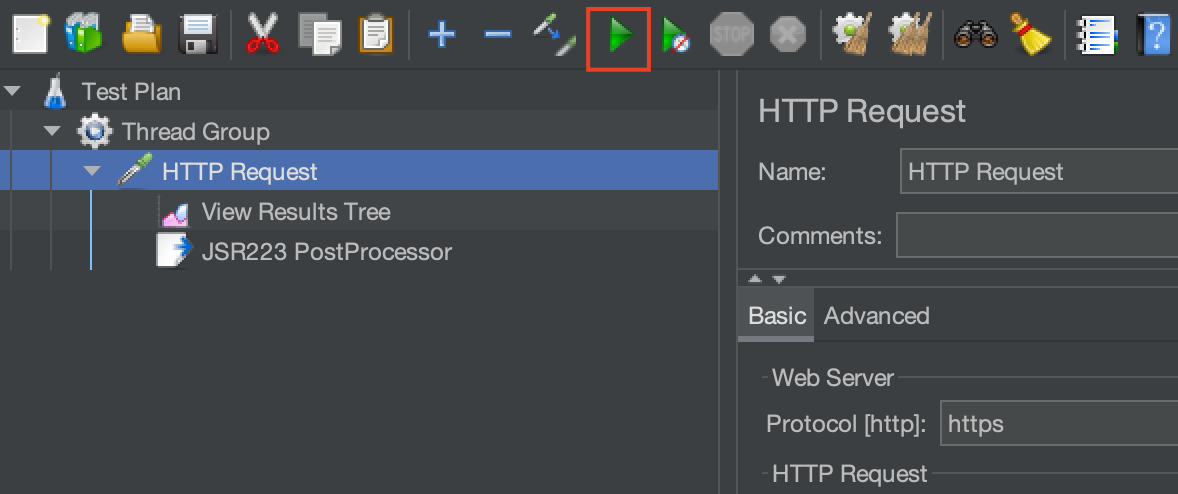
“View result tree” displays the request and response.
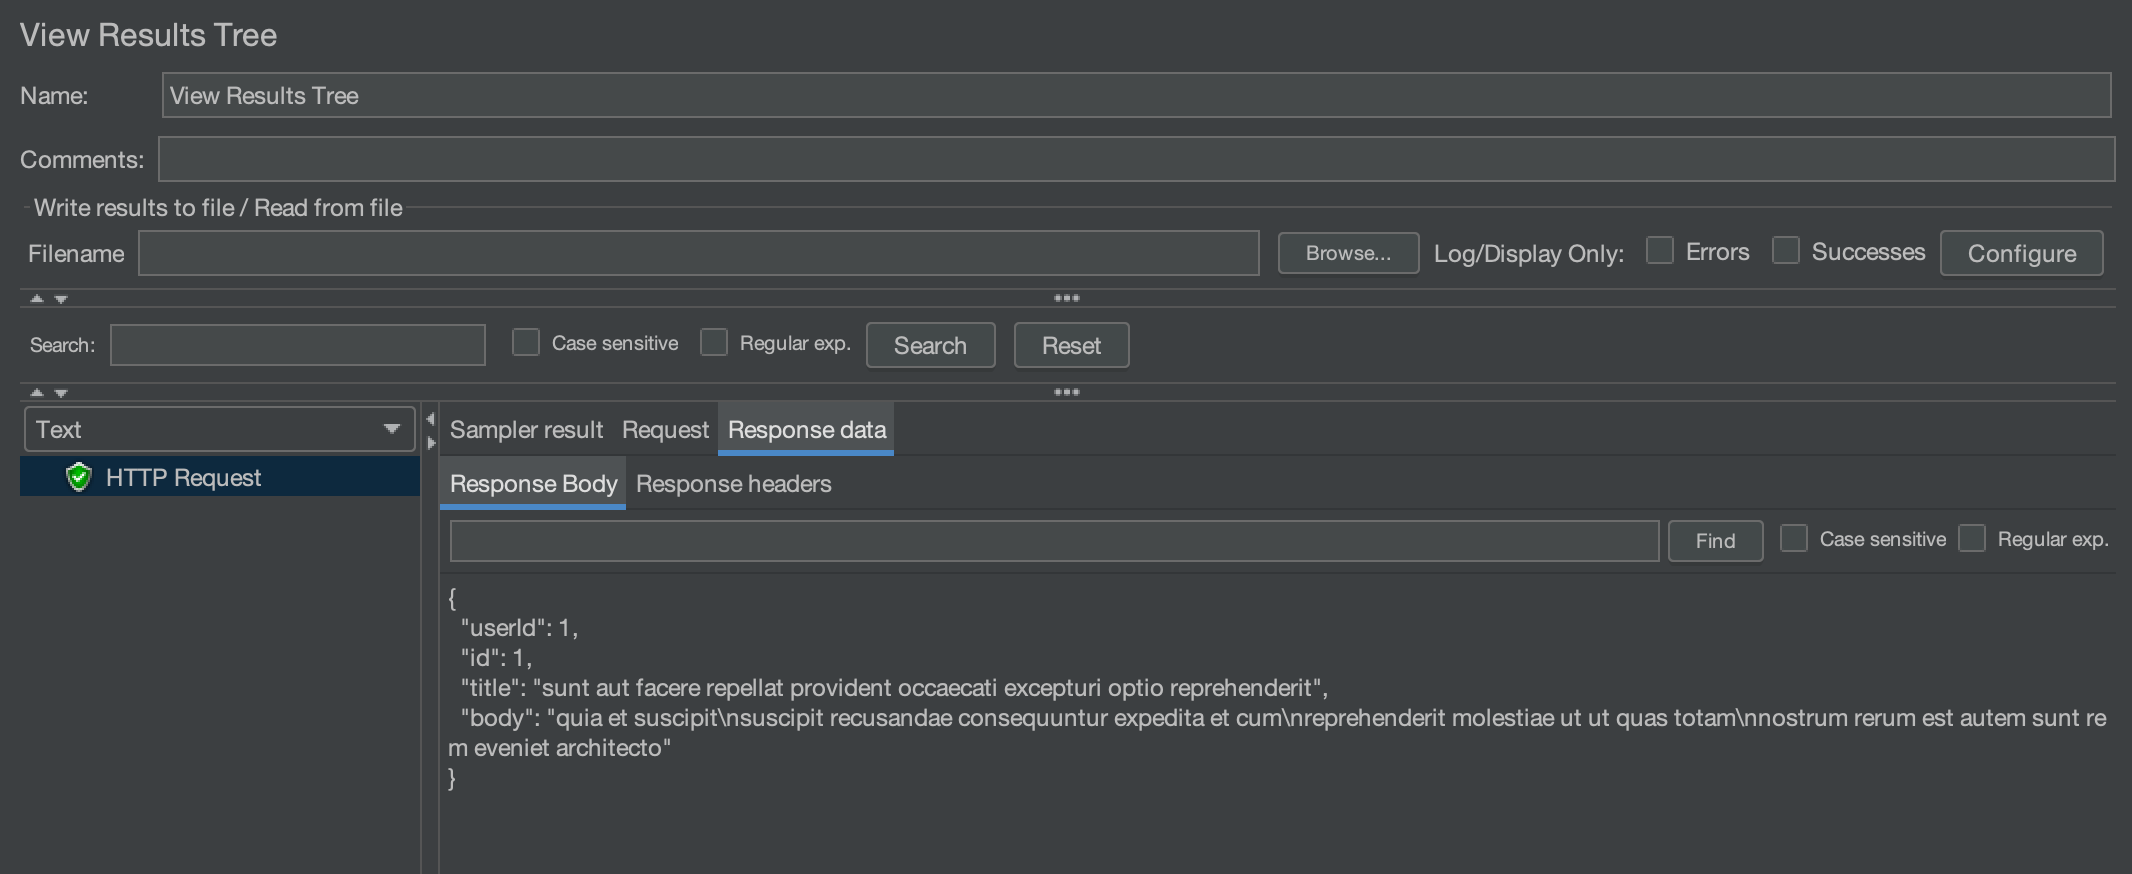
So, we got the below response from the API.
{
"userId": 1,
"id": 1,
"title": "sunt aut facere repellat provident occaecati excepturi optio reprehenderit",
"body": "quia et suscipit\nsuscipit recusandae consequuntur expedita et cum\nreprehenderit molestiae ut ut quas totam\nnostrum rerum est autem sunt rem eveniet architecto"
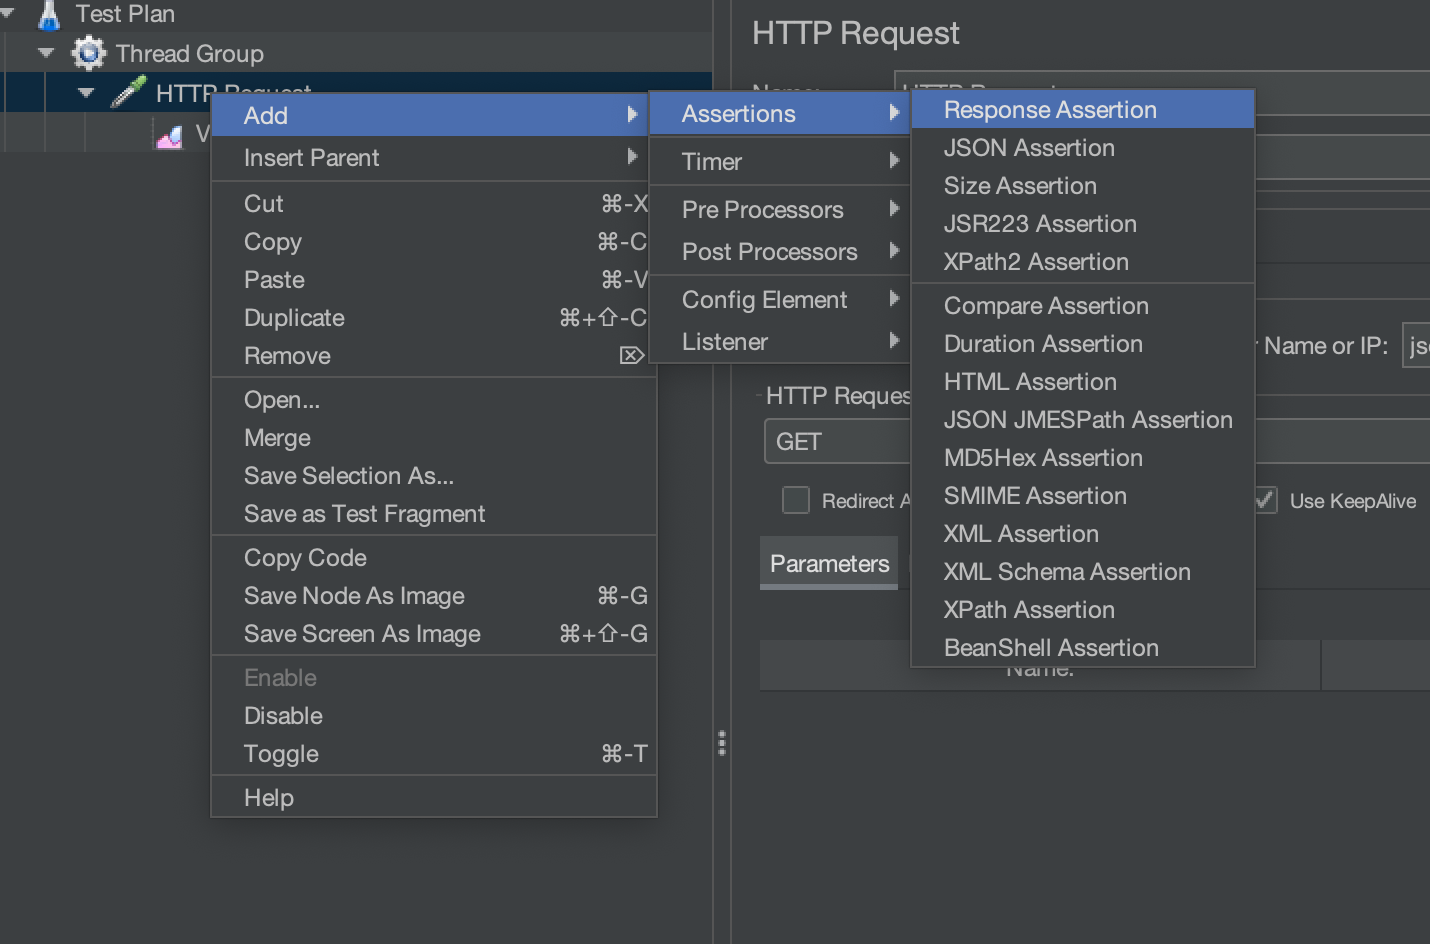
}Adding Response Assertion to Test Plan
Right-click on the HTTP request and select “Add” > “Assertions” > “Response Assertion”.

Let’s discuss the various components shown on the Response Assertion Screen in the next section.
Decoding Response Assertion ( Response Assertion Components )
- Apply to Section
- Text Response
- Response Code
- Response Message
- Response Headers
- Request Headers
- URL Sampled
- Document (text)
- Request Data
- Ignore Status
- Patterns To Test
- Custom failure message
Let’s look at the above components one by one
Apply to Section
Let’s discuss each of them one by one
Main sample only
- If you choose “Main sample only,” the assertion will only affect the primary sampler, which is the main request being made. It won’t take into account any embedded resources, such as images, stylesheets, or scripts, that may be fetched as part of the main request.
- This option is useful when you want to validate the response of the main request without considering any sub-samples or embedded resources like images, scripts, or stylesheets.
Sub-samples only
- When selecting “Sub-samples only,” the assertion applies only to embedded or sub-samples within the primary sampler
- This feature is helpful when analyzing the responses of embedded resources.
Main sample and sub-samples
- Selecting “Main sample and sub-samples” means that the assertion will be applied to both the primary sampler and any embedded or sub-samples associated with it.
- This option is helpful when you want to validate the entire set of responses associated with the main request.
JMeter Variable
- The “JMeter Variable” option allows us to apply the assertion to the value stored in a JMeter variable. You must specify the variable name in the field provided.
- This is useful when we have stored a specific value from a response in a variable during a previous request and want to validate that variable’s value using the assertion.
Text Response
- It includes the response text from the server, i.e. the body, excluding any HTTP headers.
- We can enter plain text and keywords to define the content we expect to find in the response.
- If the specified text is not found in the response data, the assertion will fail.
Example
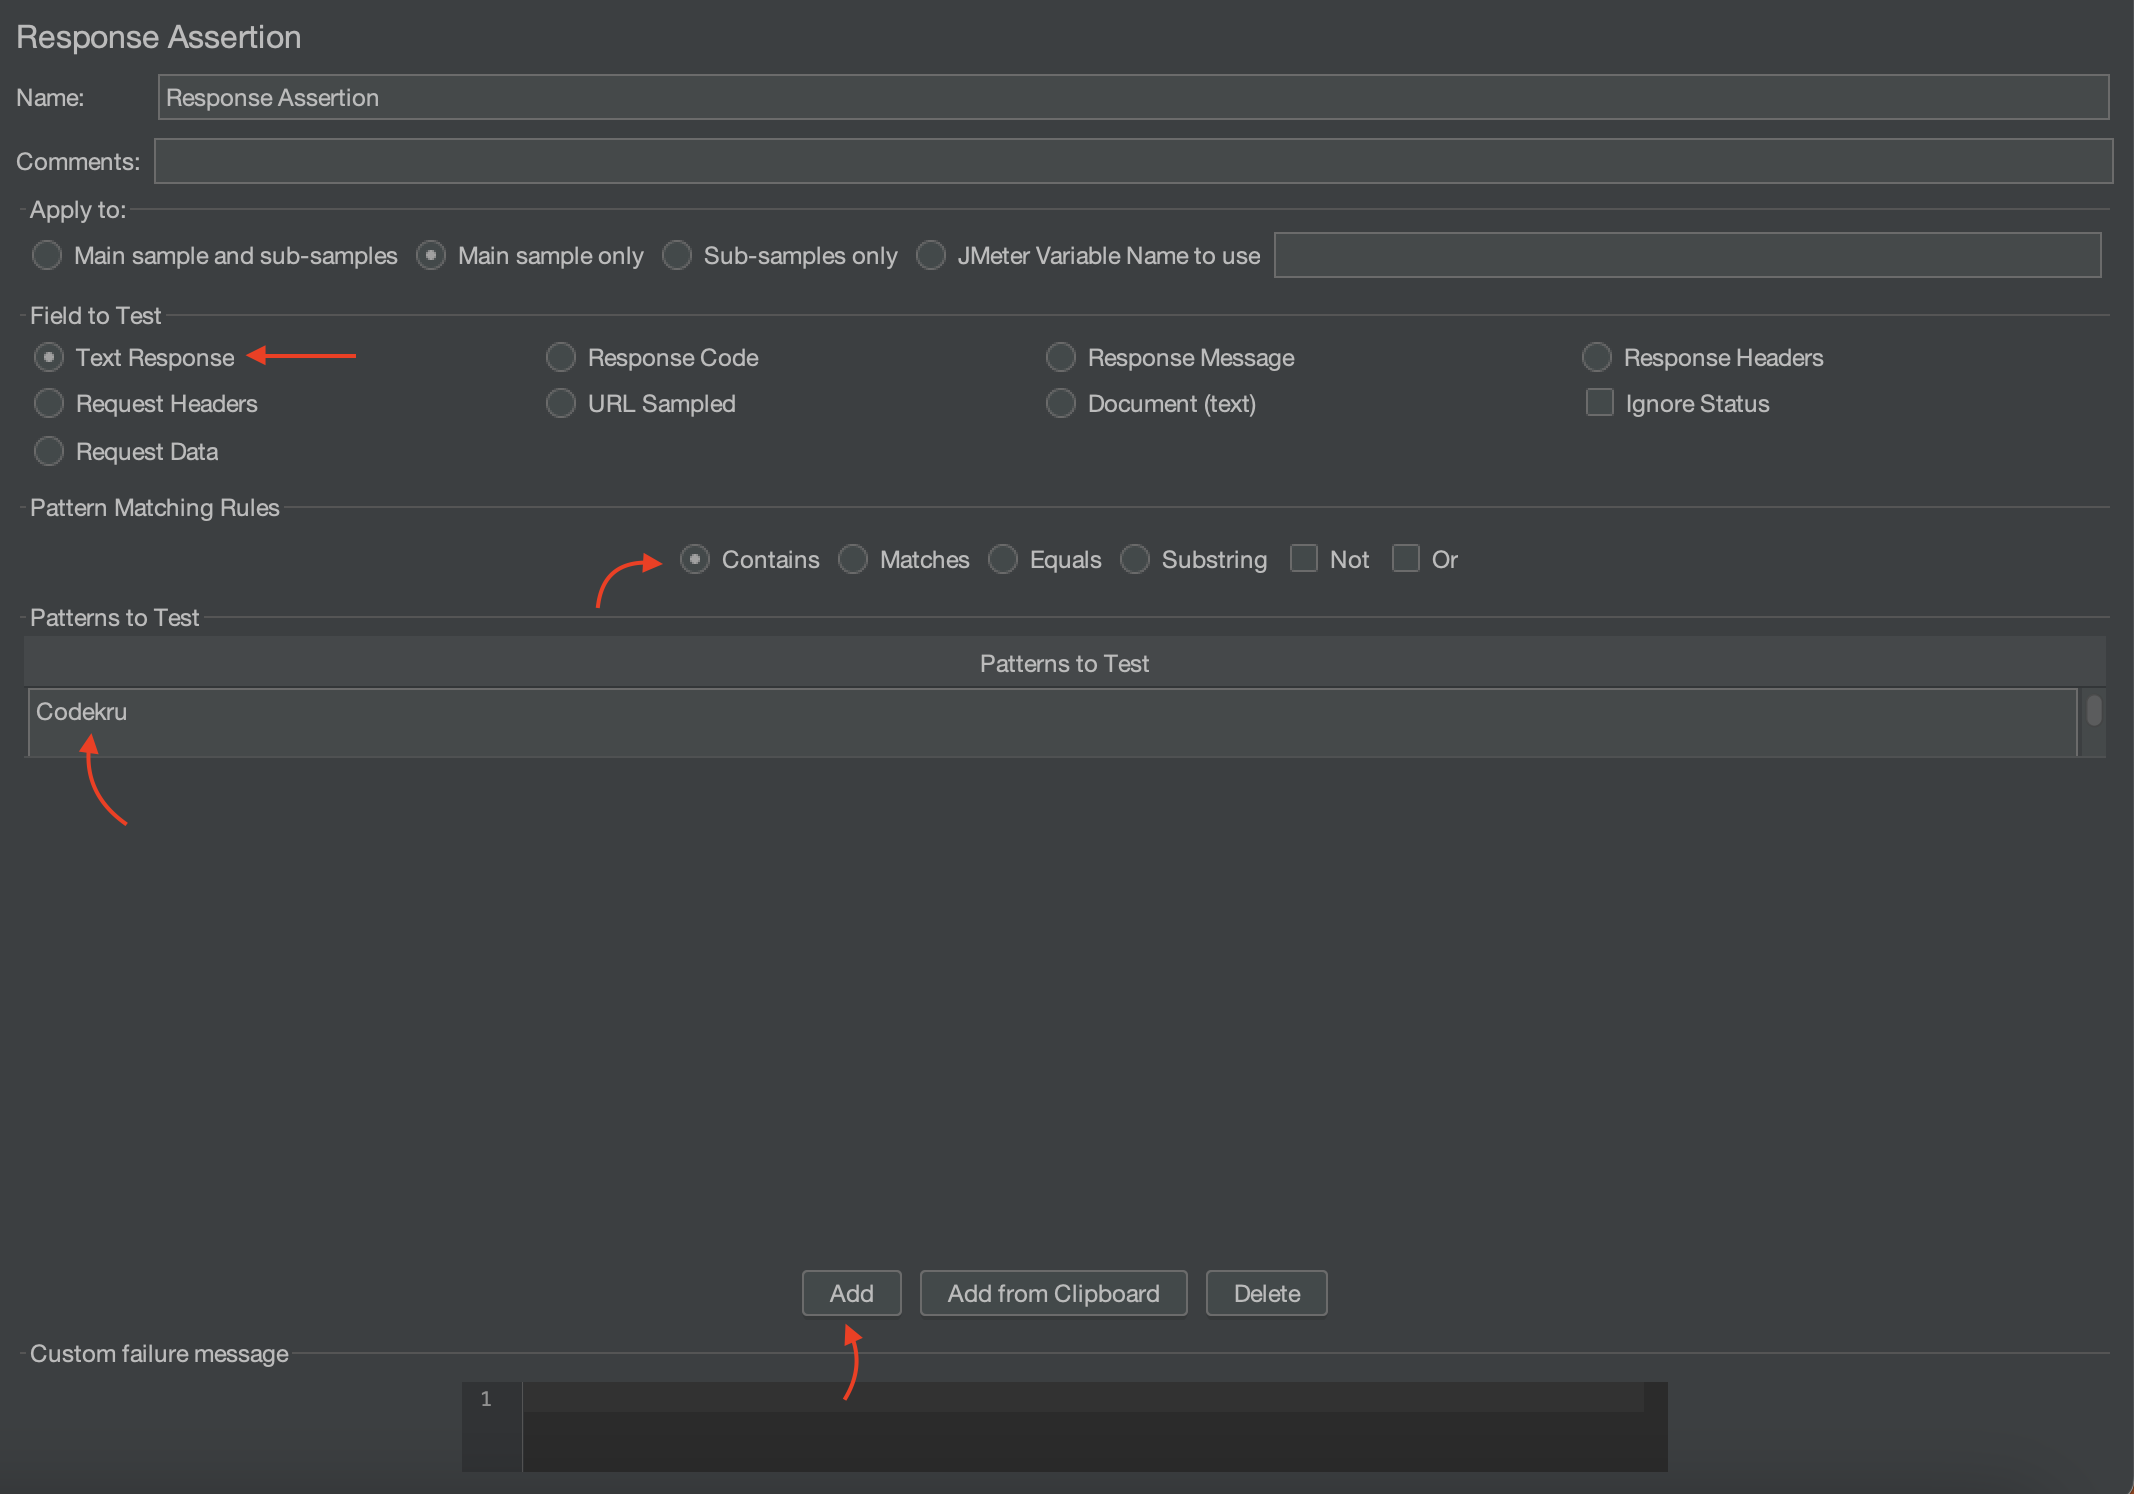
Let’s verify whether the keyword “Codekru” is present in the API response that was executed earlier.
- Select the “Text Response” radio button
- Choose “Contains” from the pattern-matching rules.
- Click on the “Add” button at the bottom to add the keyword.
- Add the “Codekru” keyword.
- The assertion should fail as the API response doesn’t contain the “Codekru” keyword.
Run the test again by clicking on the Green Run button.
When you go to the “View Results Tree“, you will notice that the test failed because the response didn’t contain the keyword “Codekru”.

Response code
- It includes the response code of the request sent, like 200, 400, etc.
- “Response Code” allows us to define the expected HTTP response code that should be returned by the server.
- For example, we can set it to expect a 200 status code for a successful response or a 404 code for a not-found error.
- If the actual response code doesn’t match the expected code, the assertion will fail.
Example
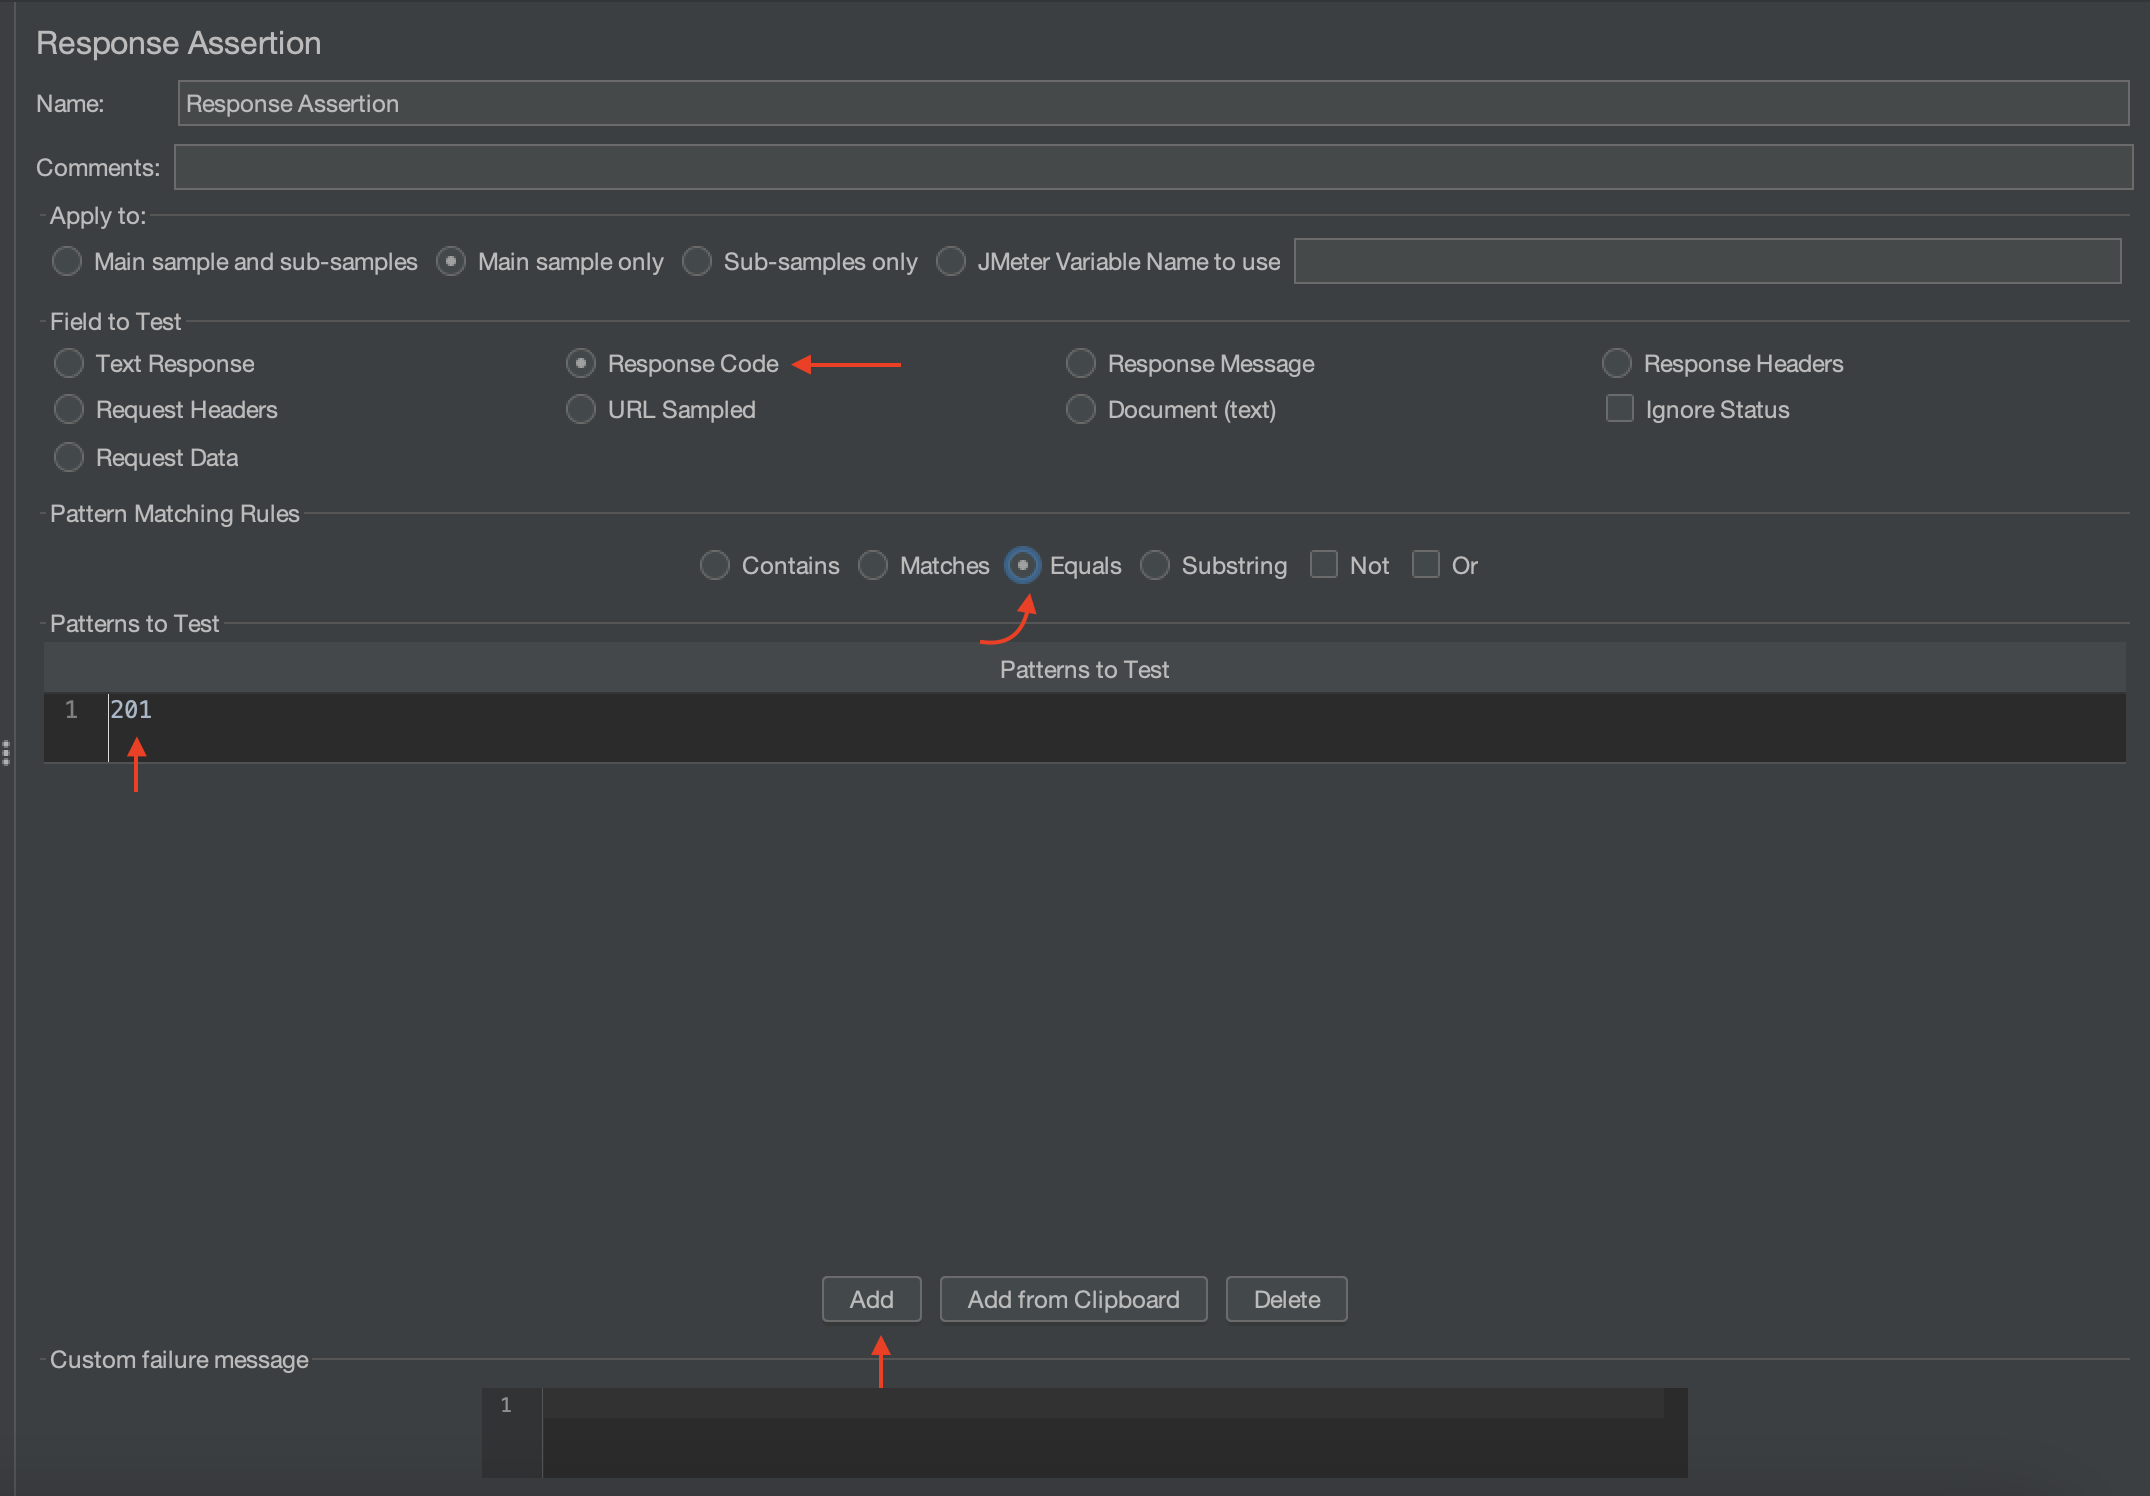
The API execution returned a 200 response code. However, for Response Assertion purposes, we will assert whether the response code was 201 after the execution. Obviously, the test should fail in this scenario.
- Select the “Response Code” radio button
- Choose “Equals” from the pattern-matching rules.
- Click on the “Add” button at the bottom.
- Add the “201” under “Patterns To Test“.
- The API response code was 200, not 201, so the assertion should fail.
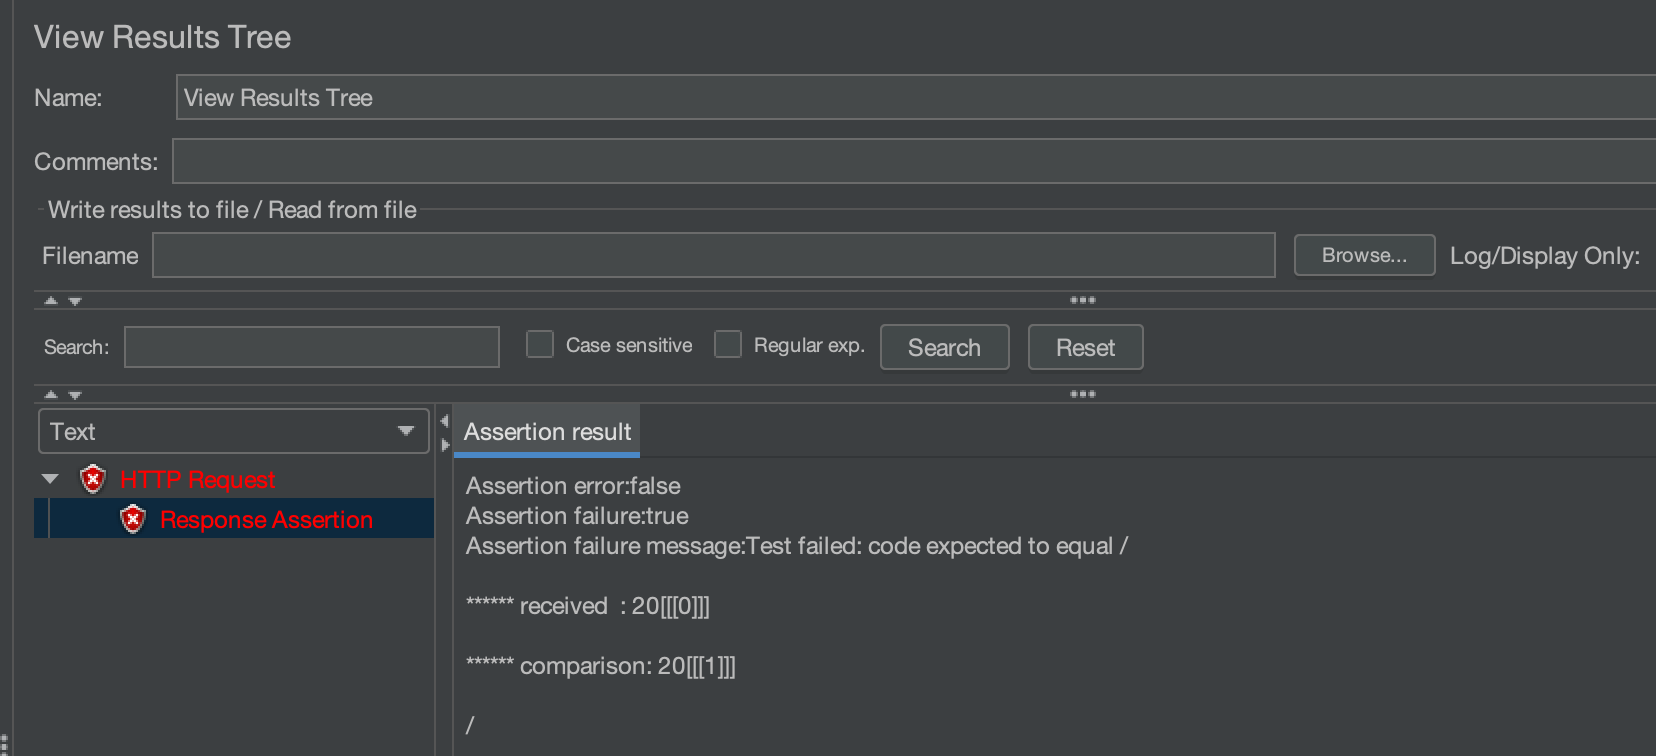
Now, click on the run button again and see the results in “View result Tree”. There you will see that the received message was 200 but the expected was 201.
Response Message
- “Response Message” lets us specify the expected HTTP response message that should accompany the response code.
- It includes response messages like “OK”, “Created”, “No Content”, etc.
Response Headers
- “Response Headers” allows us to validate specific HTTP response headers that should be present in the server’s response.
- We can check whether a particular header is sent along with the response headers or not.
Request Headers
- “Request Headers” allows us to validate specific HTTP request headers.
URL Sampled
- “URL Sampled” enables us to check if the URL of the sampled response matches a specified pattern.
Document (text)
- The extracted text from various types of documents via Apache Tika
Request Data
- It includes the request text sent to the server, i.e. the body, excluding any HTTP headers.
- We can use a keyword to check whether it exists in the request sent to the server or not.
- If the specified text is not found in the request, the assertion will fail.
Ignore Status
- When using JMeter to test HTTP requests, it’s important to understand that any requests with status codes 4XX or 5XX will be marked as fail.
- To overcome this, JMeter provides an “Ignore Status” field in “Response Assertion”. This field allows us to bypass the status code check and continue with the tests.
- So, whenever the “Ignore Status” field checkbox is checked, Jmeter will bypass the status code check.
Patterns to test
- This includes a list of the patterns that are to be tested.
- Each pattern will be tested separately.
- If a pattern fails, then further patterns are not tested.
Example to showcase multiple patterns
Till now, we have only added a single pattern in our examples. Let’s try to add 2 patterns this time, 1st one will pass, and 2nd one will fail the assertion.
Let’s use the check of “Text Response”, where we will check for the presence of two keywords ( “sunt” and “Codekru” ) in the API’s response. The “sunt” keyword exists in the response, while the “Codekru” doesn’t.
- Select the “Text Response” radio button
- Choose “Contains” from the pattern-matching rules.
- Click on the “Add” button at the bottom to add the keyword.
- Add the “sunt” keyword.
- Again, click on the “Add” button, and this time add the “Codekru” keyword.

Now, run the test case, and you will see that it failed because the Response didn’t contain the “Codekru” keyword.
Custom failure message
- Jmeter generates the failure message whenever an assertion fails.
- We can override the failure message using the “Custom failure message” field.
- Whenever a test fails due to “Response Assertion”, the customized failure message will be displayed.
We hope that you have liked the article. If you have any doubts or concerns, please write to us in the comments or mail us at admin@codekru.com