
JSON is a popular format used for exchanging data between a server and a client. Due to its widespread use in APIs and web services, it is crucial to ensure the accuracy of JSON responses when testing such systems. This is where the JSON Assertion in JMeter comes into play, providing a reliable means of verifying the correctness of JSON responses.
JSON Assertion is a powerful tool used to verify various aspects of a JSON response. With this tool, we can ensure that the response meets the required standards. JSON Assertion provides a wide range of features that can check the presence of specific elements, verify the values of particular attributes, and validate the structure of the JSON document. This tool is highly reliable and can effectively meet the needs of users who want to ensure the quality of their JSON responses.
We will divide our article into below sections –
- Executing the API and monitoring the result
- Write JSON Path expressions to access JSON keys
- Verifying JSON using JSON Assertion
Let’s see them one by one.
Executing the API and monitoring the result
Set Up a Test Plan
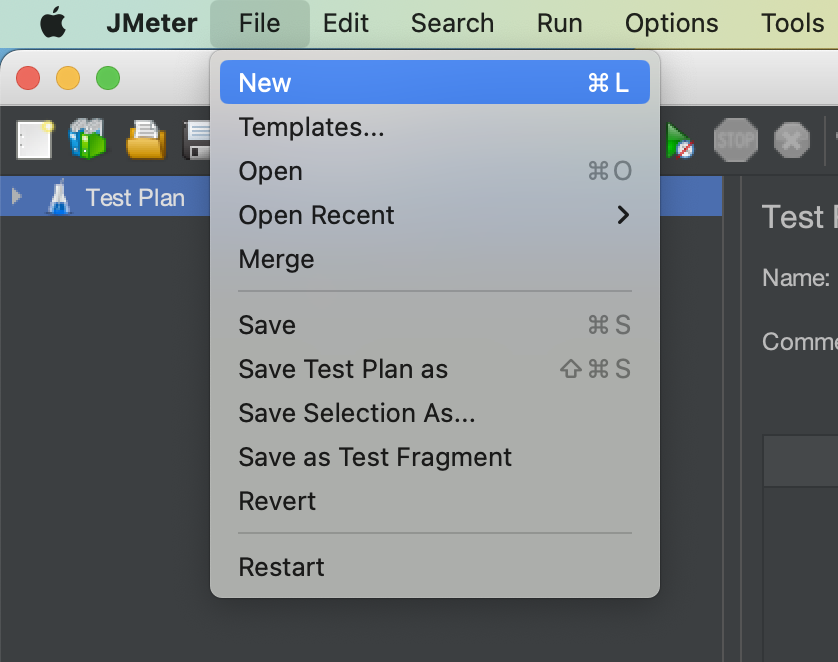
- Launch JMeter.
- Go to the “File” Menu and select “New”.
- This will create a new test plan to be used in our example.
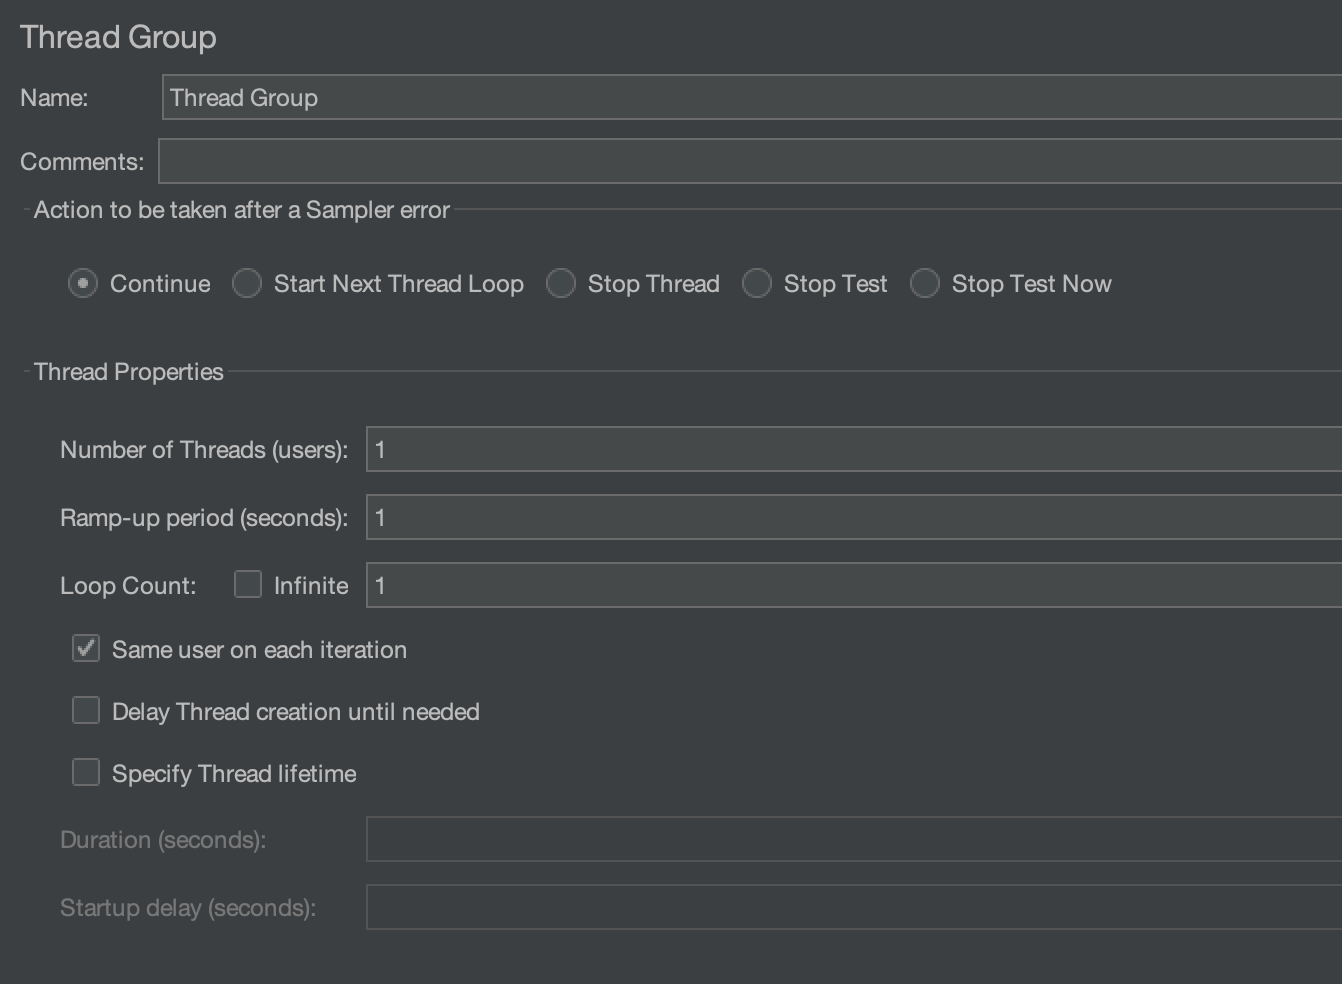
Create a Thread Group
- Right-click on the Test Plan.
- To create a Thread group, simply go to “Add > Threads (Users) > Thread Groups”.

The Thread Group is used to execute a specific number of tests. For simplicity, we will keep it set at 1. Please refer to the image below for configurations.
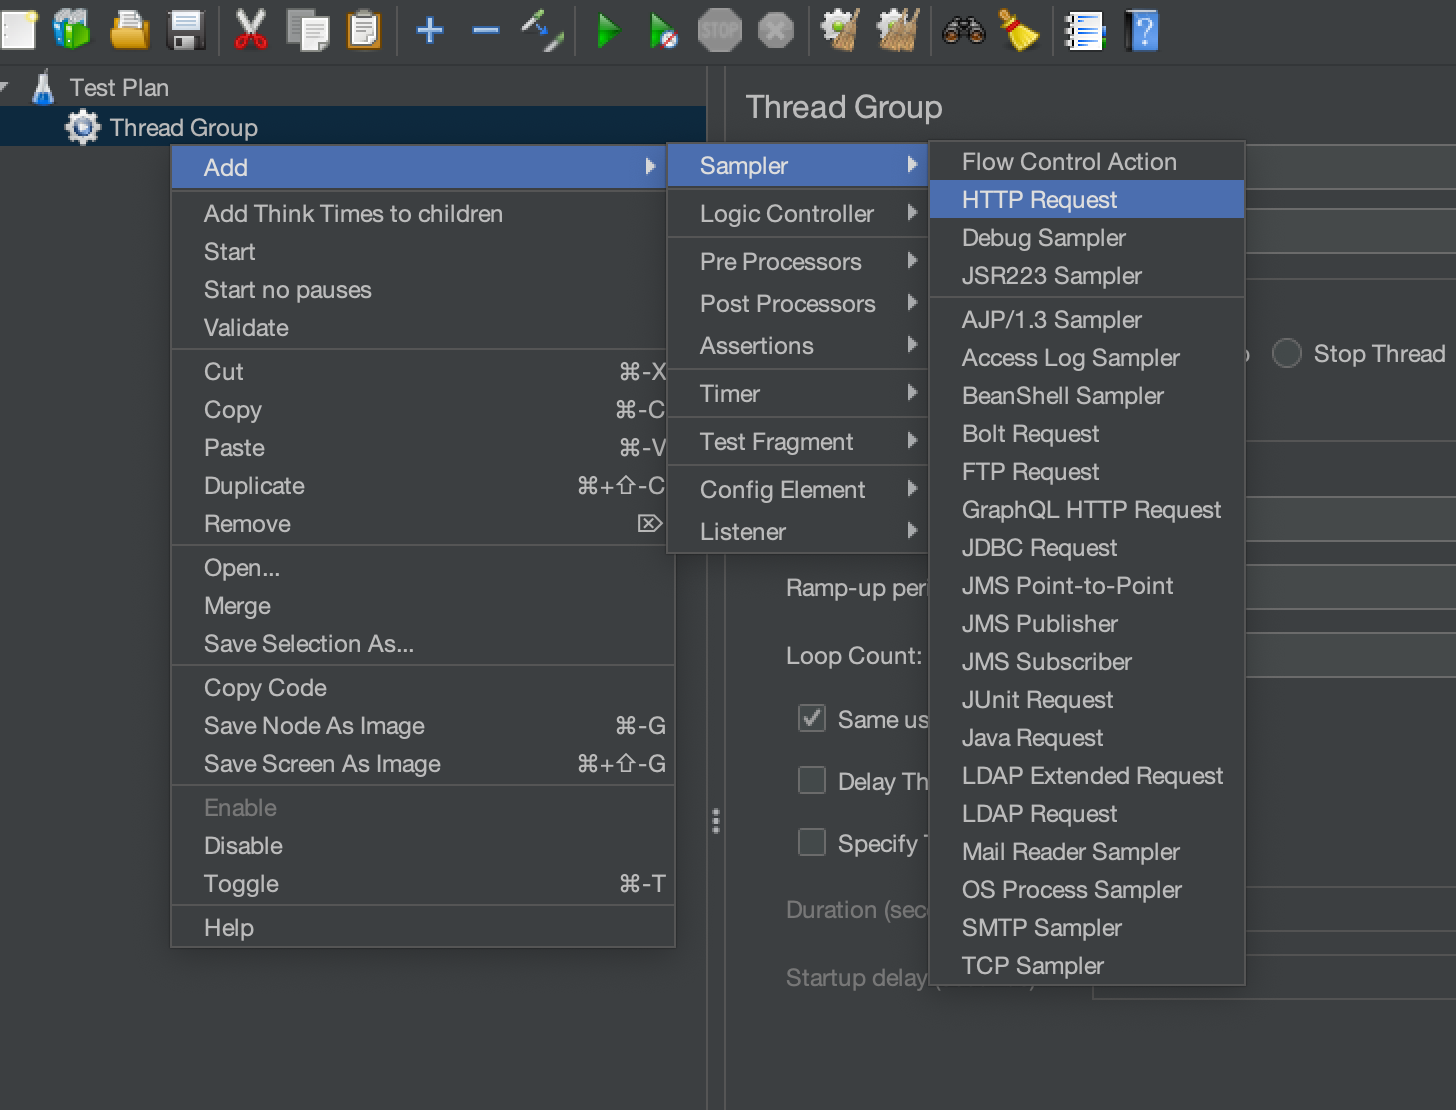
Add an HTTP sampler
We will use an HTTP sampler to execute a dummy API (https://jsonplaceholder.typicode.com/posts/1). Later, we will validate specific response values using JSON assertion.
Create an HTTP sampler by right-clicking on the Thread Group and selecting “Add” > “Sampler” > “HTTP Request”.
We will hit the GET request on the “https://jsonplaceholder.typicode.com/posts/1” API. So, we will add it to the HTTP sampler by following the below steps.
- Please enter “https” in the input box that is labelled “Protocol[https]:“.
- Enter “jsonplaceholder.typicode.com” in the input box labelled “Server Name or IP”.
- By default, the HTTP request value is set to GET. Since we are only executing a GET request, we won’t be changing it.
- Set the Path to “/posts/1“.

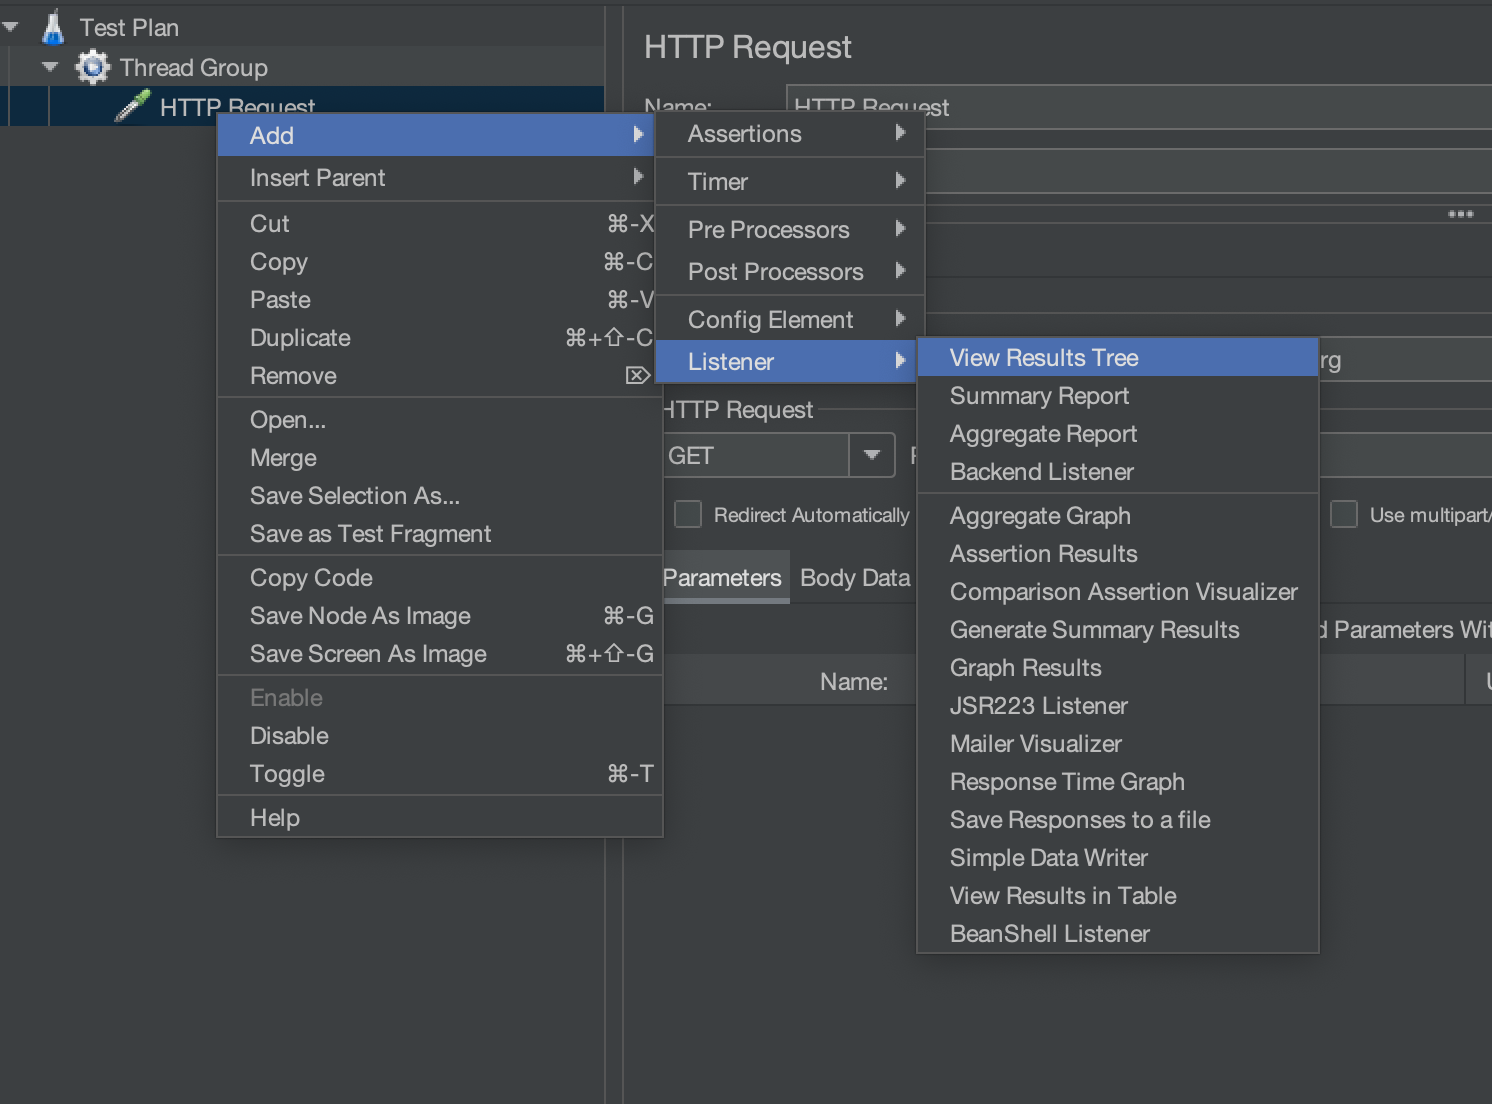
Add “View Results Tree” listener
View Results Tree listener is one of the most used listeners in Jmeter. It provides detailed information about server responses during performance testing.
Add the “View Results Tree” listener by right-clicking on the HTTP request and selecting “Add” > “Listener” > “View Result Tree”.
Run Test and monitor results
Run the test case by clicking on the green start button and analyze the results in the “view result tree” listener.
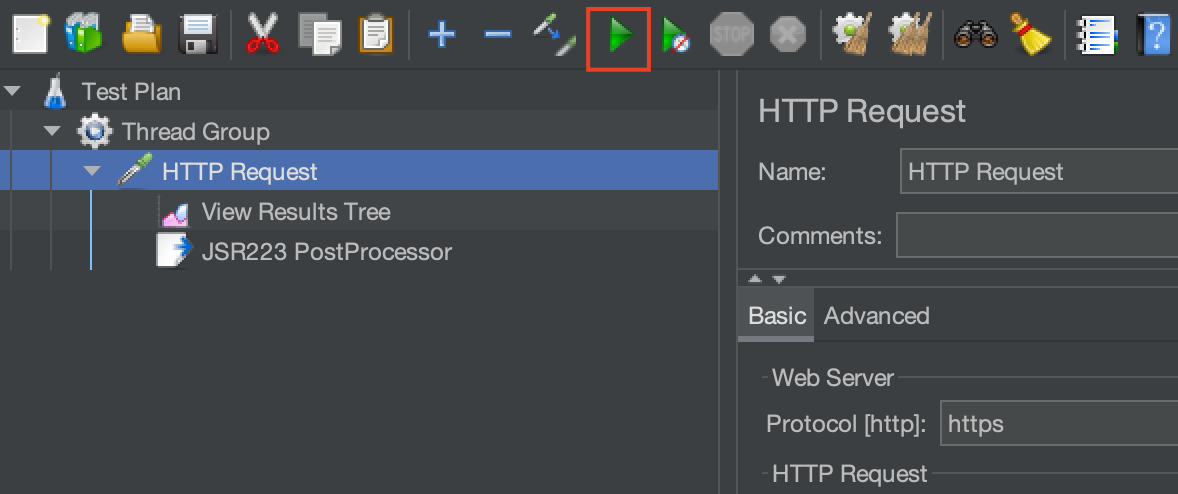
“View result tree” displays the request and response.
Write JSON Path expressions to access JSON keys
JSON assertion in JMeter is used to verify JSON responses. However, we first need to know how to access a JSON key before we can assert that key.
Syntax of accessing a JSON key
Below are some of the key points to access keys.
- If you want to check a specific attribute like “name” at the top level of the JSON:
- JSON Path Expression:
$.name
- JSON Path Expression:
- If you want to check an attribute within an object that’s nested within another object:
- JSON Path Expression:
$.user.profile.email
- JSON Path Expression:
- If you want to validate an element within an array (e.g., the first item):
- JSON Path Expression:
$.items[0]
- JSON Path Expression:
The dollar sign ($) represents the root of the JSON document and is used at the beginning of a JSON path expression to indicate starting from the top level of the JSON structure.
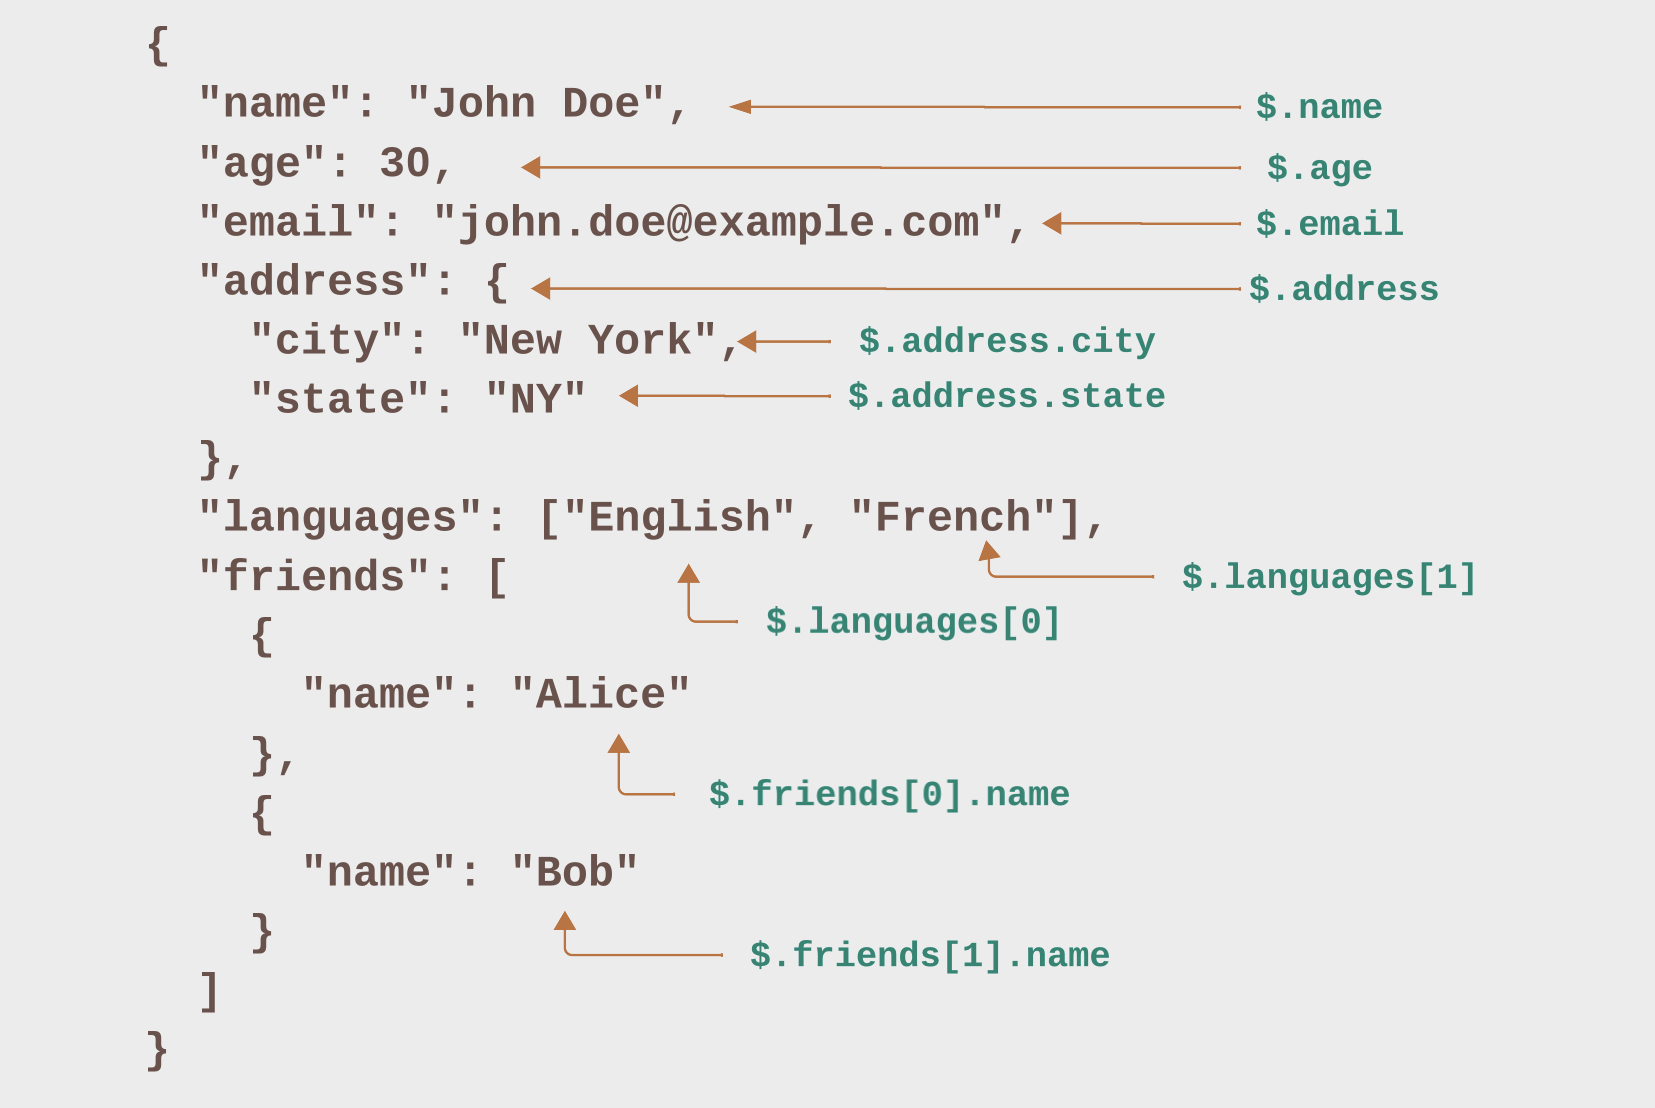
As an exercise, let’s take the below JSON and try to write JSON path expressions for each key.
{
  "name": "John Doe",
  "age": 30,
  "email": "john.doe@example.com",
  "address": {
    "city": "New York",
    "state": "NY"
  },
  "languages": ["English", "French"],
  "friends": [
    {
      "name": "Alice"
    },
    {
      "name": "Bob"
    }
  ]
}
The image below demonstrates how we can access each key in the JSON.
How to verify if your JSON path expression is correct
Suppose you have created a JSON path expression for a key ‘name‘ ( $.friends[1].name ). Now, you want to verify if it is correct before moving on to assert the results using JSON Assertion. How can we achieve it?
This is where View Result Tree swoops in and saves the day.
We hope you have already performed the previous test. You can view the results of the test in the “View Result Tree” section. There is a dropdown menu below the search box. Click on the dropdown menu and select “JSON Path Tester” to see the JSON response of the request that was executed.

Replace the JSON response with the below JSON.
{
  "name": "John Doe",
  "age": 30,
  "email": "john.doe@example.com",
  "address": {
    "city": "New York",
    "state": "NY"
  },
  "languages": ["English", "French"],
  "friends": [
    {
      "name": "Alice"
    },
    {
      "name": "Bob"
    }
  ]
}
Type the JSON path expression in the “JSON Path Expression” input box. We can only enter a single key path expression. Let’s check if “$.friends[1].name” is the correct path.
To test the JSON Path Expression, simply click on the ‘Test‘ button.

Here, we can see that “Bob“, meaning our JSON path expression, was correct.
Verifying JSON using JSON Assertion
Add JSON Assertion
Right-click on the HTTP request and select “Add” > “Assertions” > “JSON Assertion”.

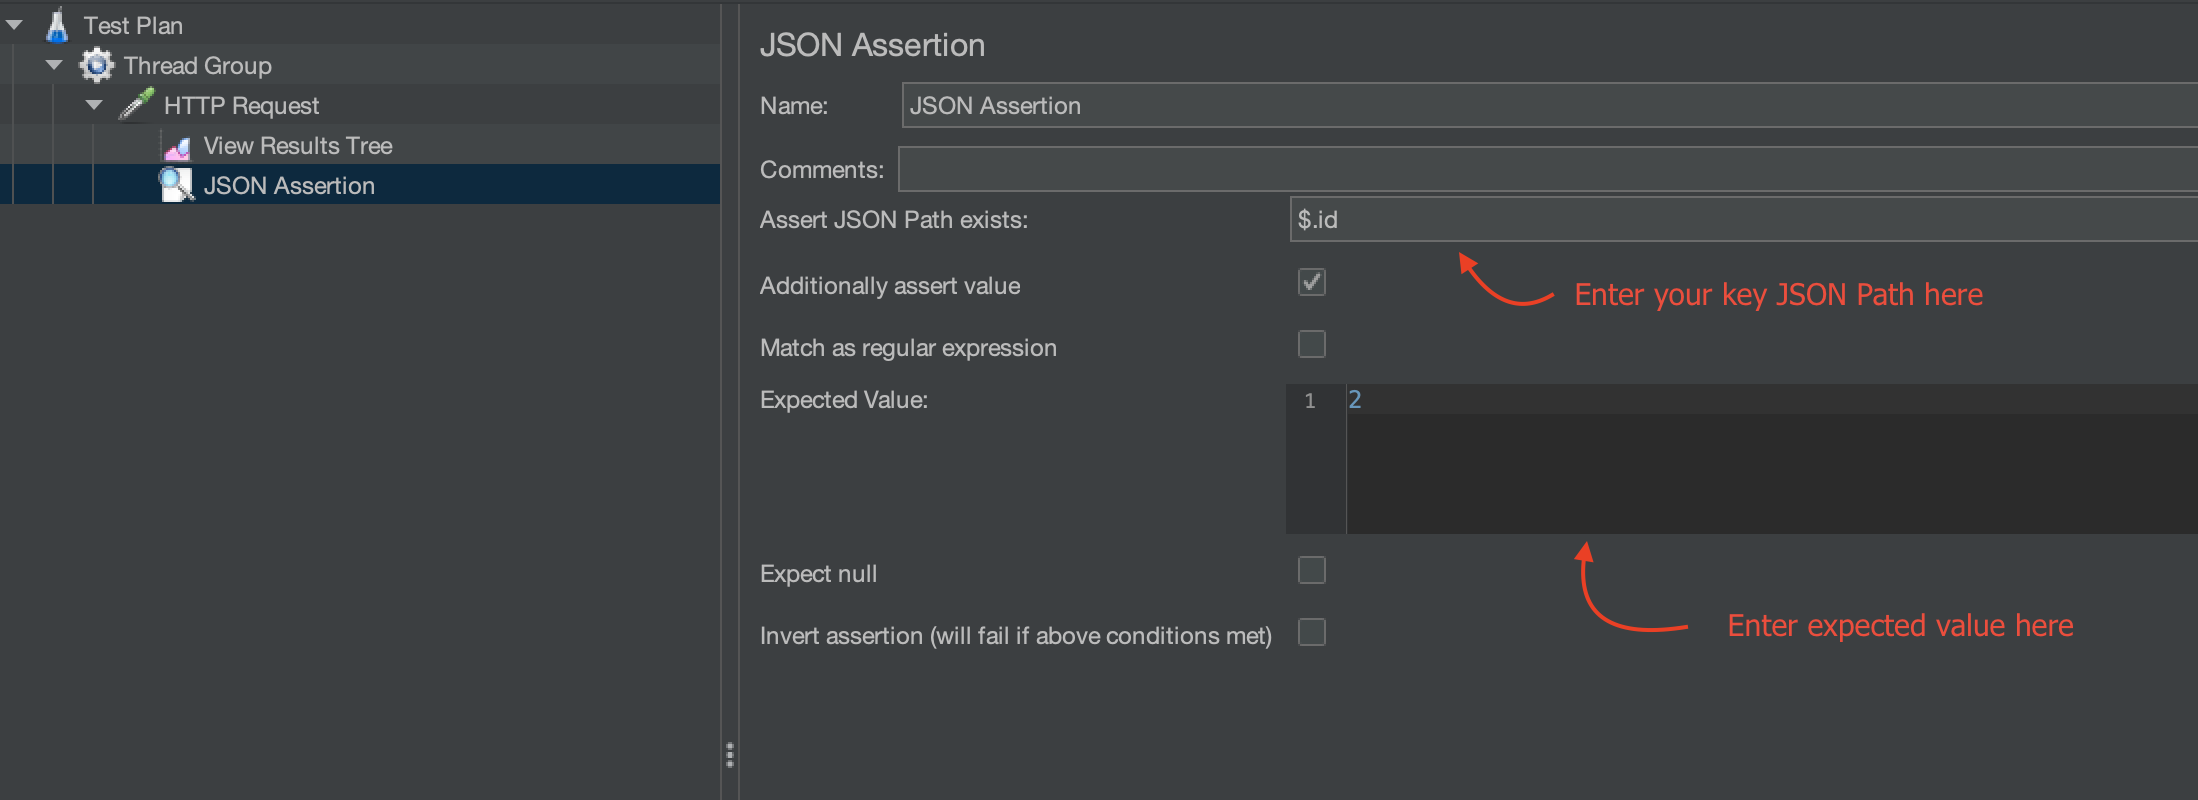
Decoding JSON Assertion
There are a bunch of things that can be seen on the JSON Assertion screen.
- Assert JSON Path exists: We will enter a JSON path expression for the key we want to assert. This field also checks whether the specified path exists or not.
- Additionally assert values: The “Expected value” text area can only be filled if this checkbox is checked. This checkbox controls whether we can enter and assert the value of the key with the value entered in the “Expected value” text area.
- Match as regular expression: If we mark this checkbox as checked, then we can assert the value of the JSON key using the regular expression as well. So, instead of entering the hard-coded value, we can enter a regex in “Expected value” text area.
- Invert assertion: If the checkbox is selected, the assertion will fail if the JSON key’s value matches the “Expected value“.
Example
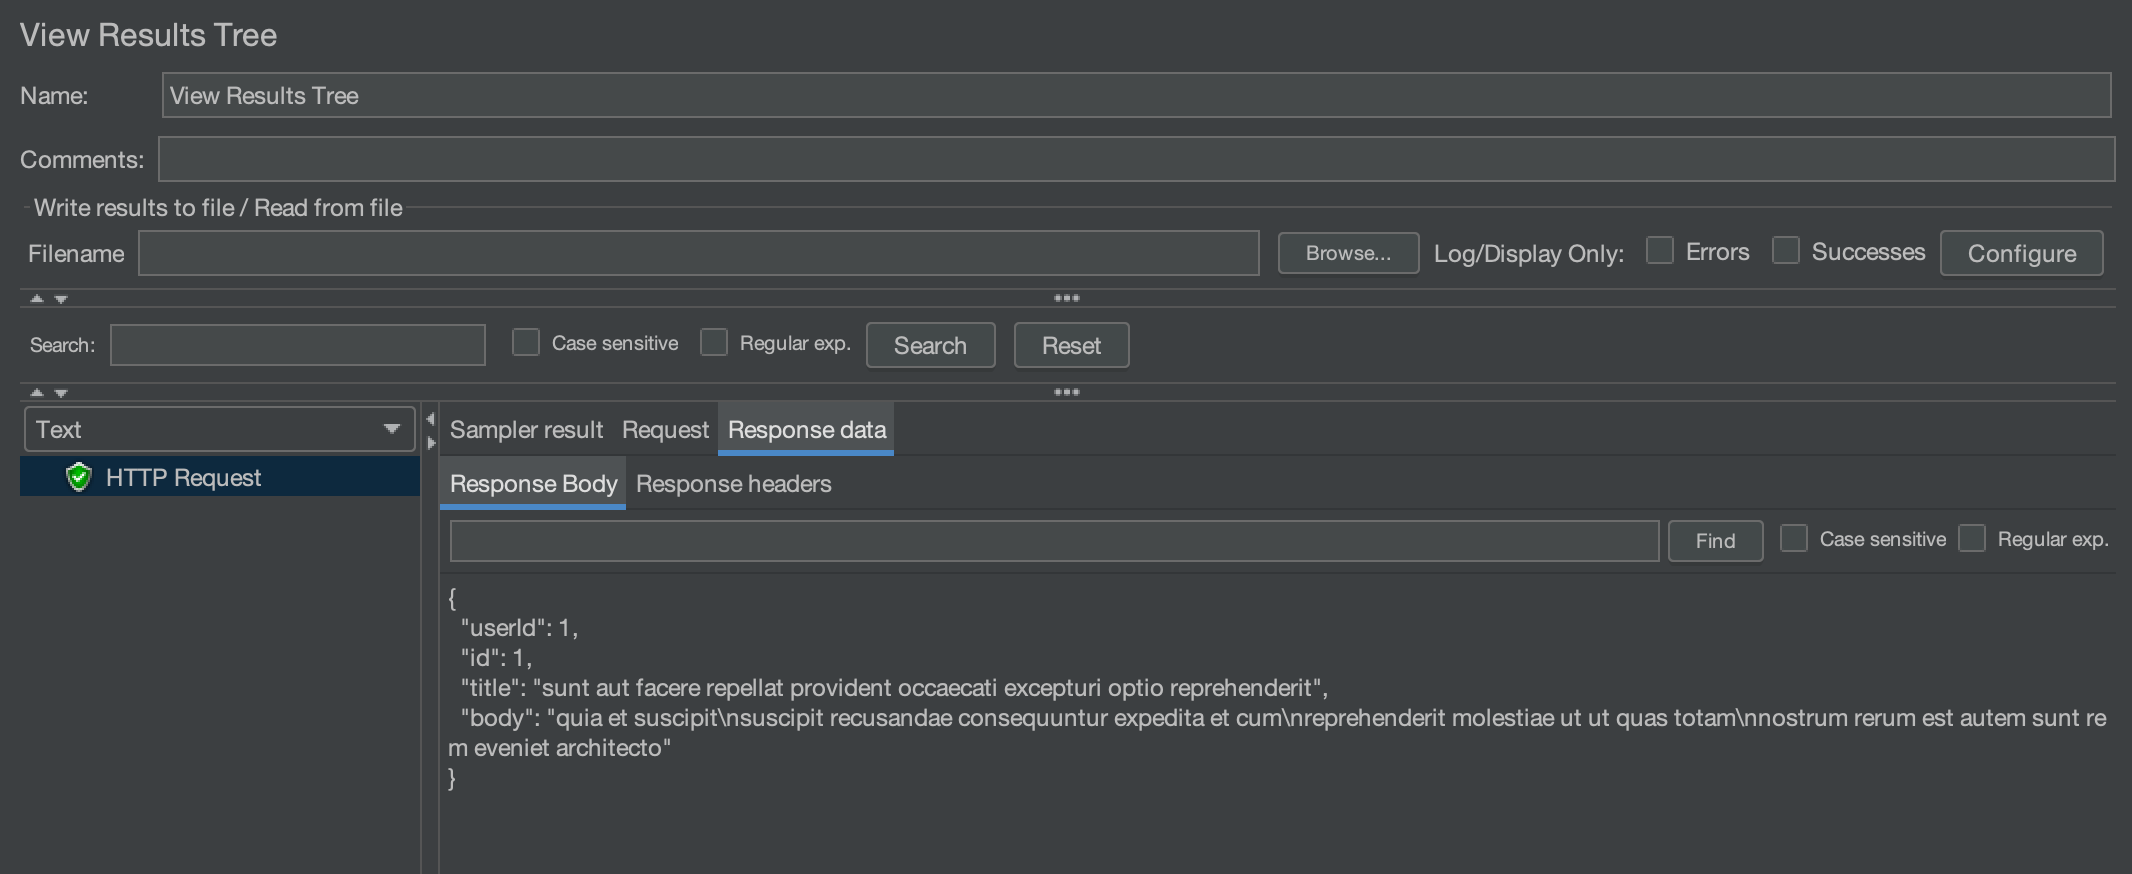
Let’s verify the id value obtained from the API execution in the first section of this post.
{
"userId": 1,
"id": 1,
"title": "sunt aut facere repellat provident occaecati excepturi optio reprehenderit",
"body": "quia et suscipit\nsuscipit recusandae consequuntur expedita et cum\nreprehenderit molestiae ut ut quas totam\nnostrum rerum est autem sunt rem eveniet architecto"
}
We can see that the id value is 1, but we will be putting 2 as the expected value. It will fail the JSON assertion, and the same can be seen in the “View Result Tree”.
So, run the test again and observe the results in the “View Result Tree”.

We can see a failure message in the results, stating that the expected value was “2”, but we received “1” in the response.
How to verify multiple keys using JSON Assertion
A single JSON assertion can only verify one key. To verify multiple keys, multiple JSON assertions are required, each verifying a specific key.
Related Articles –
We hope that you have liked the article. If you have any doubts or concerns, please write to us in the comments or mail us at admin@codekru.com.