
Note: We have also attached a video at the end of this article. In case you are more comfortable with the video version, please feel free to have a look
When you’re running a load test with hundreds or thousands of requests, it’s not practical to manually inspect each one in the JMeter GUI or even in the .jtl file. Here’s why exporting responses to a CSV file can be helpful:
- Debugging Made Easy: If a test fails or behaves unexpectedly, having the full response body saved in a CSV file helps you pinpoint the exact issue – whether it’s an error message, missing data, or an unexpected format.
- Automated Post-Test Analysis: With responses in CSV format, you can use tools like Excel, Python, or even Google Sheets to filter, group, or search through the results. This is perfect when you need to validate business logic or extract specific data from the responses.
- Audit and Traceability: Need to prove what responses your system returned under load? Saving them to a CSV gives you a clear, timestamped record. This is especially important in QA or regulated environments.
Let’s first execute a dummy API (“https://jsonplaceholder.typicode.com/posts/1“) and then we will save the result of this API in a CSV file.
- Executing the API
- Saving the response data to a CSV file
- Saving multiple responses to a CSV file
- Saving response in separate columns of a CSV file
Executing the API
Set Up a Test Plan
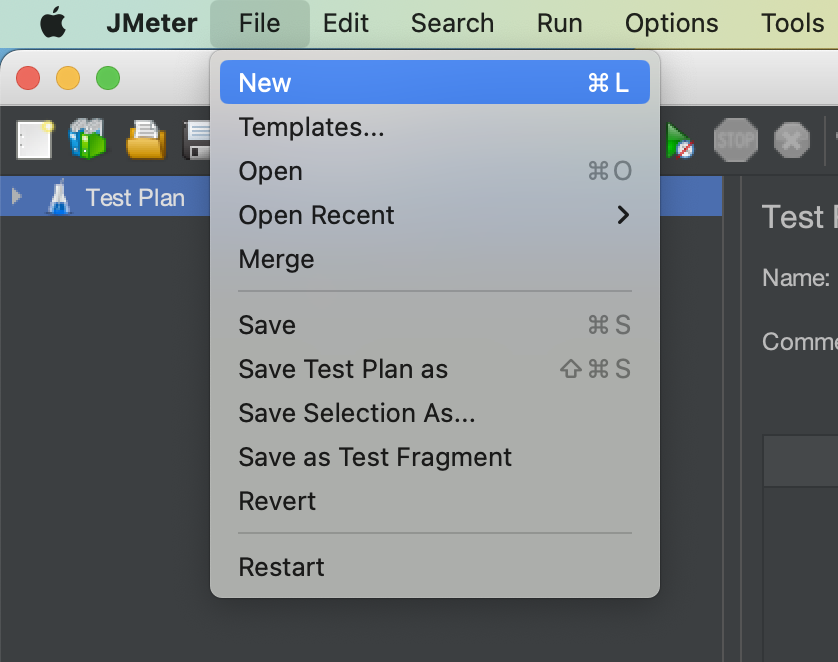
- Launch JMeter.
- Go to the “File” Menu and select “New”.
- This will create a new test plan to be used in our example.
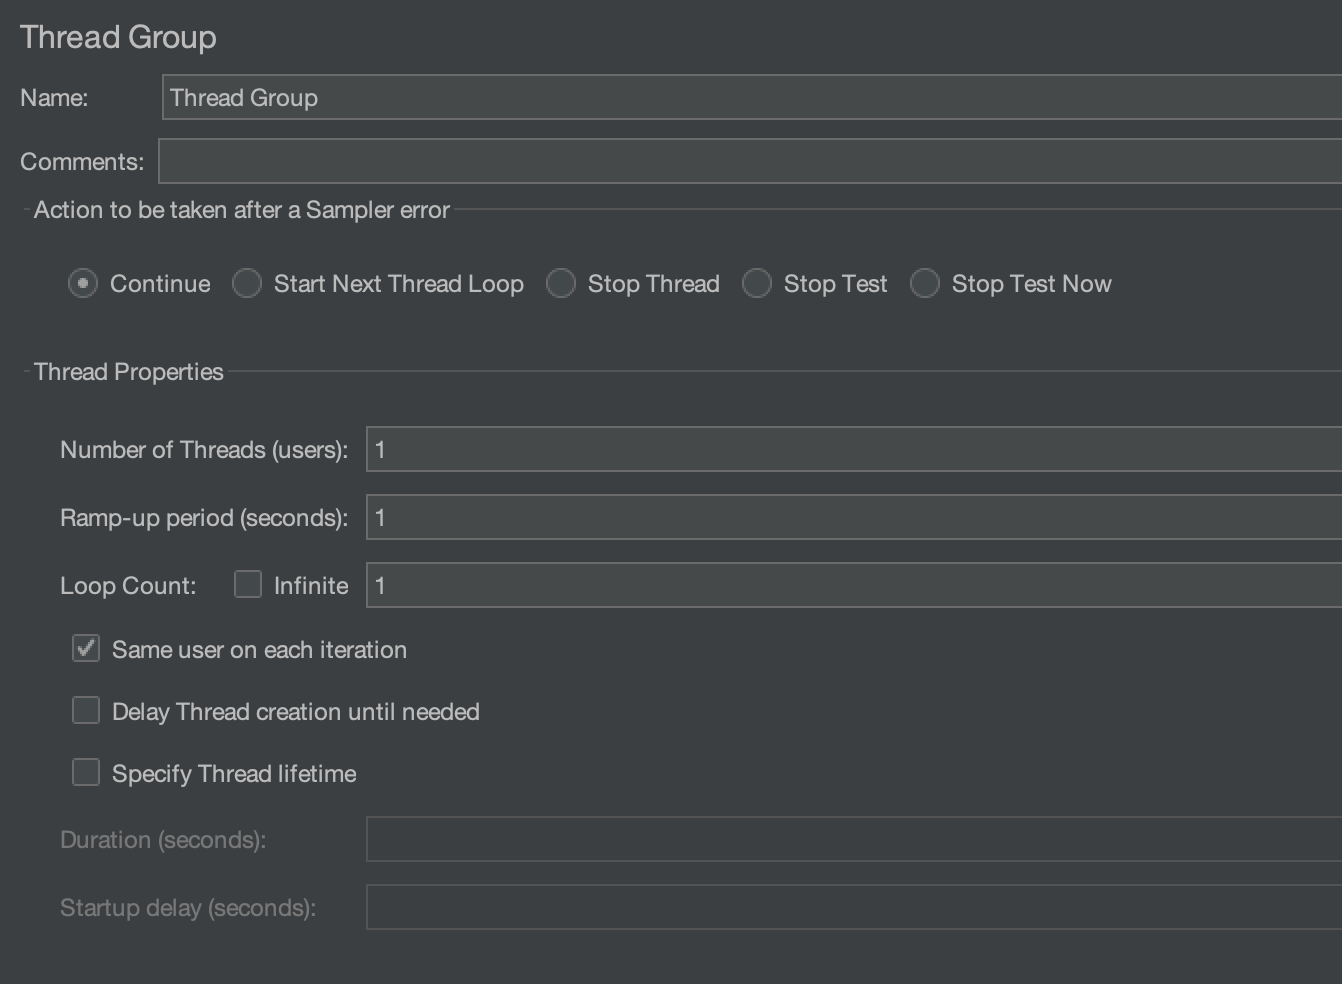
Create a Thread Group
- Right-click on the Test Plan.
- To create a Thread group, simply go to “Add > Threads (Users) > Thread Groups”.

The Thread Group is used to execute a specific number of tests. For simplicity, we will keep it set at 1. Please refer to the image below for configurations.
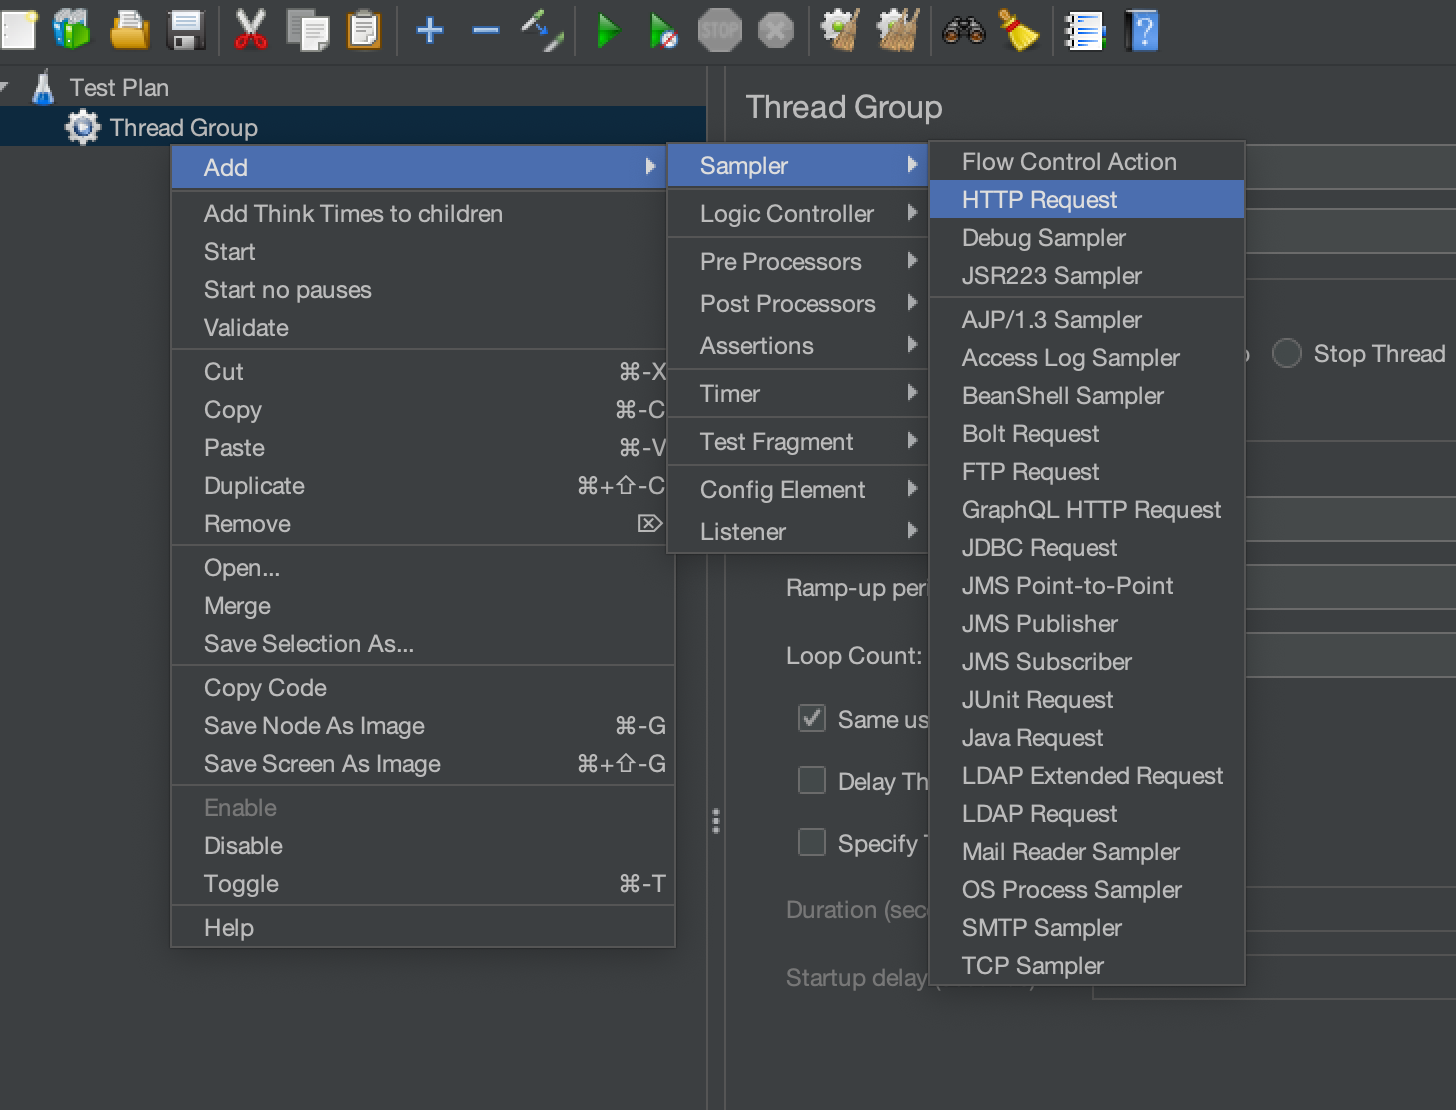
Add an HTTP sampler
We will use an HTTP sampler to execute a dummy API (https://jsonplaceholder.typicode.com/posts/1). We can create an HTTP sampler by right-clicking on the Thread Group and selecting “Add” > “Sampler” > “HTTP Request”.
We will hit the GET request on the “https://jsonplaceholder.typicode.com/posts/1” API. So, we will add it to the HTTP sampler by following the below steps.
- Please enter “https” in the input box that is labelled “Protocol[https]:“.
- Enter “jsonplaceholder.typicode.com” in the input box labelled “Server Name or IP”.
- By default, the HTTP request value is set to GET. Since we are only executing a GET request, we won’t be changing it.
- Set the Path to “/posts/1“.

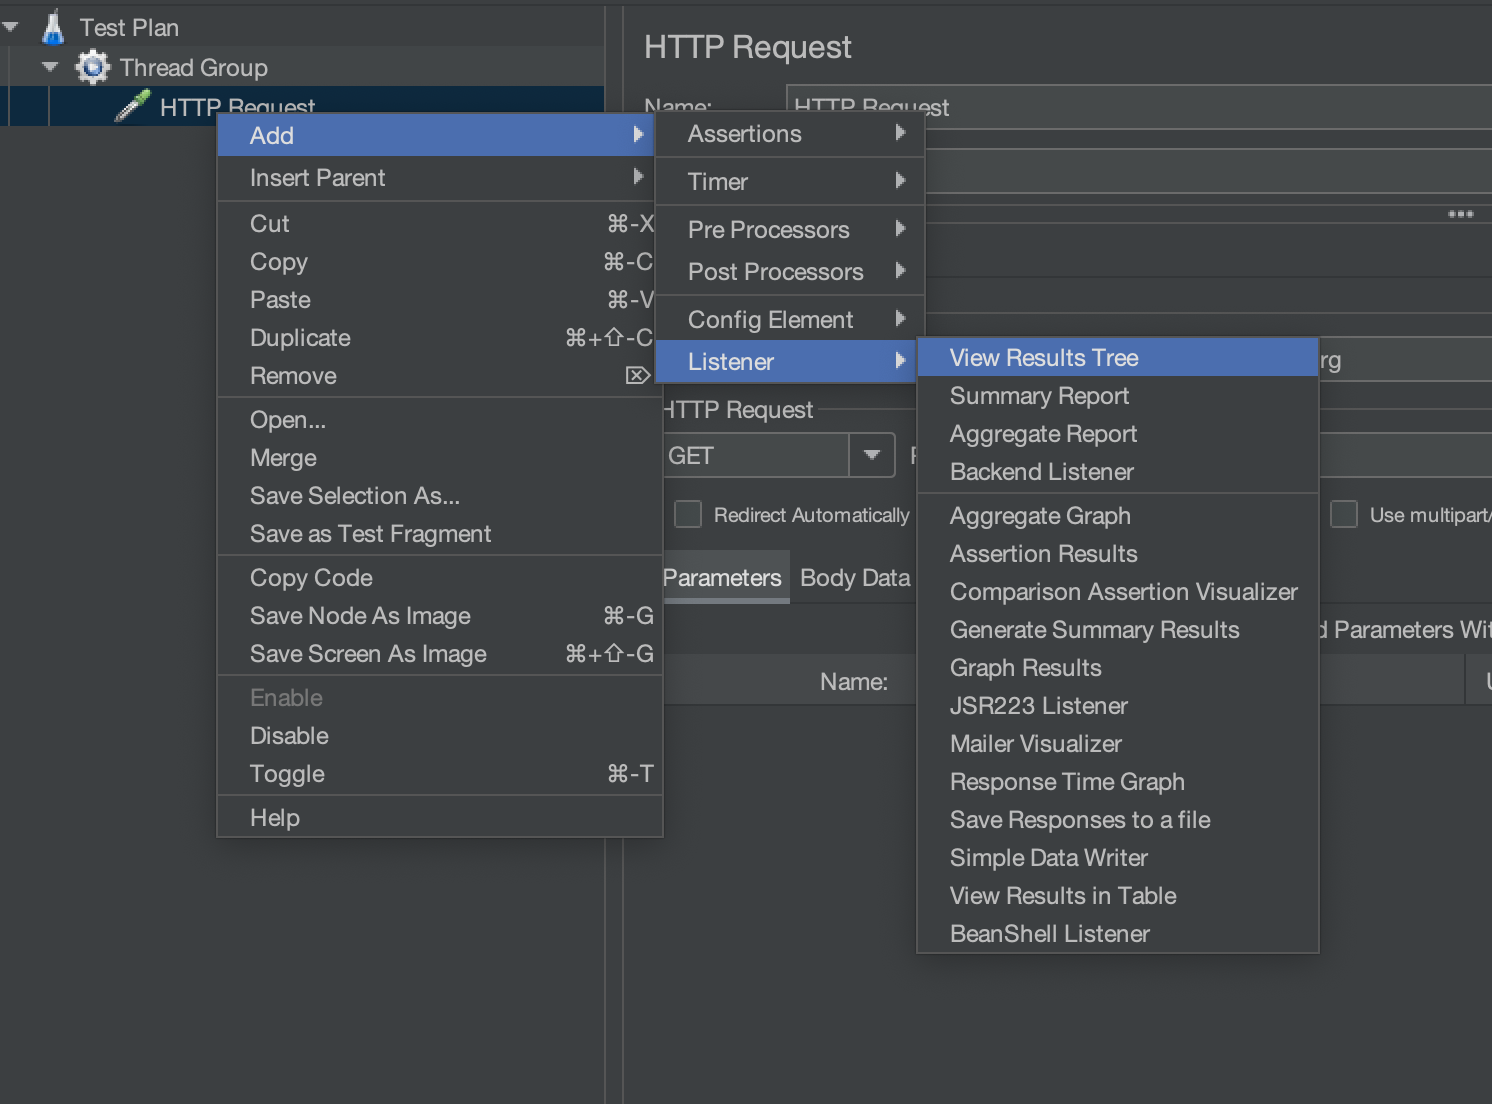
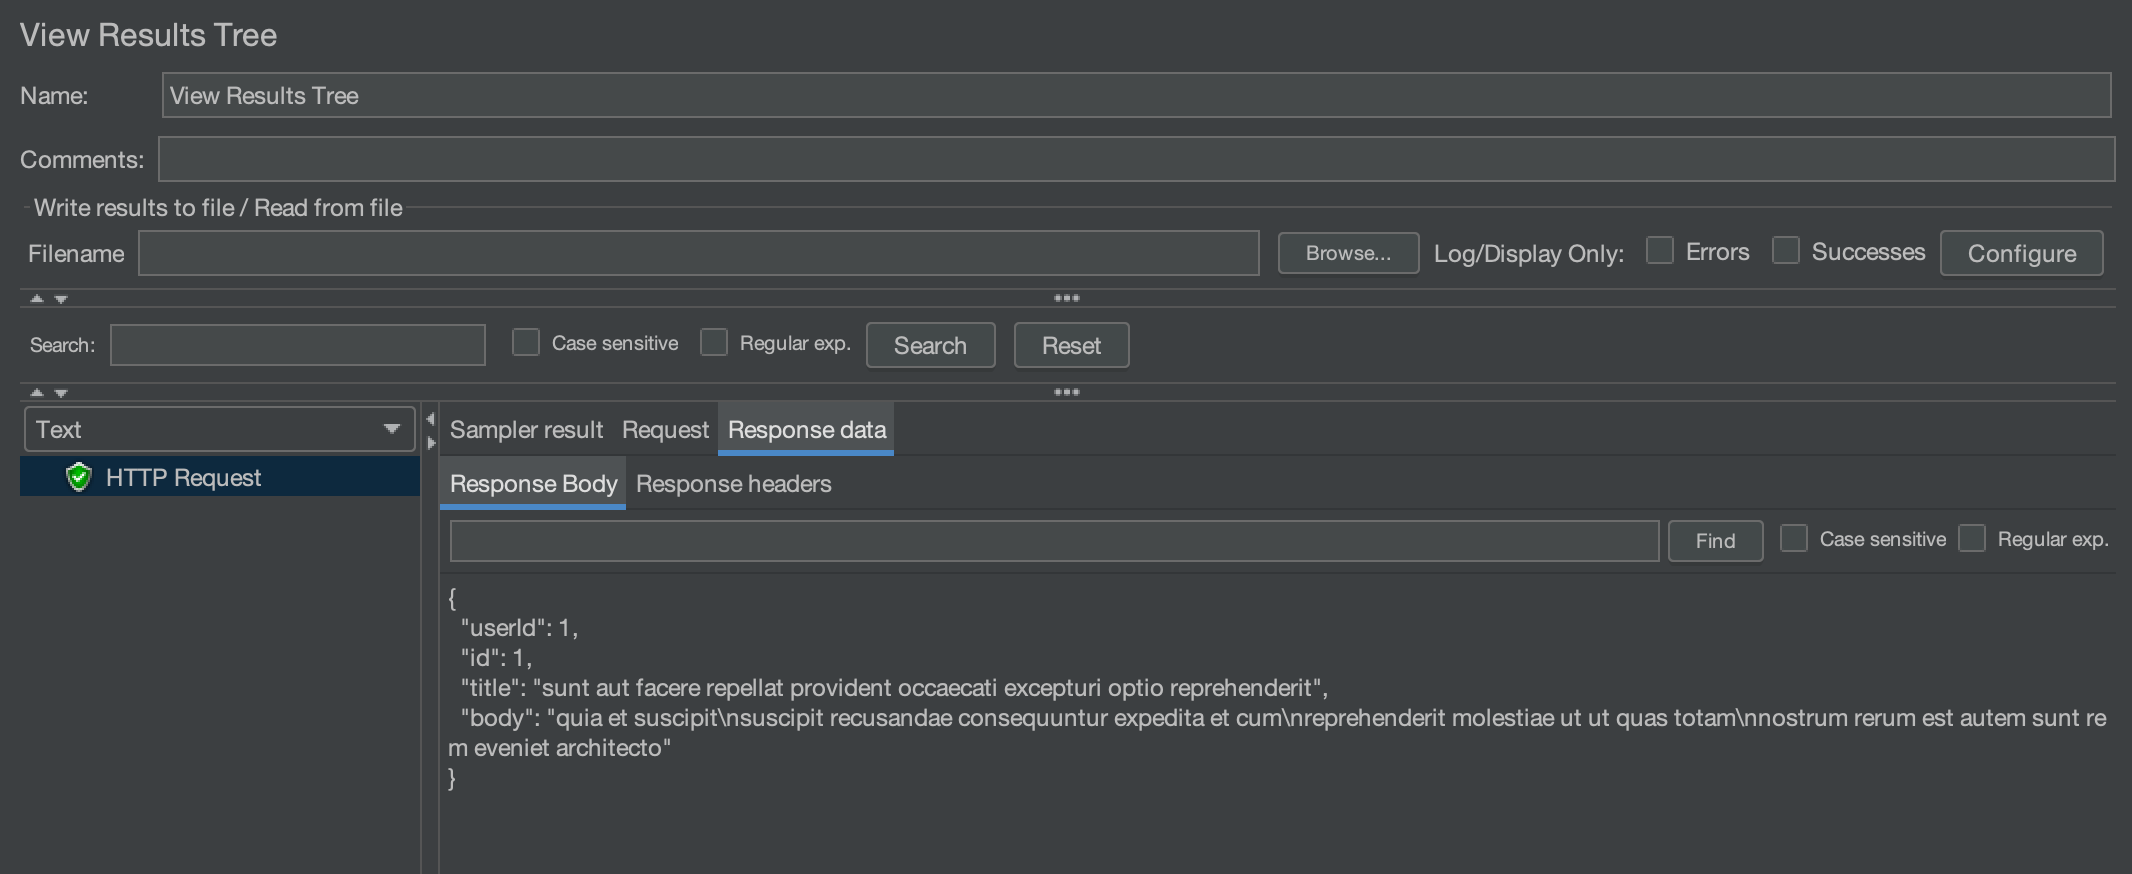
Add “View Results Tree” listener
View Results Tree listener is one of the most used listeners in Jmeter. It provides detailed information about server responses during performance testing.
Add the “View Results Tree” listener by right-clicking on the HTTP request and selecting “Add” > “Listener” > “View Result Tree”.
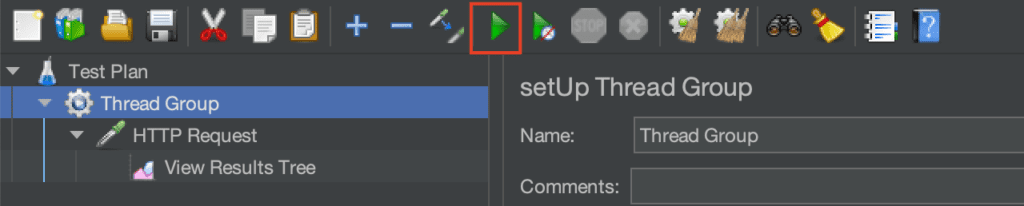
Run Test and monitor results
Run the test case by clicking on the green start button and analyze the results in the “view result tree” listener.
“View result tree” displays the request and response.
Saving the response data to a CSV file
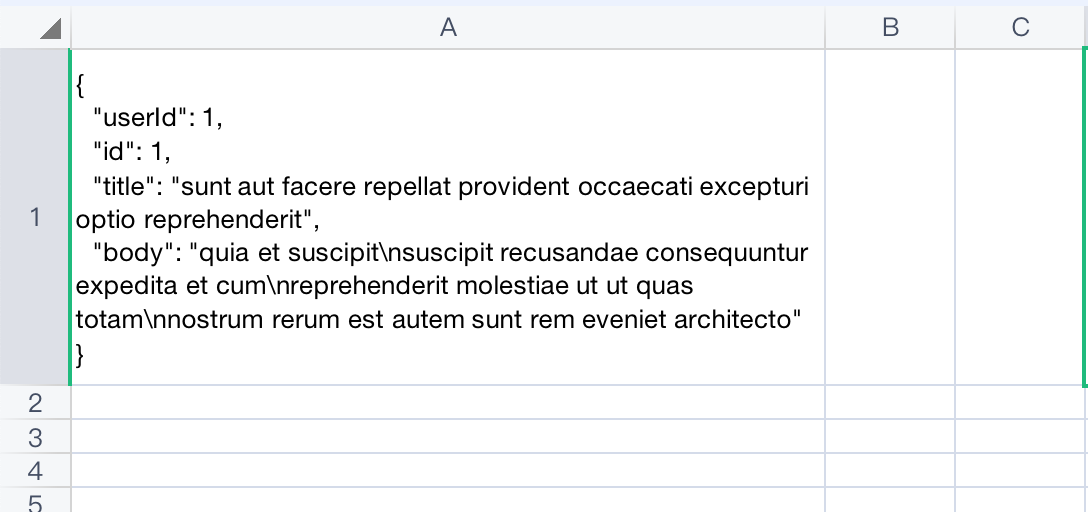
We have received below response from the API and will attempt to save it to a CSV file.
{
  "userId": 1,
  "id": 1,
  "title": "sunt aut facere repellat provident occaecati excepturi optio reprehenderit",
  "body": "quia et suscipit\nsuscipit recusandae consequuntur expedita et cum\nreprehenderit molestiae ut ut quas totam\nnostrum rerum est autem sunt rem eveniet architecto"
}
We will use the JSR223 PostProcessor and write the code there to save the API’s response in a CSV file.
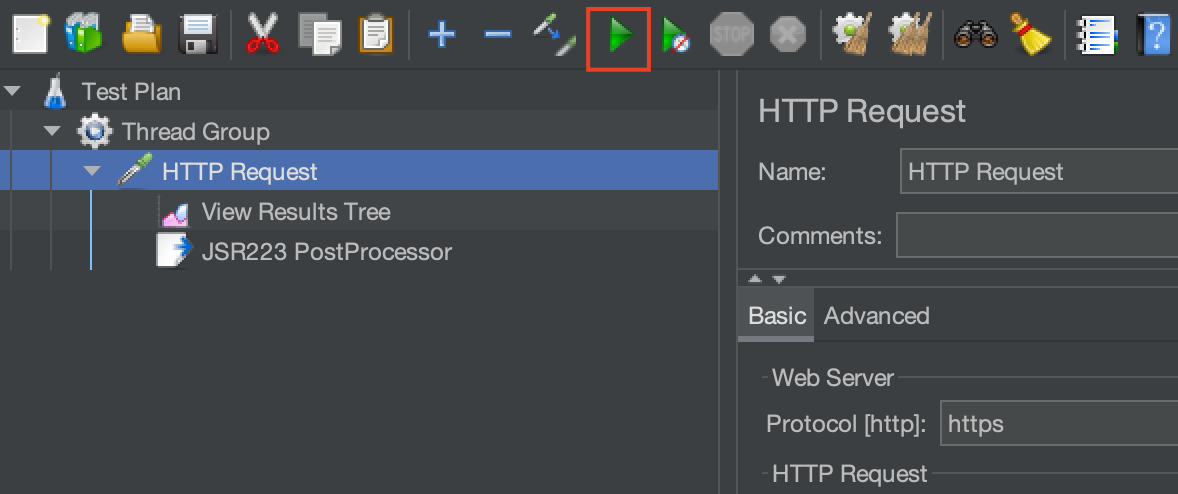
Adding the JSR223 PostProcessor
JSR223 PostProcessor in Jmeter is one of the most commonly used ways to process the response data. To add this PostProcessor, right-click on the HTTP sampler and select “Add” > “Post Processors” > “JSR223 PostProcessor”.


Writing code
Getting the API response
prev.getResponseData() will get us the response that we received from the API. It returns a byte array( byte[] ), which we can convert to a String using new String(prev.getResponseData()).
// Getting the response body
String responseBody = new String(prev.getResponseData());
Using FileWriter to write into a CSV file
Let’s assume that the CSV file path is “D:/Demo.csv”
String fileName = "D:/Demo.csv";
Below code writes the response in the CSV file.
try {
	FileWriter fileWriter = new FileWriter(new File(fileName), true);
	responseBody ="\"" + responseBody.replaceAll("\"", "\"\"") + "\"";
	fileWriter.write(responseBody);
	fileWriter.write("\n");
	fileWriter.flush();
	fileWriter.close();
}
catch (IOException e) {
 }
responseBody ="\"" + responseBody.replaceAll("\"", "\"\"") + "\""; line is necessary to tackle all the newlines or other escape characters that we might encounter while saving the response.
Below is the whole Code –
// Getting the response body
String responseBody = new String(prev.getResponseData());

String fileName = "D:/Demo.csv";

try {
	FileWriter fileWriter = new FileWriter(new File(fileName), true);
	responseBody ="\"" + responseBody.replaceAll("\"", "\"\"") + "\"";
	fileWriter.write(responseBody);
	fileWriter.write("\n");
	fileWriter.flush();
	fileWriter.close();
}
catch (IOException e) {
 }

Now, again click on the “Run” button to execute the test plan.
You will see that the API’s response is now saved to the CSV file.
Now, this should be enough if you are looking to save a response in a CSV file, but we will explore more to save multiple responses in the CSV file.
Saving multiple responses from each HTTP sampler in the CSV file
Up to this point, we’ve configured the Thread Group to run just once, which means our HTTP request was executed only a single time. As a result, only one response was saved in the CSV file. But in real-world testing scenarios, you’ll often need to handle hundreds or even thousands of requests and capture all their responses.
Let’s try that now.
We’ll be sending requests to the endpoint https://jsonplaceholder.typicode.com/posts/${postID}, where postID is a number that starts from 1 and increments with each request – like 1, 2, 3, and so on.
Here’s what we’ll do:
- Send the request using the current
postID. - Increment the
postIDby 1. - Repeat this process until all the desired requests are completed and their responses are saved.
Add postID variable in Test Plan
First, make a “postID” variable and initialize its value to 0. To do this, navigate to the “Test Plan” screen, click the “Add” button, and enter the variable’s name and its value.

Increment the postID value
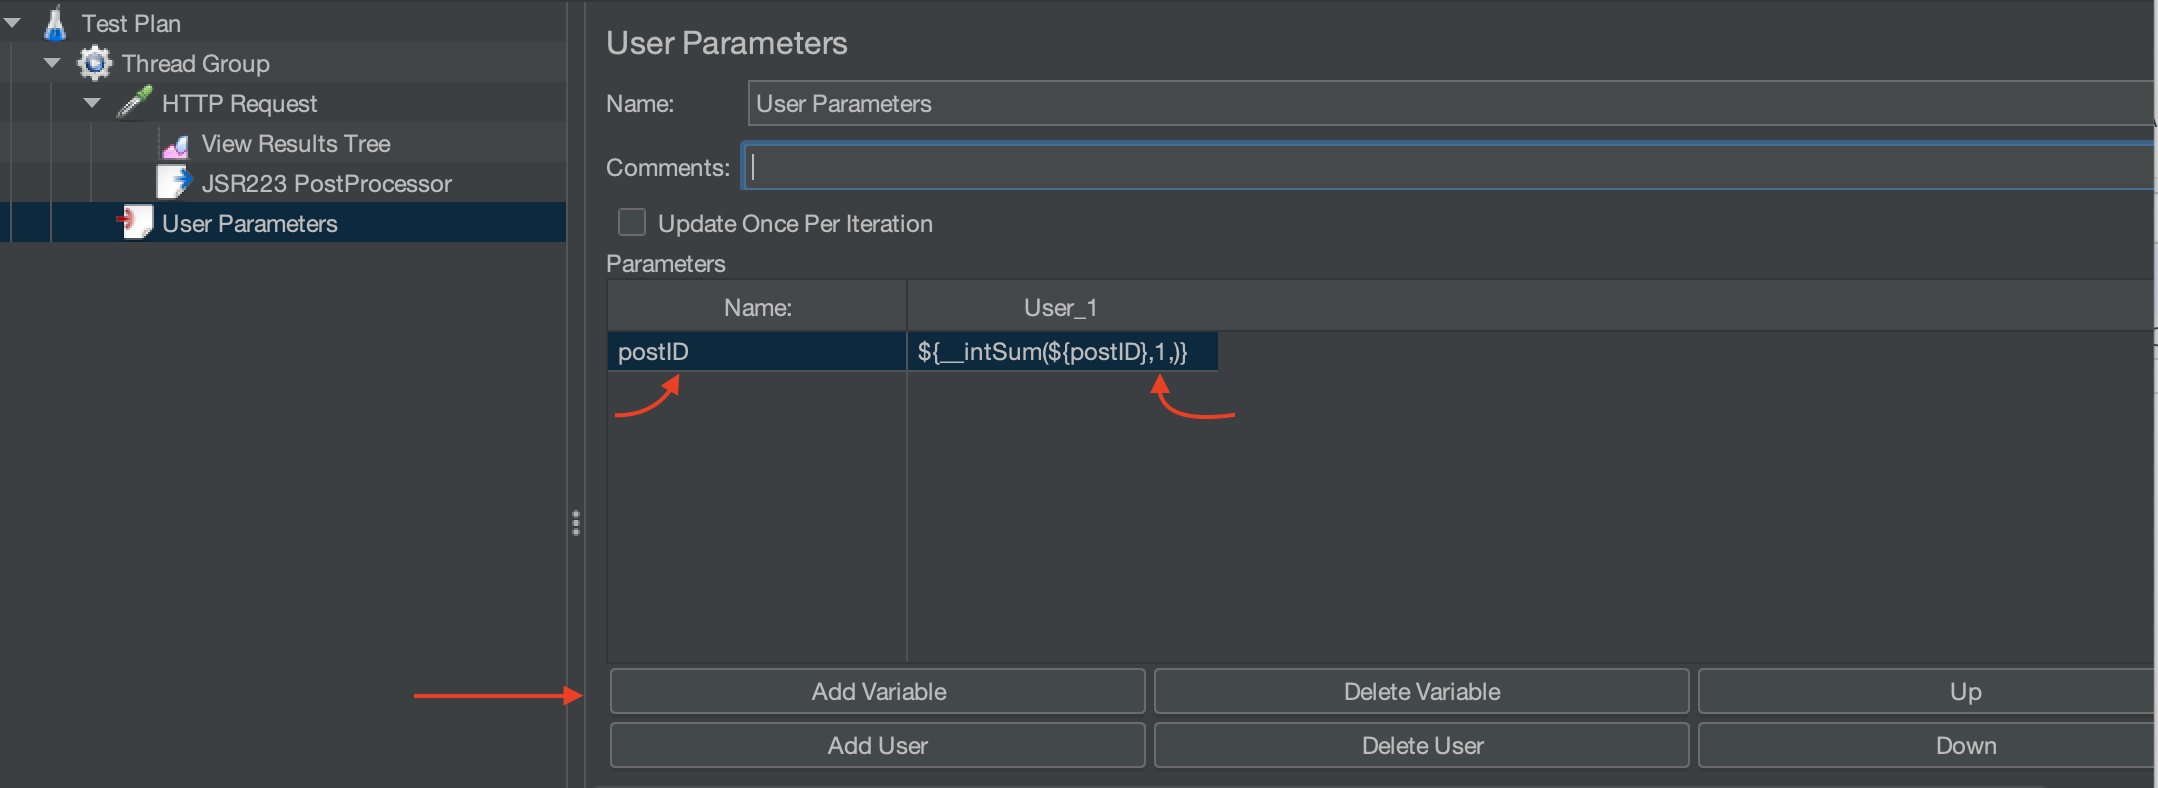
Now, we need to make sure that the postID value increases by 1 with each request. In JMeter, we can achieve this using a PreProcessor called User Parameters.
To add the User Parameters PreProcessor:
- Right-click on the Thread Group.
- Navigate to Add > Pre Processors > User Parameters.
This will allow us to dynamically update the postID for each iteration of the test.

Click on the “Add variable” button and add the “postID” under the “Name:” section and “${__intSum(${postID},1,)}” under the “User_1” section as shown below. ${__intSum(${postID},1,)} is used to increment the value by 1.
Click on the Add Variable button, then enter postID in the Name field. In the User_1 field, enter the following expression:
${__intSum(${postID},1,)}This function increments the current value of postID by 1 with each request.
Parameterize the postID value in the HTTP sampler

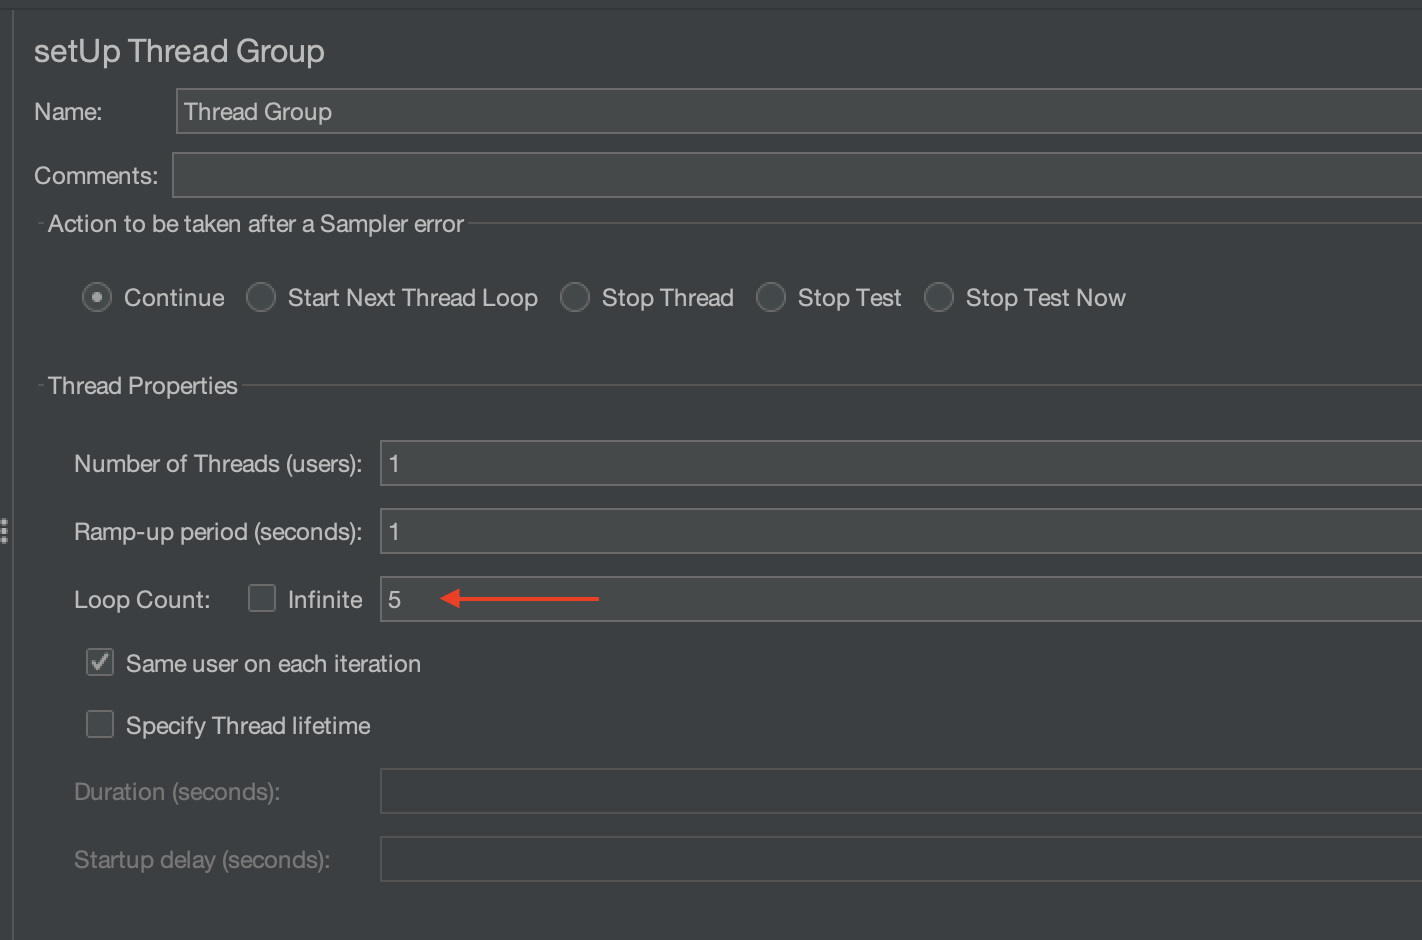
Update the Loop count in Thread Group
Next, update the Loop Count in the Thread Group to 5. This setting ensures that five requests will be executed, with postID values ranging from 1 to 5.
Once these requests are complete, the code in the JSR223 PostProcessor will save the responses from all five requests into the CSV file.
Finally, click on the run button to execute the Test Plan. You will see that the responses from all the executed requests is saved in the CSV file.
Saving response in separate columns of a CSV file
Up until now, we’ve been saving the entire API response into a single column in the CSV file. However, it’s also possible, and often more useful, to extract specific fields from the response and save them in separate columns.
For example, consider the following API response:
{
  "userId": 1,
  "id": 1,
  "title": "sunt aut facere repellat provident occaecati excepturi optio reprehenderit",
  "body": "quia et suscipit\nsuscipit recusandae consequuntur expedita et cum\nreprehenderit molestiae ut ut quas totam\nnostrum rerum est autem sunt rem eveniet architecto"
}
Instead of saving the entire JSON as one string, we can extract and store each key – userId, id, title, and body in its own column. This makes the CSV file cleaner, more structured, and easier to work with for reporting or further processing.
Now, we need to update the code in our JSR223 PostProcessor to handle the response more effectively. The updated code will:
- Parse the JSON response.
- Extract individual fields: userId, id, title, and body.
- Properly escape any quotes or newline characters.
- Write each field into a separate column in the CSV file.
Here’s the code that accomplishes all of this:
import groovy.json.JsonSlurper
import java.io.FileWriter
import java.io.File

String responseBody = new String(prev.getResponseData())
String fileName = "D:/Demo.csv";

try {
    def json = new JsonSlurper().parseText(responseBody)

    def userId = json.userId?.toString() ?: ""
    def id = json.id?.toString() ?: ""
    def title = json.title ?: ""
    def body = json.body ?: ""

    // Helper to escape CSV values
    def escapeCSV = { val ->
        val = val.replaceAll('"', '""')
        if (val.contains(",") || val.contains("\n") || val.contains("\"")) {
            return "\"${val}\""
        }
        return val
    }

    // Compose CSV line
    def csvLine = [
        escapeCSV(userId),
        escapeCSV(id),
        escapeCSV(title),
        escapeCSV(body)
    ].join(",") + "\n"

    FileWriter fileWriter = new FileWriter(new File(fileName), true)
    fileWriter.write(csvLine)
    fileWriter.flush()
    fileWriter.close()

} catch (Exception e) {
    log.error("Failed to write CSV: " + e.message)
}
Now, click on the run button to execute the Test Plan. This will save responses in separate columns for each API call.
Video Tutorial
This is it. We hope that you liked the article. If you have any doubts or concerns, please write to us in the comments or mail us at admin@codekru.com.