
Spring MVC is a popular Java framework for building web applications. It provides a powerful set of features for building dynamic, scalable, and secure web applications. This article will walk you through the steps of building a basic Spring MVC application.
We will use the below tools in our project.
- Eclipse IDE (where we write our code)
- Maven ( to automate our build process, and it follows convention over configuration, so it is a little easy to use )
- Apache tomcat server ( all applications require a server to run the code, we will use the infamous tomcat server here).
Please see this post to configure tomcat on your device. We hope that the tomcat is configured on your device 😀
Here are the steps to run a spring MVC application on your machine –
- Creating a new Maven Project
- Adding Spring to the Project using Maven
- Creating configuration classes for Spring
- Creating a Controller class
- And finally, building the project and running the war file
Let’s look at the above steps one by one.
Creating a new Maven Project
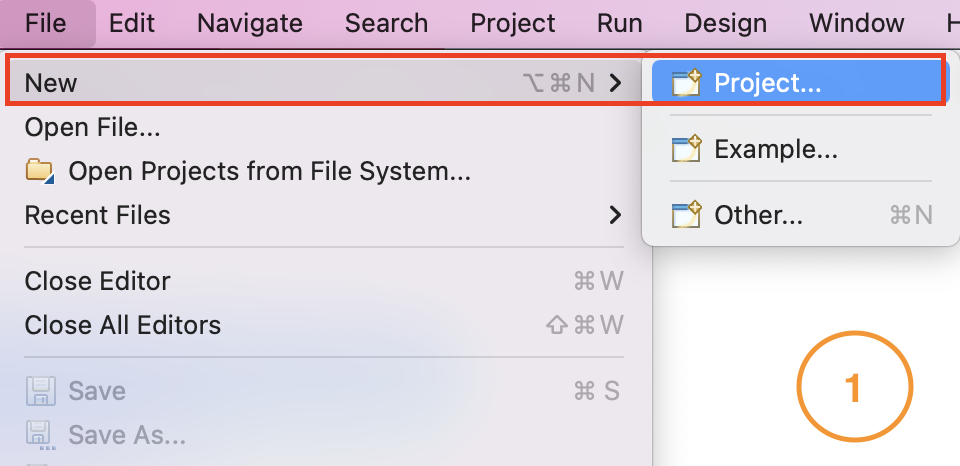
- Click on the File menu and select New -> Project.
- Under Maven, select Maven Project.
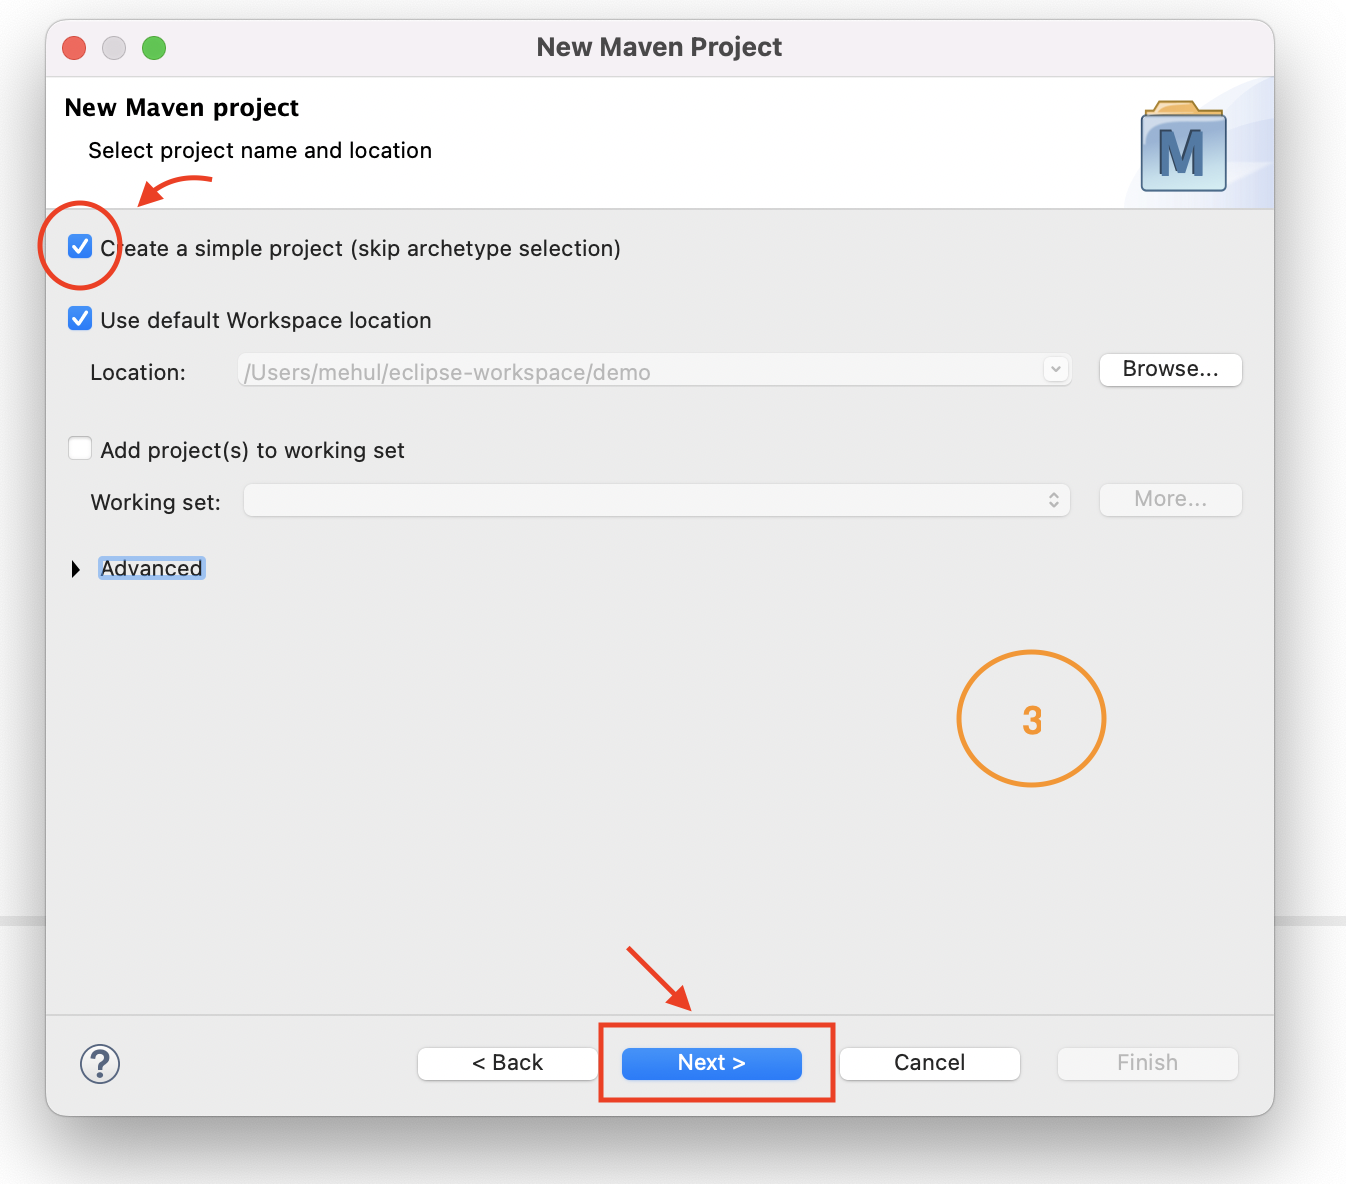
- Select the Create a simple project (skip archetype selection) checkbox and click on Next.
- Enter Group Id as “com.codekru“, Artifact id as “demo“, and select Packaging as “war“.
- Now, click on Finish.


Adding Spring to the Project using Maven
We have created the maven project, and there is one file, pom.xml, at the project’s root. It contains information about the project and configuration details used by Maven to build the project.
Initially, your pom.xml file will look something like this –
<project xmlns="http://maven.apache.org/POM/4.0.0" xmlns:xsi="http://www.w3.org/2001/XMLSchema-instance" xsi:schemaLocation="http://maven.apache.org/POM/4.0.0 https://maven.apache.org/xsd/maven-4.0.0.xsd">
  <modelVersion>4.0.0</modelVersion>
  <groupId>com.codekru</groupId>
  <artifactId>demo</artifactId>
  <version>0.0.1-SNAPSHOT</version>
  <packaging>war</packaging>
</project>
Add the properties and dependencies in your pom.xml file, below the packaging ( line 6 ).
	<properties>
		<java.version>1.8</java.version>
		<spring.version>4.1.5.RELEASE</spring.version>
        <maven.compiler.source>1.8</maven.compiler.source>
		<maven.compiler.target>1.8</maven.compiler.target>
	</properties>
	<dependencies>
		<!-- Servlet API -->
		<dependency>
			<groupId>javax.servlet</groupId>
			<artifactId>javax.servlet-api</artifactId>
			<version>3.1.0</version>
			<scope>provided</scope>
		</dependency>

		<!-- Spring Core -->
		<dependency>
			<groupId>org.springframework</groupId>
			<artifactId>spring-context</artifactId>
			<version>${spring.version}</version>
		</dependency>

		<!-- Spring MVC -->
		<dependency>
			<groupId>org.springframework</groupId>
			<artifactId>spring-webmvc</artifactId>
			<version>${spring.version}</version>
		</dependency>
	</dependencies>
You might see an error like “web.xml is missing and <failOnMissingWebXml> is set to true” in the pom.xml file.

Please add the following configuration in pom.xml, and this error should be resolved.
	<build>
		<finalName>demo</finalName>
		<plugins>
			<plugin>
				<groupId>org.apache.maven.plugins</groupId>
				<artifactId>maven-war-plugin</artifactId>
				<version>3.3.1</version>
				<configuration>
					<failOnMissingWebXml>false</failOnMissingWebXml>
				</configuration>
			</plugin>
		</plugins>
	</build>
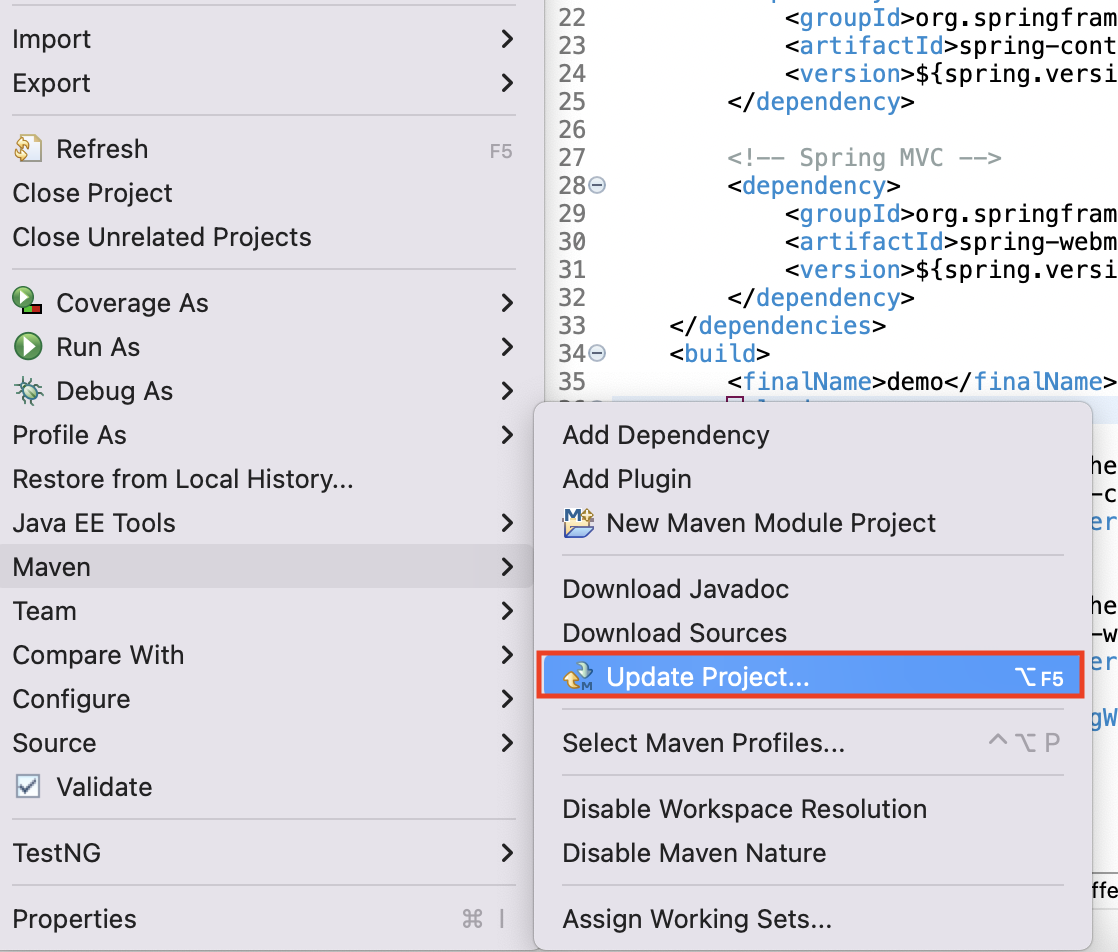
If the problem persists, click on Maven by right-clicking the project folder and then selecting the Update Project.
And that’s it, your configurations are done now.
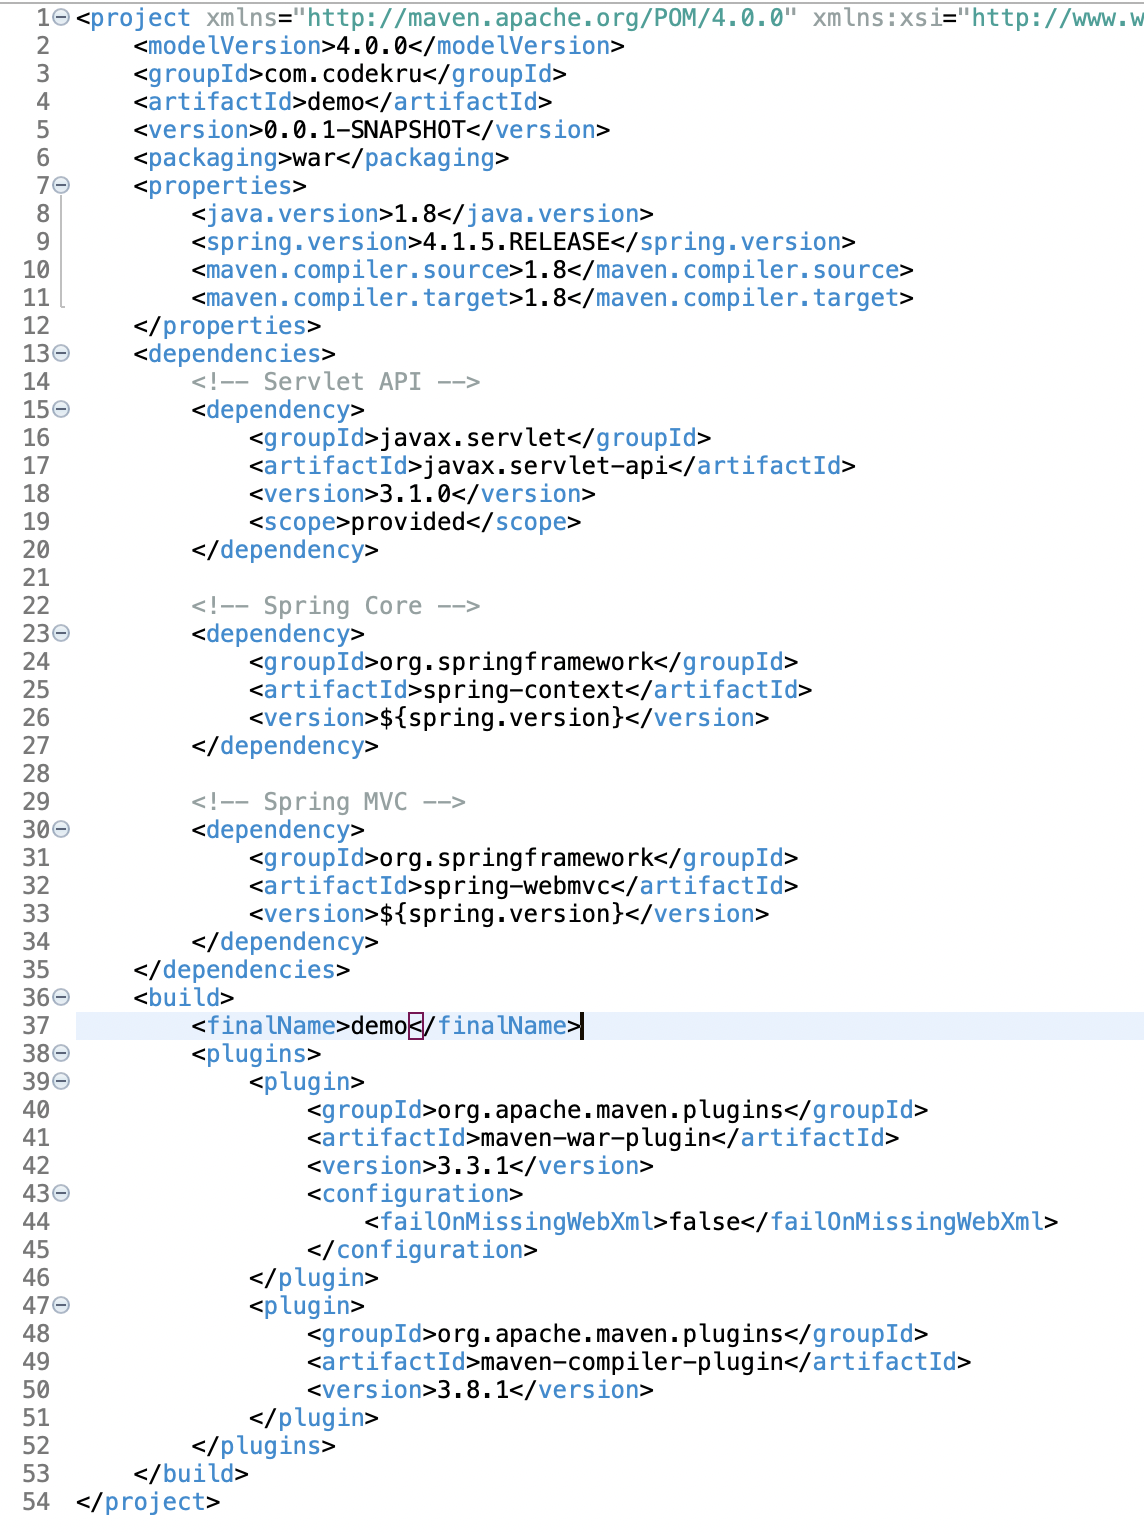
Below is the final pom.xml screenshot.
Please note that in this project, we are not using web.xml here because, after Servlet specification 3.0 (implemented in Tomcat 7 and higher versions), we don’t require web.xml to run our projects anymore and can focus on our code. We will use a ServletInitializer class in place of web.xml, which is fairly easy to use.
Note: Mentioned libraries and dependencies in pom.xml are being downloaded by the eclipse in the background. They are listed under Maven Dependencies in the left-hand side pane of Package Explorer.
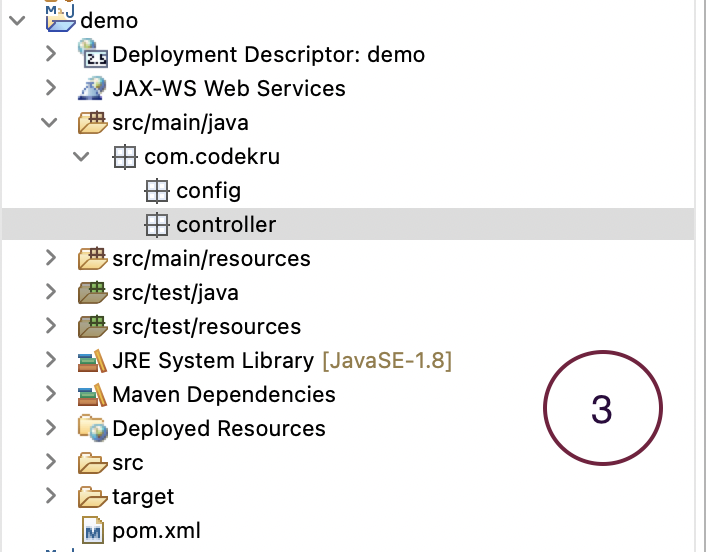
Till now, our “Hello World” program project structure looks like this –

Till now, our src/main/java folder is empty, and now, we will make our packages and classes within this folder only.
Creating the configuration classes for Spring
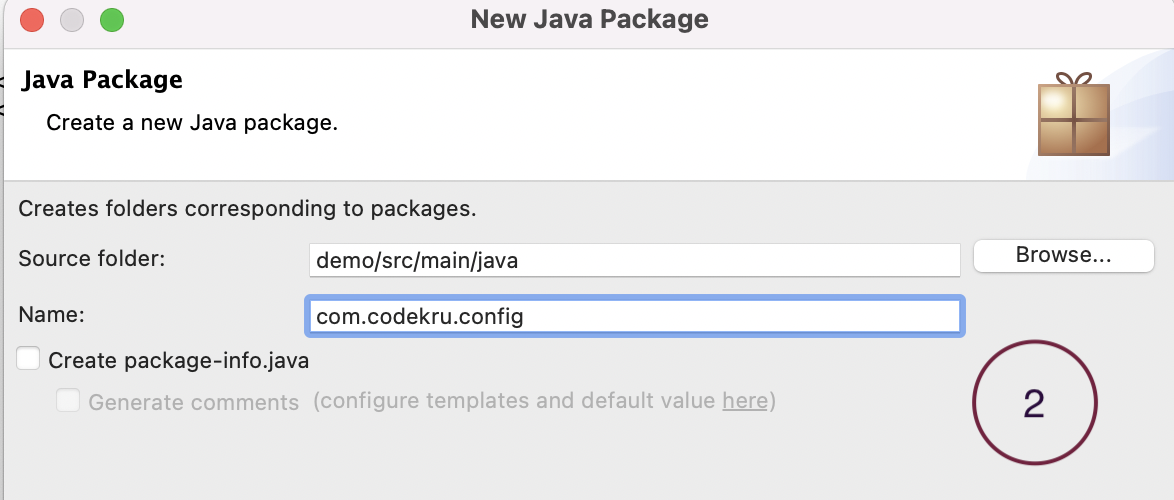
- Create Java packages “com.codekru.config” and “com.codekru.controller“. You can create packages by right on the project folder and selecting New > Package.
- Create a configuration class, say, AppConfig in “com.codekru.config” class.


package com.codekru.config;

import org.springframework.context.annotation.ComponentScan;
import org.springframework.context.annotation.Configuration;
import org.springframework.web.servlet.config.annotation.EnableWebMvc;

@Configuration
@EnableWebMvc
@ComponentScan( basePackages = {"com.codekru.controller"})
public class AppConfig {

}
- @Configuration – This declares it as a Spring Configuration class.
- @EnableWebMvc – This enables Spring’s ability to receive and process web requests.
- @ComponentScan – This scans the mentioned packages for Spring components.
- Still, in the same config package, create another class called ServletInitializer which will extend AbstractAnnotationConfigDispatcherServletInitializer and override its unimplemented methods.
package com.codekru.config;

import org.springframework.web.servlet.support.AbstractAnnotationConfigDispatcherServletInitializer;

public class ServletInitializer extends AbstractAnnotationConfigDispatcherServletInitializer{

	@Override
	protected Class<?>[] getRootConfigClasses() {
		return new Class<?>[0];
	}

	@Override
	protected Class<?>[] getServletConfigClasses() {
		return new  Class<?>[] {AppConfig.class};
	}

	@Override
	protected String[] getServletMappings() {
		return new String[] {"/"};
	}

}
ServletInitializer is a configuration class for Spring’s servlet, which replaces the standard web.xml file. It will be detected automatically by SpringServletContainerInitializer. ServletInitializer extends the AbstractAnnotationConfigDispatcherServletInitializer abstract class and implements the required methods.
getServletMappings() – This declares the servlet root URI.
getServletConfigClasses() – This declares the Spring configuration classes. Here, we declared the AppConfig class that we made earlier.
Creating a Controller class
In the “com.codekru.controller” package, create a HelloController class with its “helloWorld” method:
package com.codekru.controller;

import org.springframework.stereotype.Controller;
import org.springframework.web.bind.annotation.RequestMapping;
import org.springframework.web.bind.annotation.ResponseBody;

@Controller
public class HelloController {

	@RequestMapping("helloWorld")
    @ResponseBody
	public String helloWorld() {
		return "Hello World";
	}
}
Now, when we navigate to http://localhost:8080/demo/helloWorld, the helloWorld method of HelloController will be called and will return a “Hello World” message.
Build the project
Now let’s build this project using Maven.
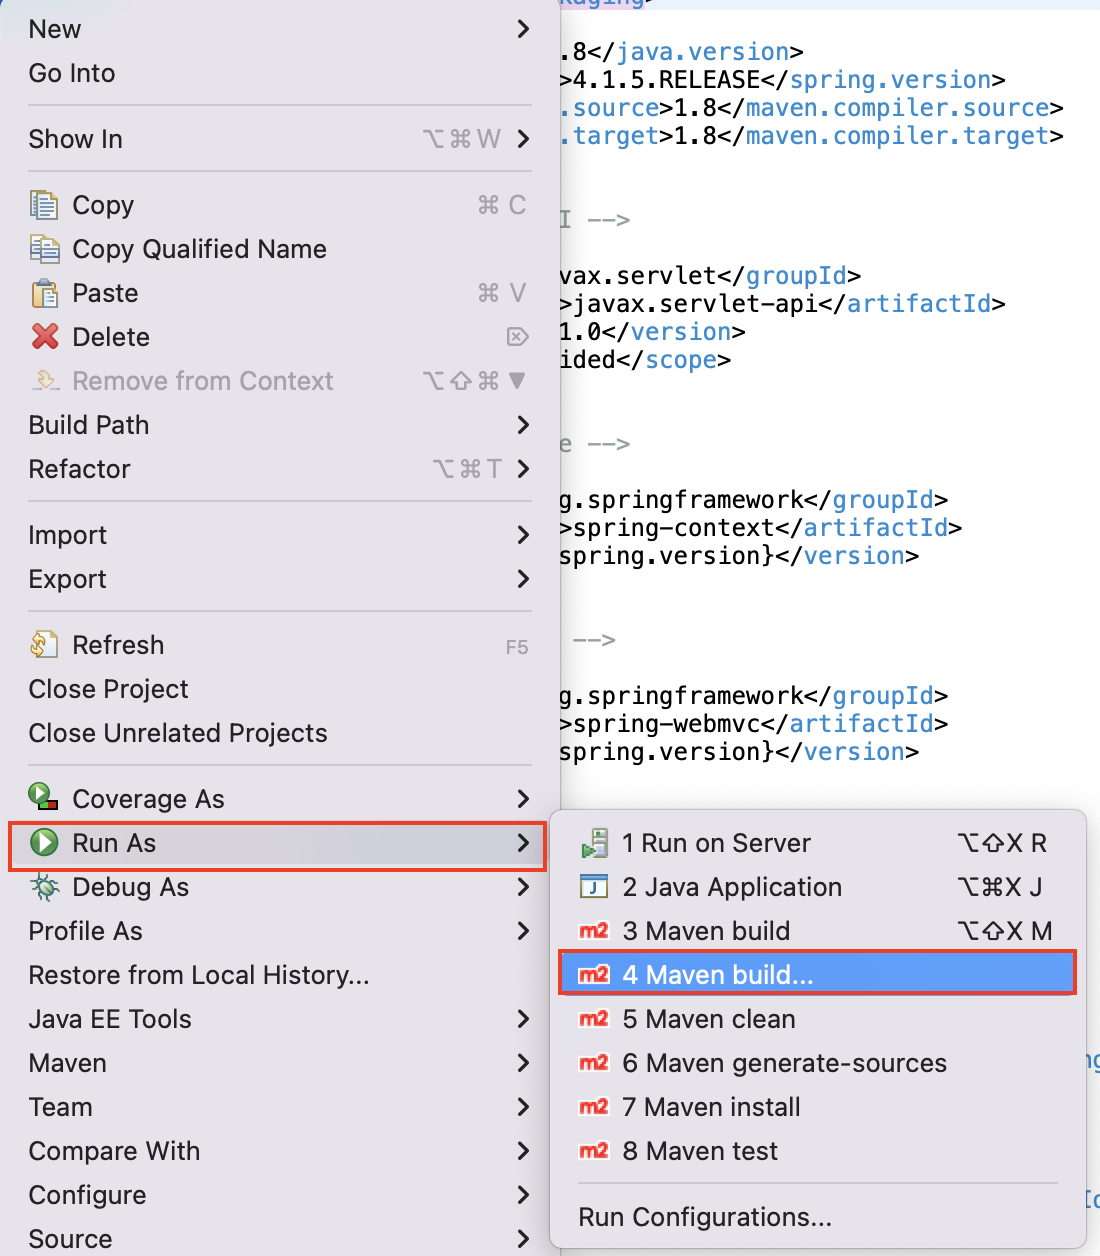
- Go to “Run as” by right-clicking the project folder.
- Select the “Maven build” option
- In the Goals field, enter clean install, as shown in the image below, and click on the Run button.

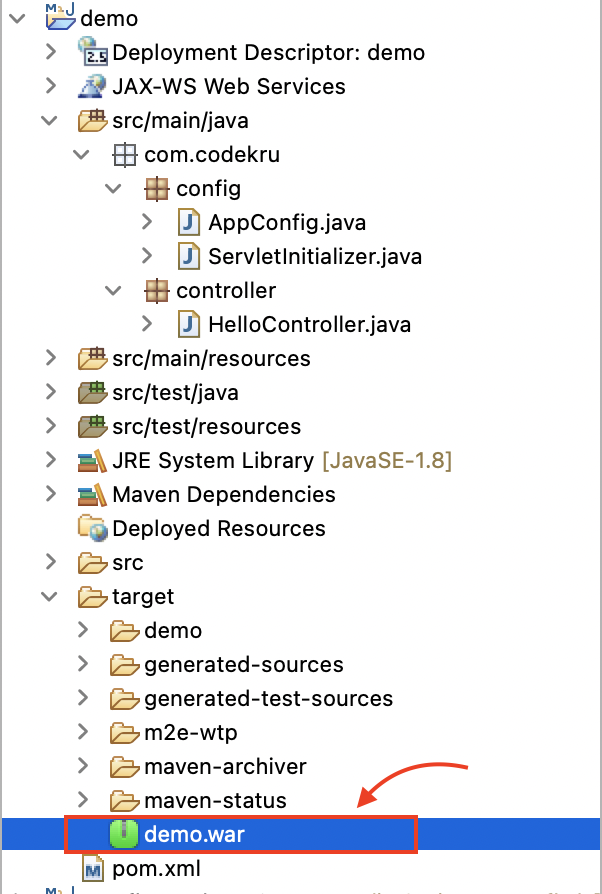
This will build your project and create a war file in your target folder with the name “demo.war“. If you don’t see it in the target folder, please refresh the project and demo.war should appear in the target folder.
Running the war file
- Now copy the war file under Tomcat’s “webapps” folder.
- Launch tomcat using the command bin/catalina.sh run.
- This will run your application on tomcat’s server. Now go to http://localhost:8080/demo/helloWorld, and you will see “Hello World” printed on the screen.
Note: If you have another way to run this on the tomcat server, then you can choose that as well. We have set up our tomcat server as mentioned in this post.

Note: After each build, you have to copy the war file to the tomcat webapps folder.
Github link for the project – https://github.com/CodekruTeam/HelloWorldSpringApplication
We hope that you have liked the article. If you have any doubts or concerns, please feel free to write us in the comments or mail us at admin@codekru.com