
Build your local Selenium test lab
In the previous article, you met the Selenium ecosystem: WebDriver is the coding API, Selenium Manager helps with drivers, IDE can record actions, and Grid helps tests run at scale. That path started with What is Selenium?.
Today you will set up only the pieces needed for one local Java test. First install Java. Then use IntelliJ to create a Maven project. Maven downloads Selenium and TestNG. Finally, run one test against TestKru.
Think of it like setting up a kitchen before cooking. Java runs the recipe. IntelliJ is the workbench. Maven brings the ingredients. Selenium and TestNG are the instructions. Chrome is the thing your test will operate. Once this small lab works, later lessons can focus on browser automation instead of installation surprises.
The tools in this lab
| Tool | Plain-English job |
|---|---|
| JDK (Java) | Compiles and runs your Java test code |
| IntelliJ IDEA | The editor where you write, run, and debug tests |
| Maven | Downloads libraries (Selenium, TestNG) and builds the project |
| selenium-java | The WebDriver API that controls the browser |
| TestNG | Runs test methods and checks pass/fail assertions |
| Browser (Chrome) | The real browser your test drives |
| Selenium Manager | Helps provide a matching browser driver when needed |
You do not need Grid, IDE recording, or Docker for this lesson. The setup path is simple: install Java, create the Maven project, add two dependencies, then run one local Chrome test.
Install Java (the JDK)
Selenium’s Java bindings need a JDK (Java Development Kit), not only a runtime that can start apps. A JDK includes the compiler (javac) and the tools you need to build projects. Official Selenium guidance requires Java 11 or newer for current Selenium 4 releases. The Selenium project’s own Java examples commonly compile with Java 17. Current TestNG releases also expect Java 11 or higher, so one modern JDK covers both.
Choose your Java version
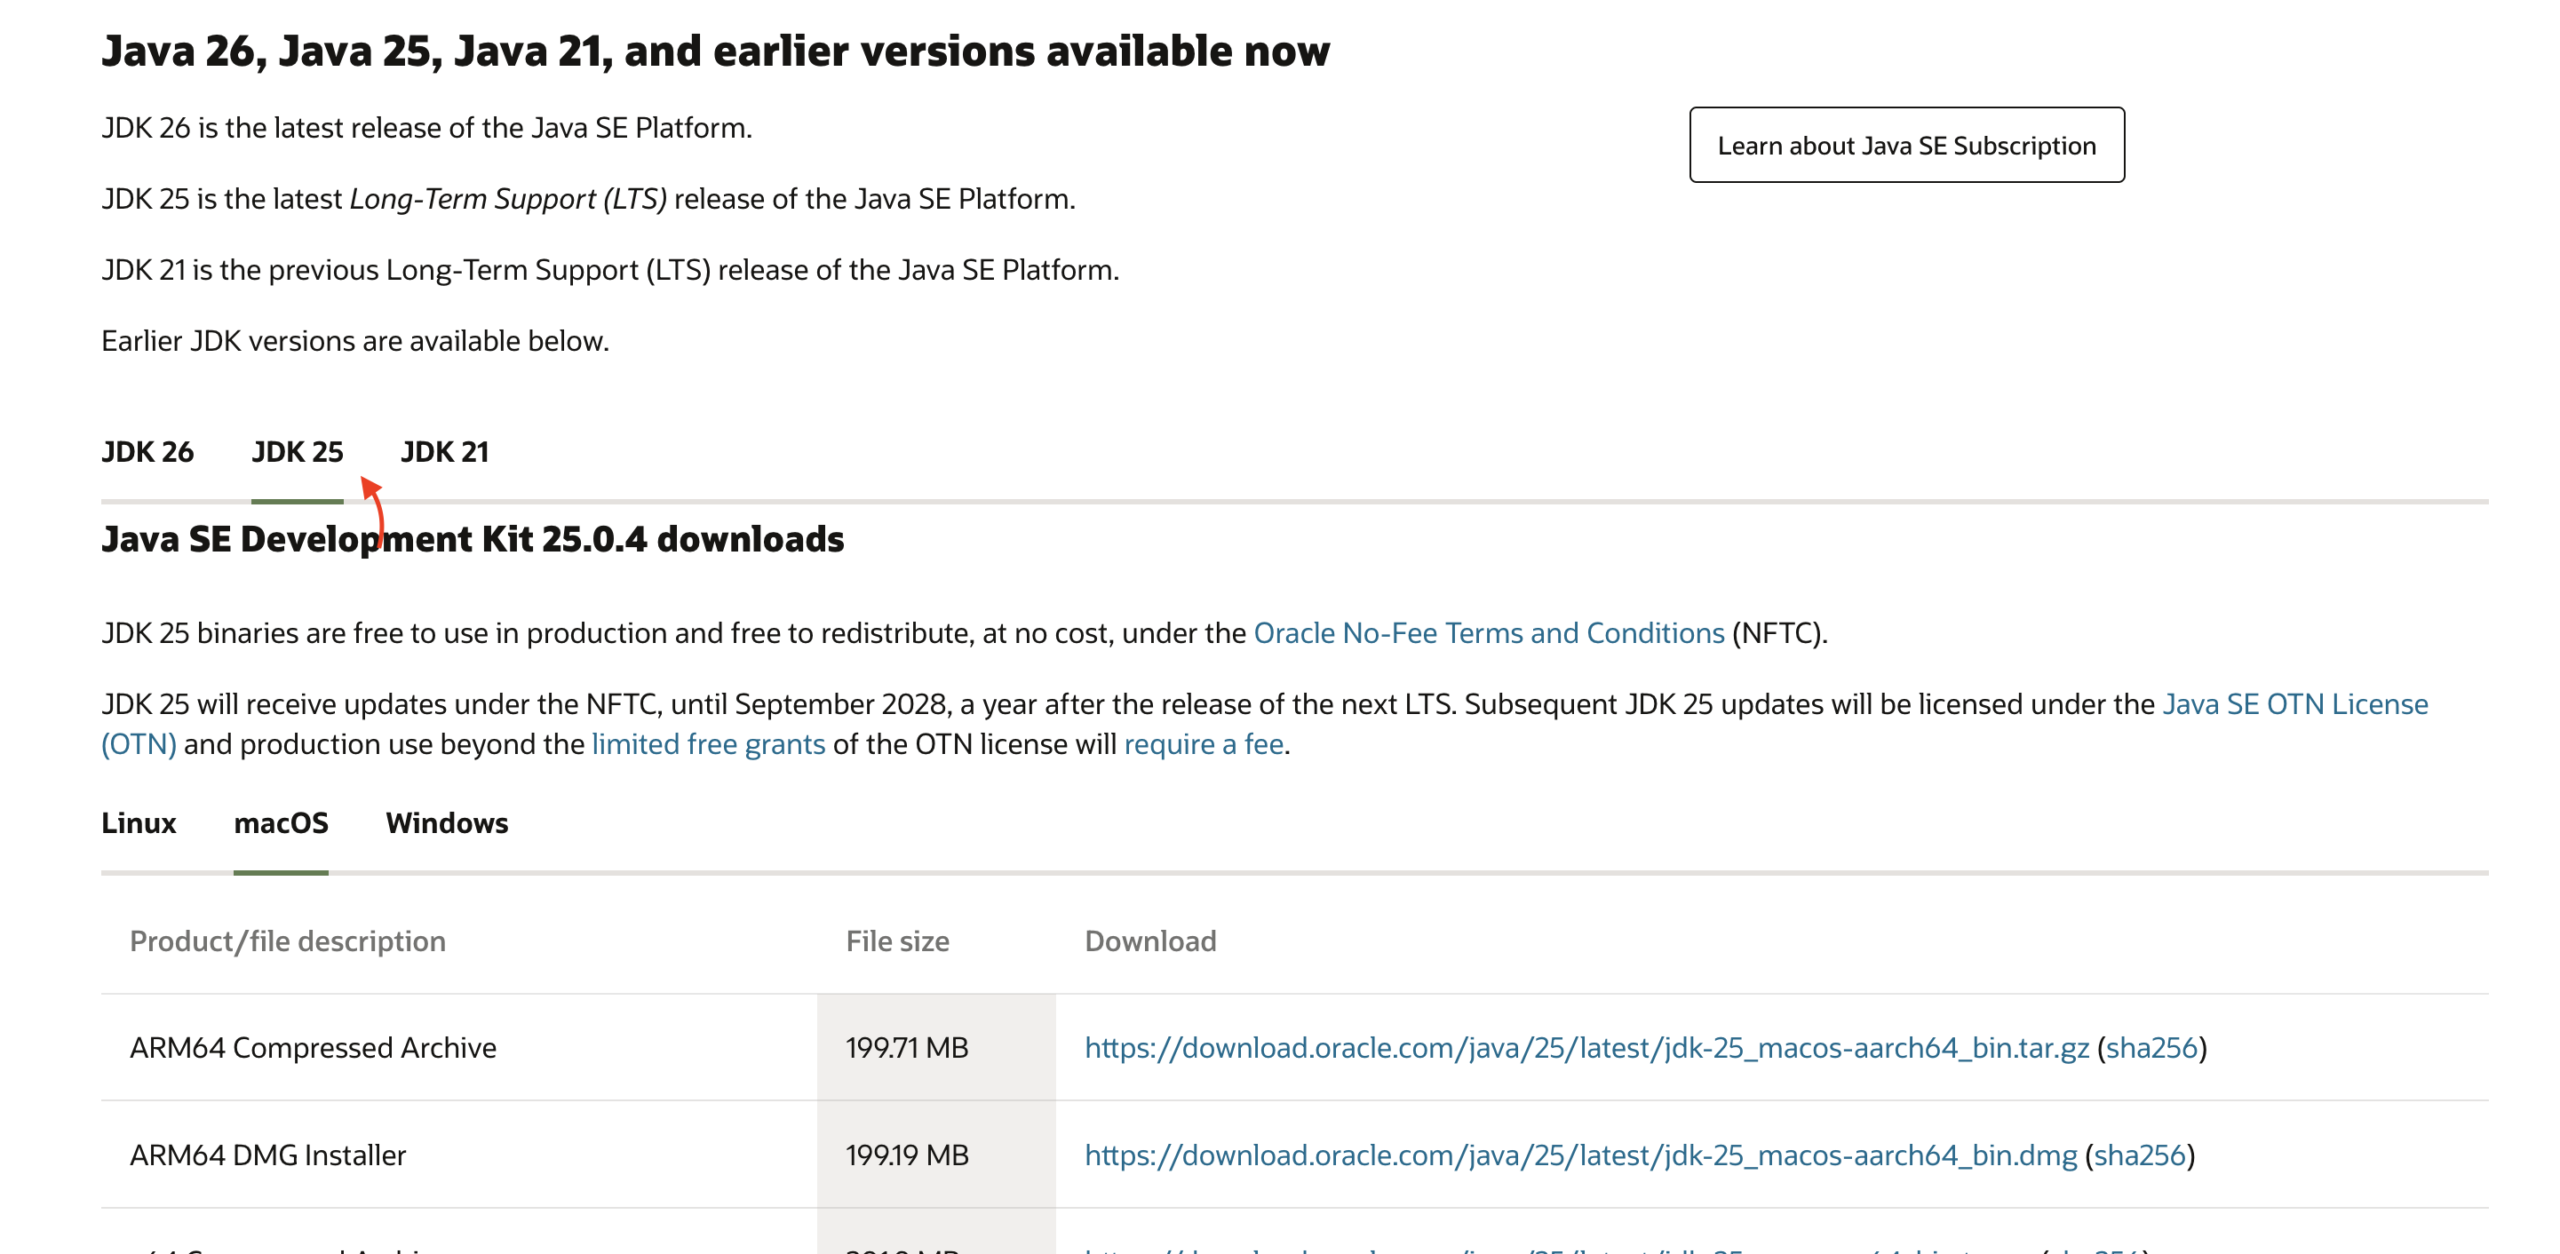
Install a current long-term support (LTS) JDK such as 17, 21, or 25. This lesson’s installer and IntelliJ screenshots use JDK 21. Oracle’s download page may also show a JDK 25 tab. Either LTS release is fine for Selenium 4 and TestNG. The clicks are the same.
Download the JDK from Oracle Java downloads. You can also let IntelliJ fetch a JDK later (Project Structure → Download JDK). Download the JDK, not a JRE-only package. If your machine still has only Java 8, upgrade. Current Selenium Java is not built for Java 8.
Open the Oracle page and choose an LTS tab such as JDK 25:
Install on macOS
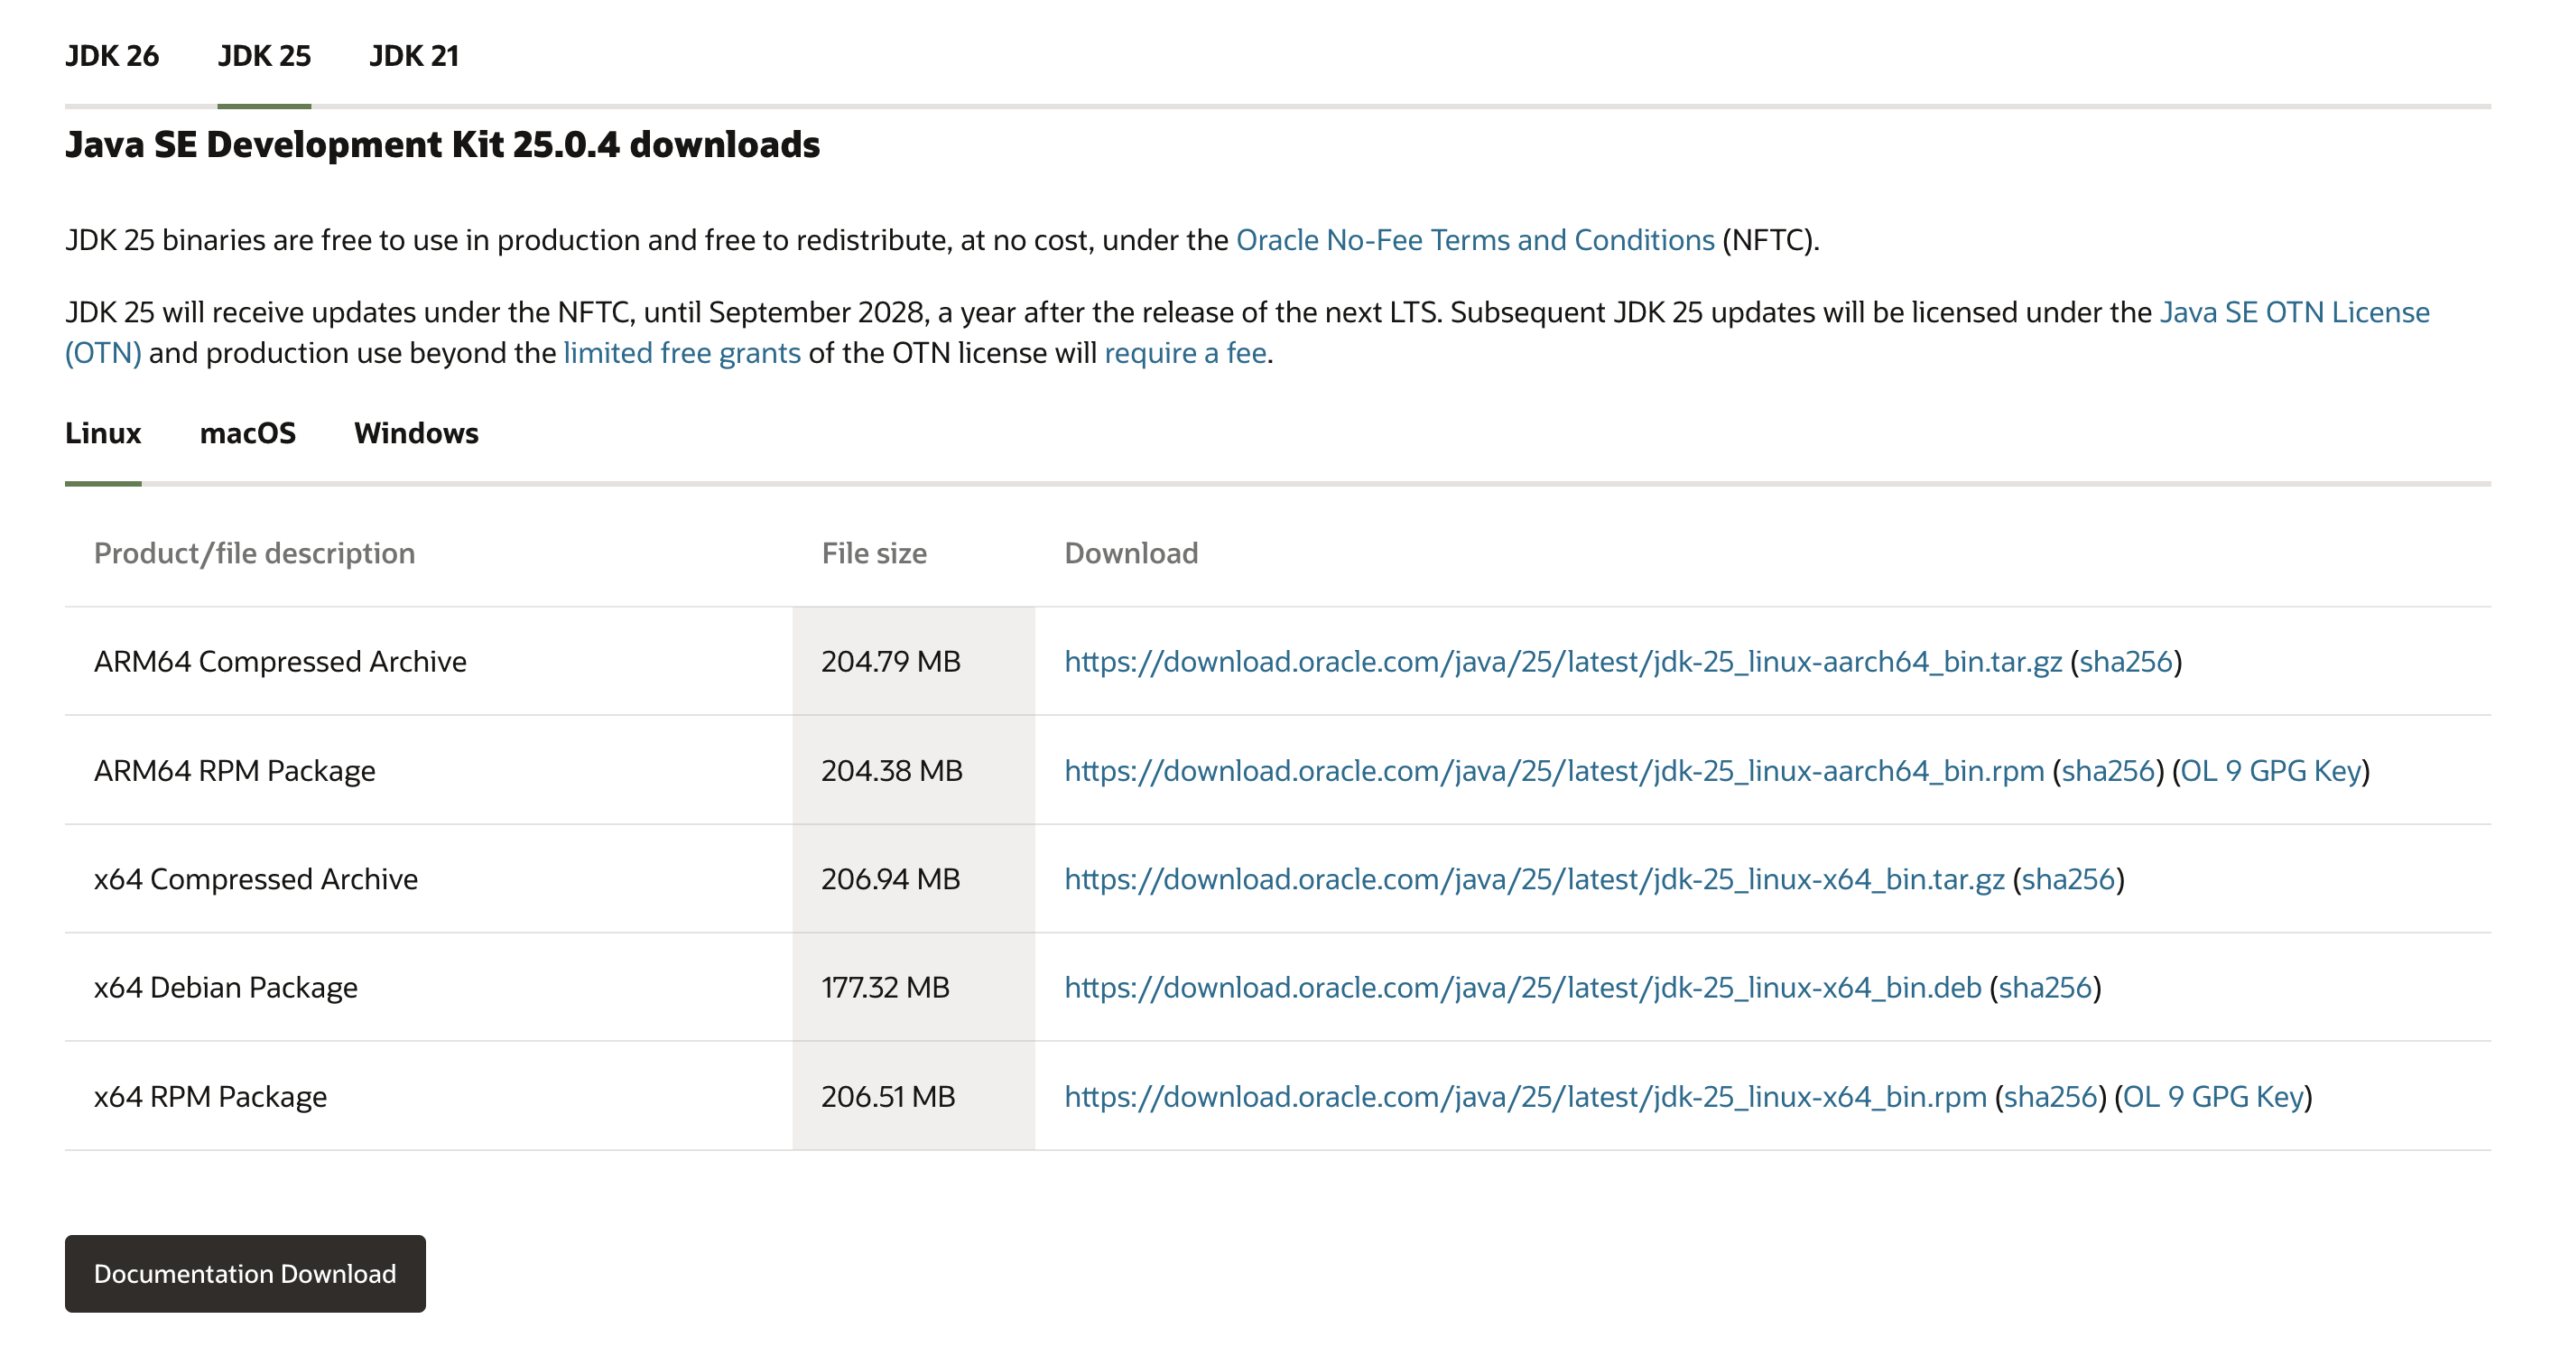
macOS supports Apple Silicon (ARM64 / aarch64) and Intel (x64). Choose the matching installer.
Not sure which Mac you have? Open the Apple menu → About This Mac. If the chip says Apple M1/M2/M3/M4, download ARM64. If it says Intel, download x64.
- Open Oracle Java downloads.
- Select an LTS release such as JDK 21, JDK 25, or 17.
- Open the macOS tab.
- Download the matching DMG Installer (ARM64 for Apple Silicon, x64 for Intel).
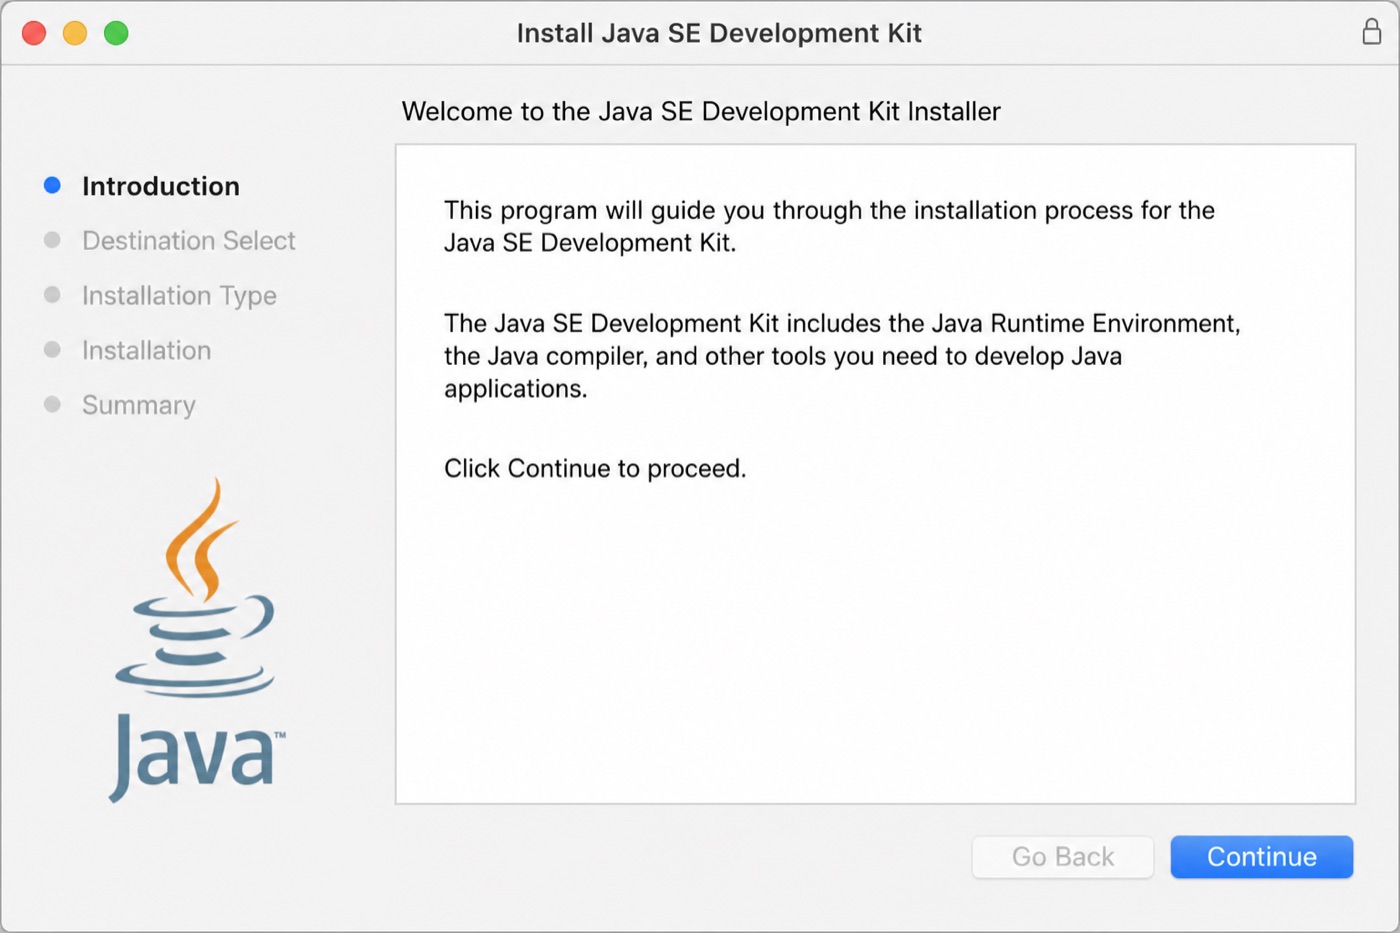
- Double-click the
.dmg, then the.pkginstaller. - Click Continue, then Install, and enter your Mac password when asked.
- Close the installer, eject the DMG, and open a new Terminal window.
Oracle installs the JDK under a path like /Library/Java/JavaVirtualMachines/jdk-<version>.jdk.
Install on Windows
You need 64-bit Windows and administrator rights.
- Open Oracle Java downloads.
- Select an LTS release such as JDK 21 or JDK 25.
- Open the Windows tab.
- Download the x64 Installer (
.exe).
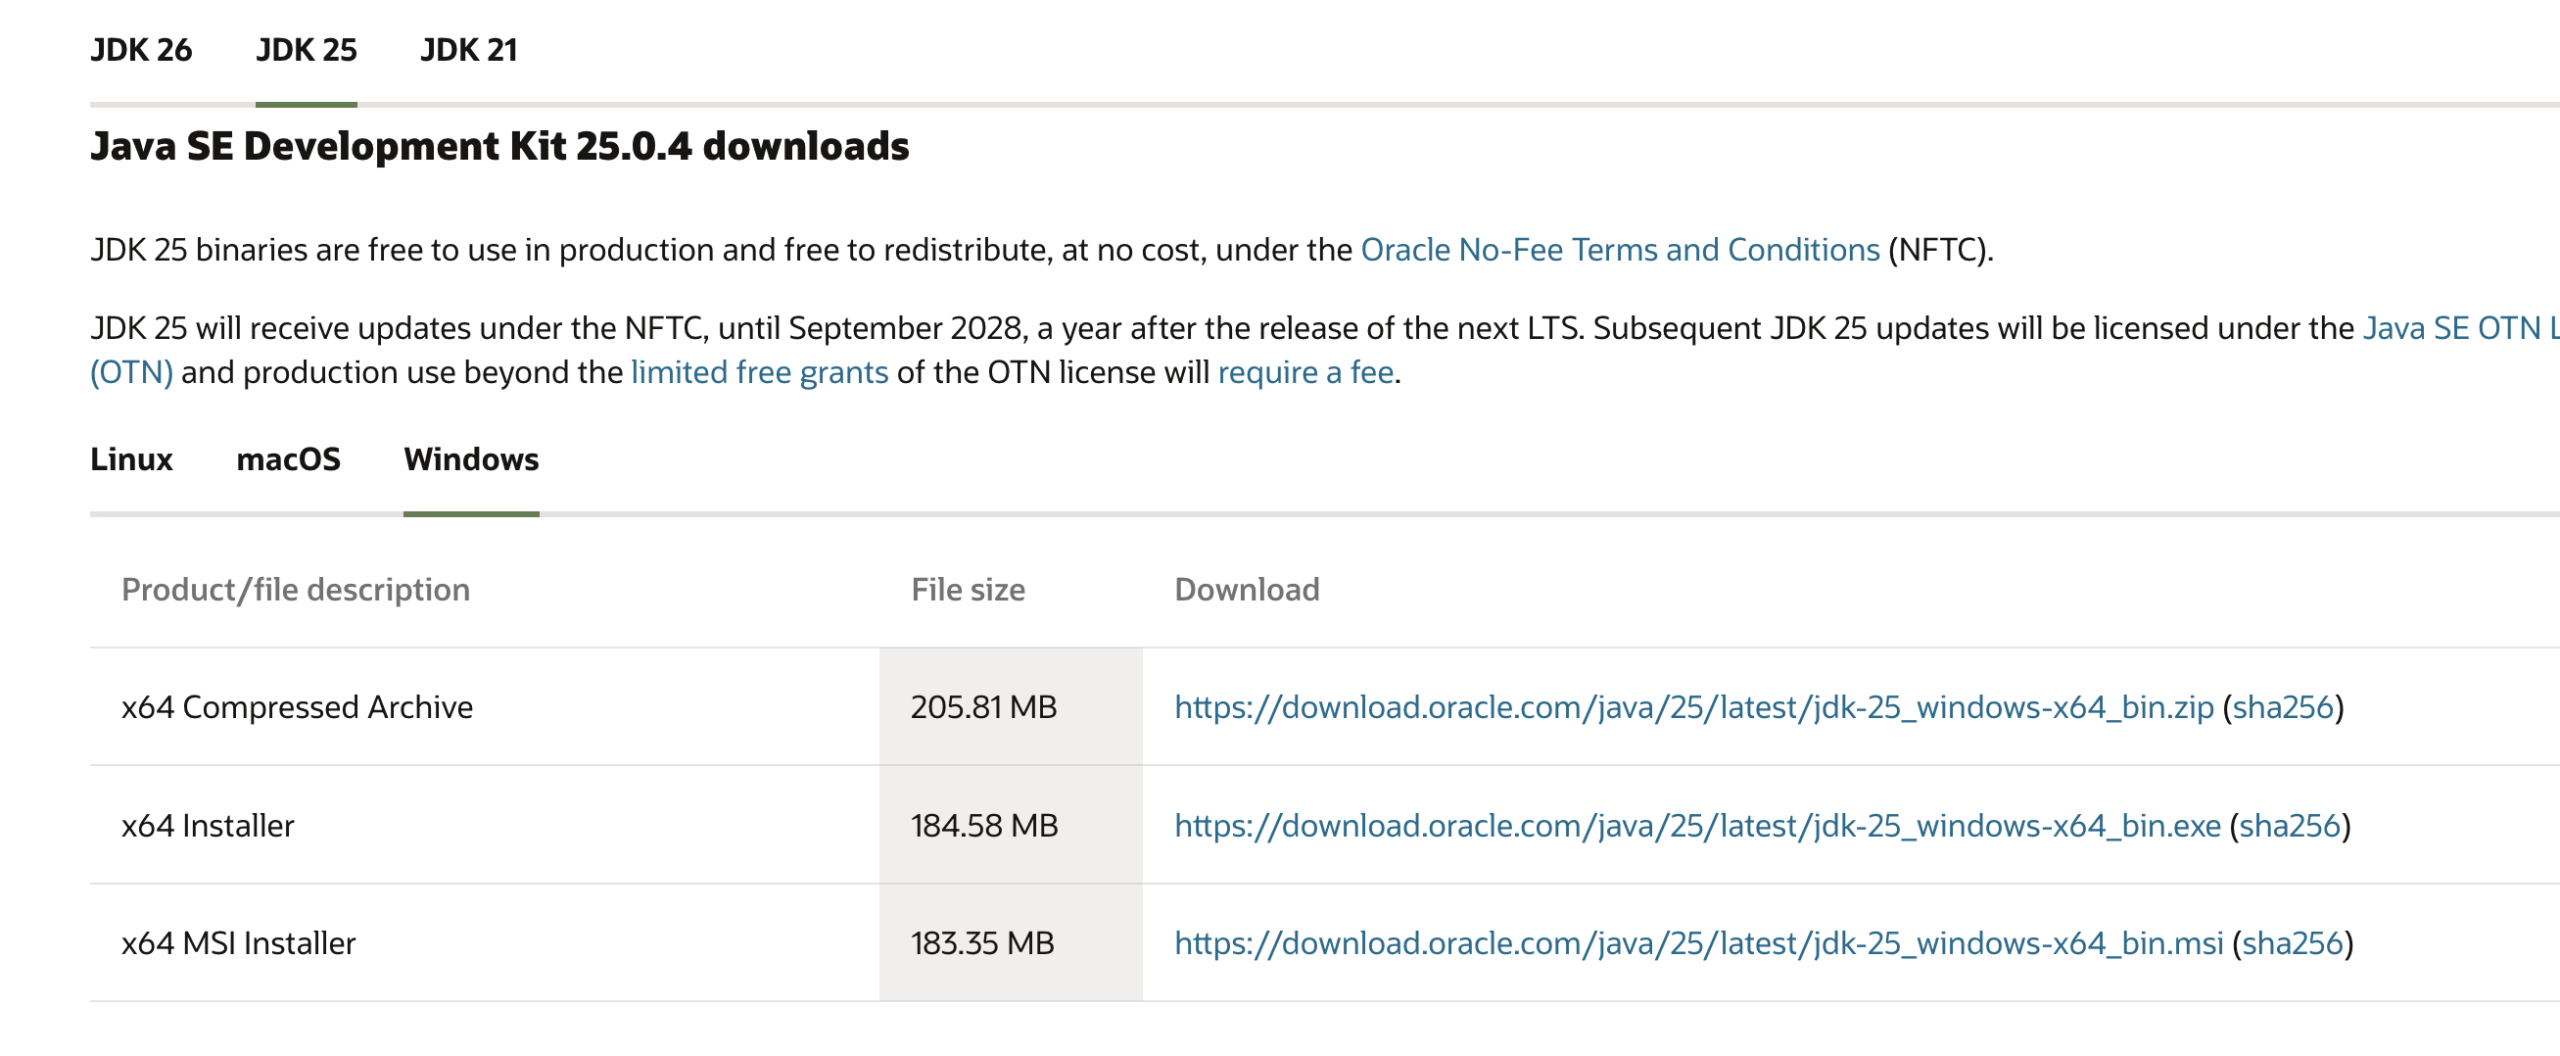
- Run the installer as administrator, click through Next / Install, then reopen Command Prompt or PowerShell.
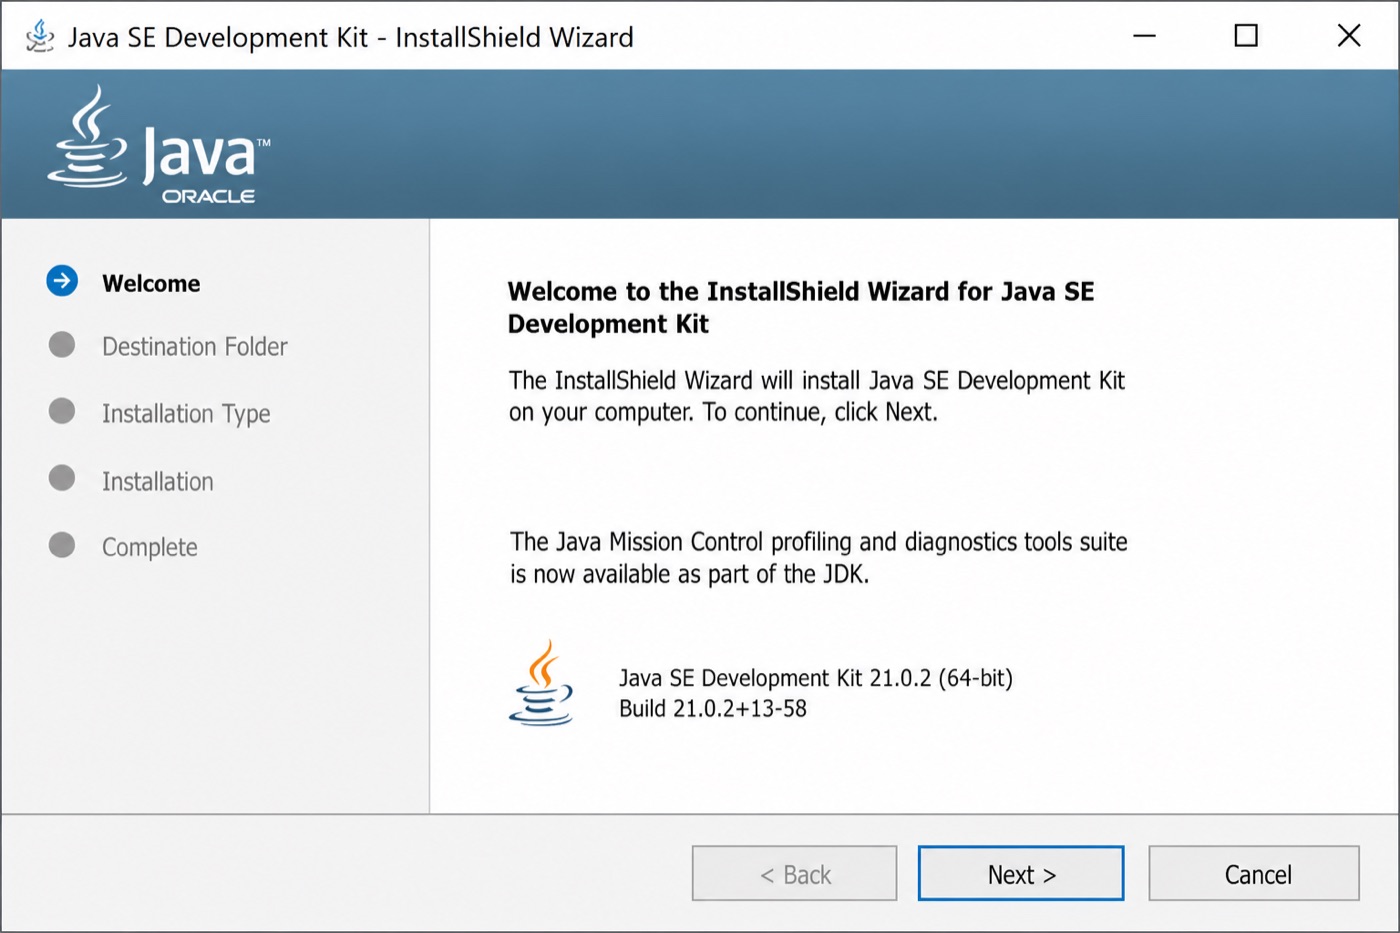
Recent Oracle JDKs usually install under C:\Program Files\Java\jdk-<version> and place java / javac on PATH.
Verify your Java installation
java -version
javac -version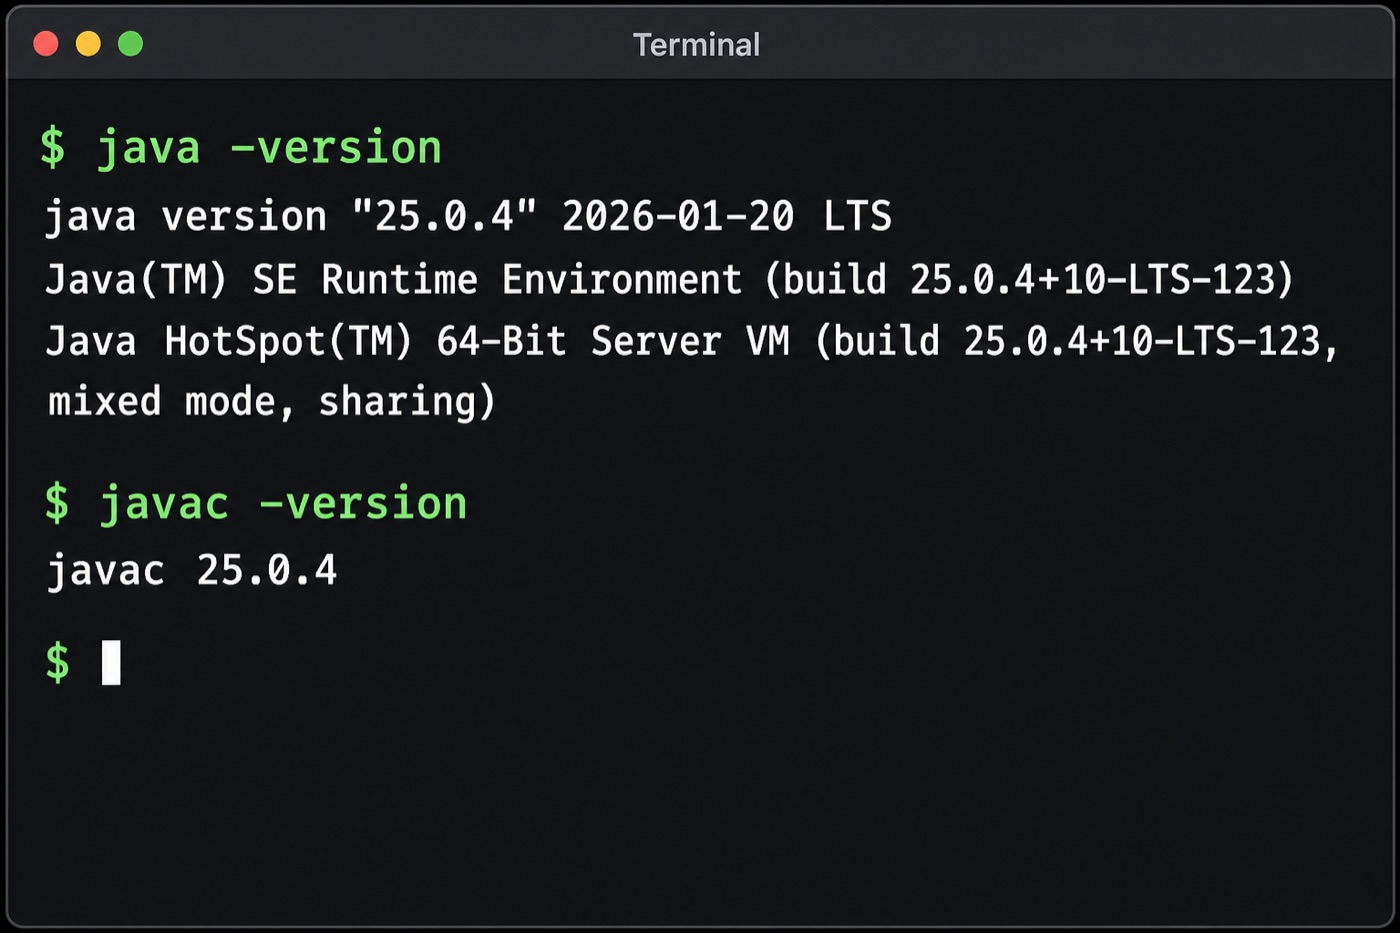
If java works but javac is missing, install the full JDK. If IntelliJ sees the JDK but the terminal does not, IntelliJ can still run tests, but fix PATH before command-line Maven.
If the terminal cannot find Java
Most installs work after you open a new terminal. Use this section only if the verification commands above still fail.
macOS: run /usr/libexec/java_home -V, then add these lines to ~/.zshrc (change 21 to the JDK version you installed, such as 17 or 25), and open a new Terminal:
export JAVA_HOME=$(/usr/libexec/java_home -v 21)
export PATH="$JAVA_HOME/bin:$PATH"
If java_home -V lists only 17 or 25, use that number instead of 21. Windows: open Environment Variables, set JAVA_HOME to your JDK folder (for example C:\Program Files\Java\jdk-21), add %JAVA_HOME%\bin to Path, then open a new terminal.
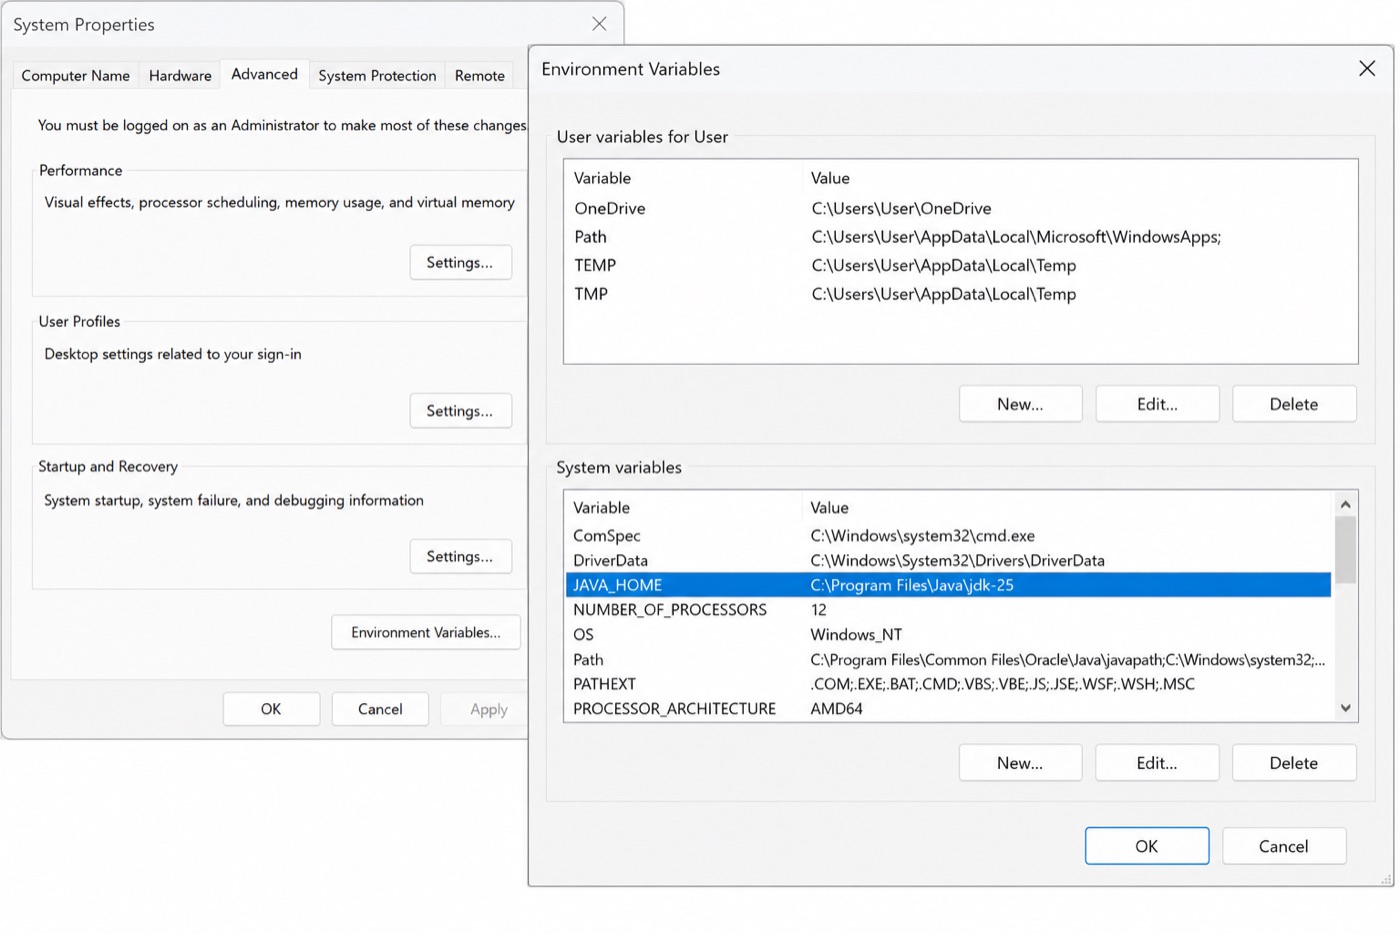
You can also let IntelliJ manage the JDK in Project Structure. Still verify javac once for terminal Maven later.
Install IntelliJ IDEA
Download and install IntelliJ
- Open https://www.jetbrains.com/idea/download/.
- Choose the installer for your operating system (macOS or Windows).
- Download the free/core IntelliJ IDEA build. If the page offers an Ultimate trial, you can skip the trial and use the free core features for this academy.
- Run the installer.
- On first launch, accept the default first-run choices unless you already know you want different plugins or a custom UI theme. Defaults are safe for Lesson 3.
- When IntelliJ finishes loading, you should see a welcome screen with New Project.
Which IntelliJ edition you need
As of IntelliJ IDEA 2025.3, JetBrains ships a unified IntelliJ IDEA product. Core Java and Maven support remains free, and that free core is enough for this academy. An Ultimate trial is optional. Older Community Edition installs (2025.2 and earlier) also work for Java + Maven + TestNG.
IntelliJ helps you create Maven projects, sync pom.xml dependencies, run TestNG with a green play button, and catch compile errors before the browser starts. No paid plugins are required for Lesson 3.
Create a Maven project
Maven is your project’s shopping list. Instead of downloading Selenium jars by hand, you declare them in pom.xml, and Maven fetches matching versions from Maven Central. That is easier to share and update than loose jar files.
Do you need to install Maven separately?
No, not for this lesson. IntelliJ includes a bundled Maven, so it can create and run this project without a separate Maven installation. You will need Maven on your system PATH only when you want to run mvn test from a terminal later.
Create the project in IntelliJ
- On the welcome screen, click New Project. If a project is already open, use File → New → Project.
- In the left list, select Java.
- Set the build system to Maven (not IntelliJ or Gradle).
- Under JDK, pick the JDK you installed earlier (17+ preferred). If the list is empty, click Add JDK / Download JDK and choose a modern LTS release.
- Name the project
selenium-java-academy. - Open Advanced Settings if that section is shown, then set GroupId to
com.codekruand ArtifactId toselenium-java-academy. - Click Create.
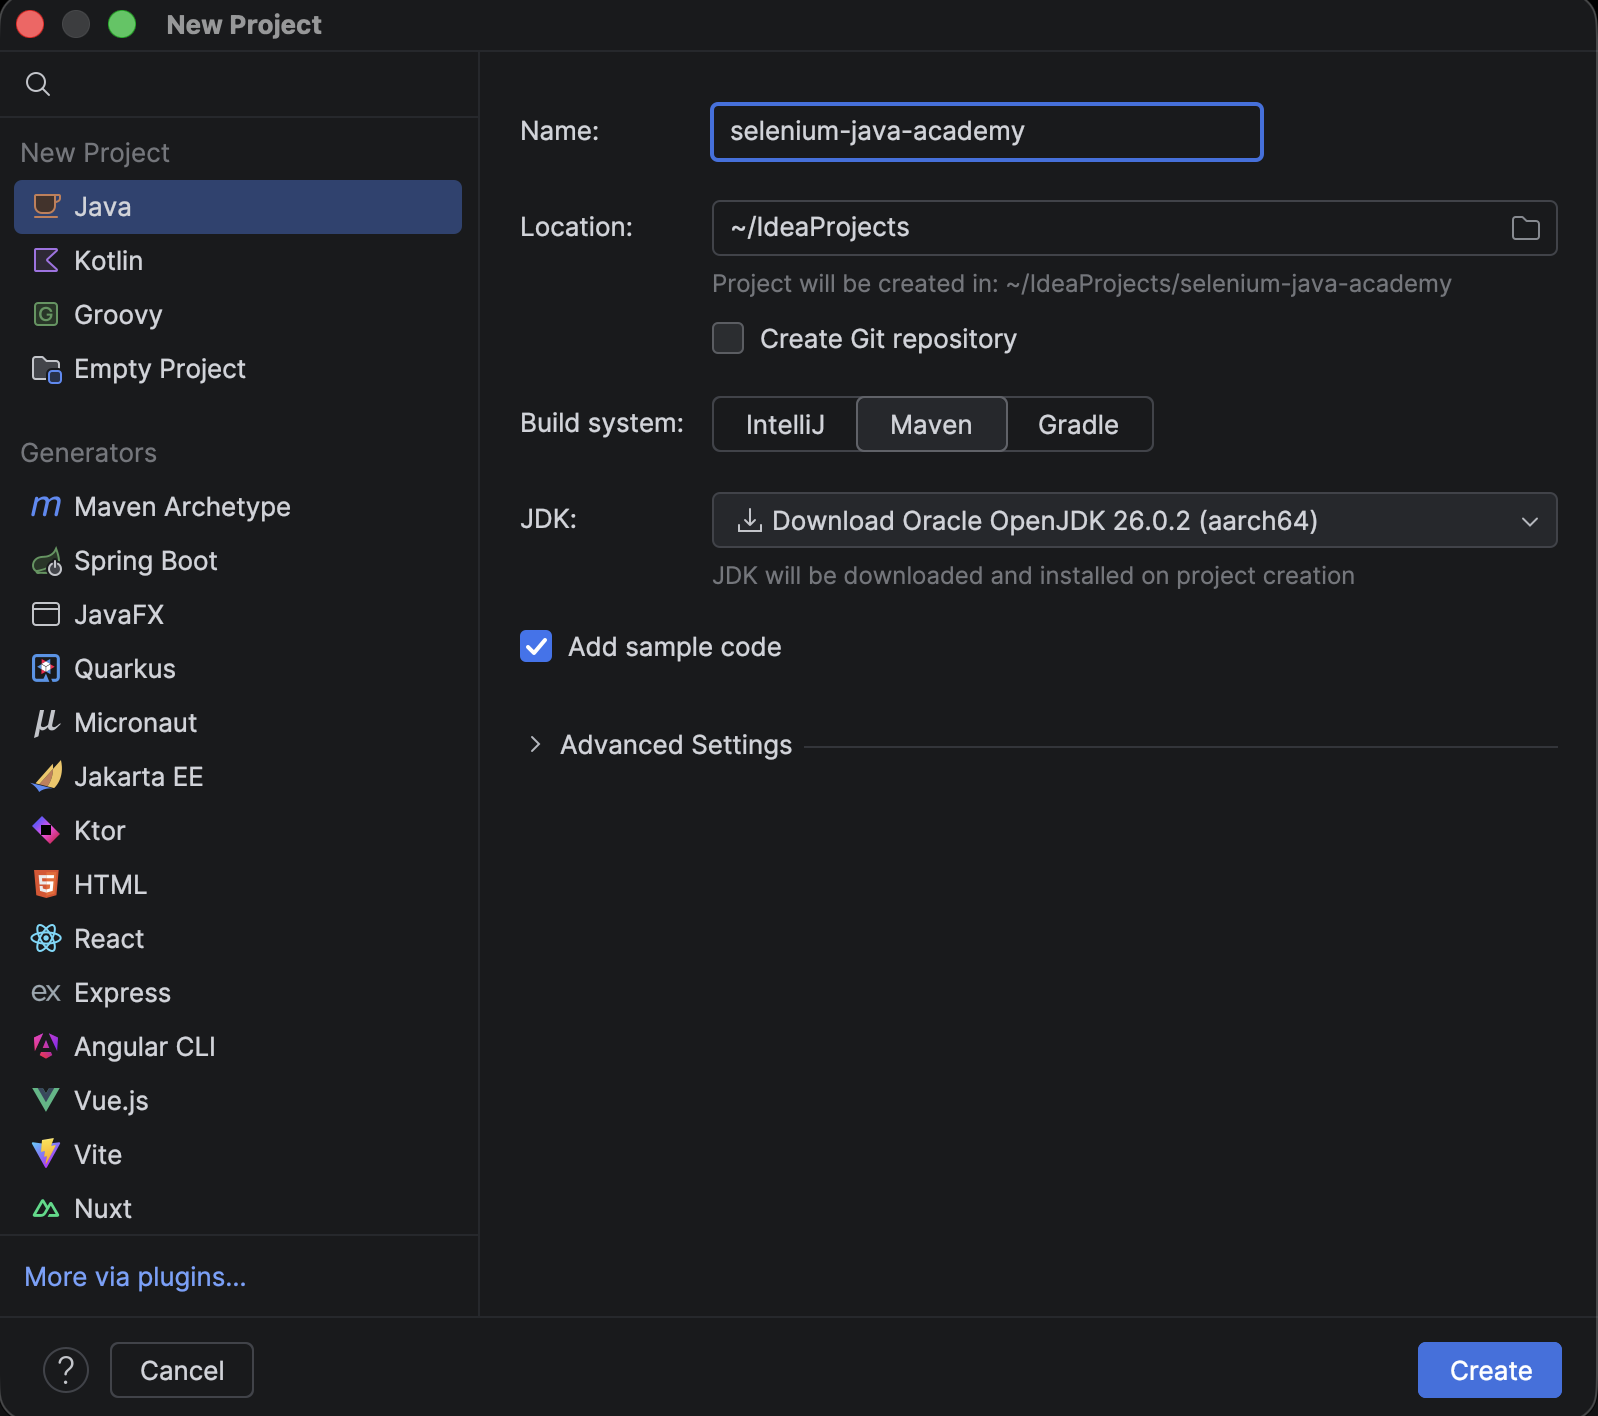
groupId is like an organization namespace. artifactId is the project name Maven uses.
Wait until IntelliJ finishes indexing. You should see a Project tool window on the left with pom.xml and a src folder.
Folders you will use
selenium-java-academy/
├── pom.xml
└── src/
    ├── main/java          (often empty for early tests)
    └── test/java          (put Selenium tests here)
Beginner Selenium tests belong under src/test/java. That is Maven’s standard test source folder.
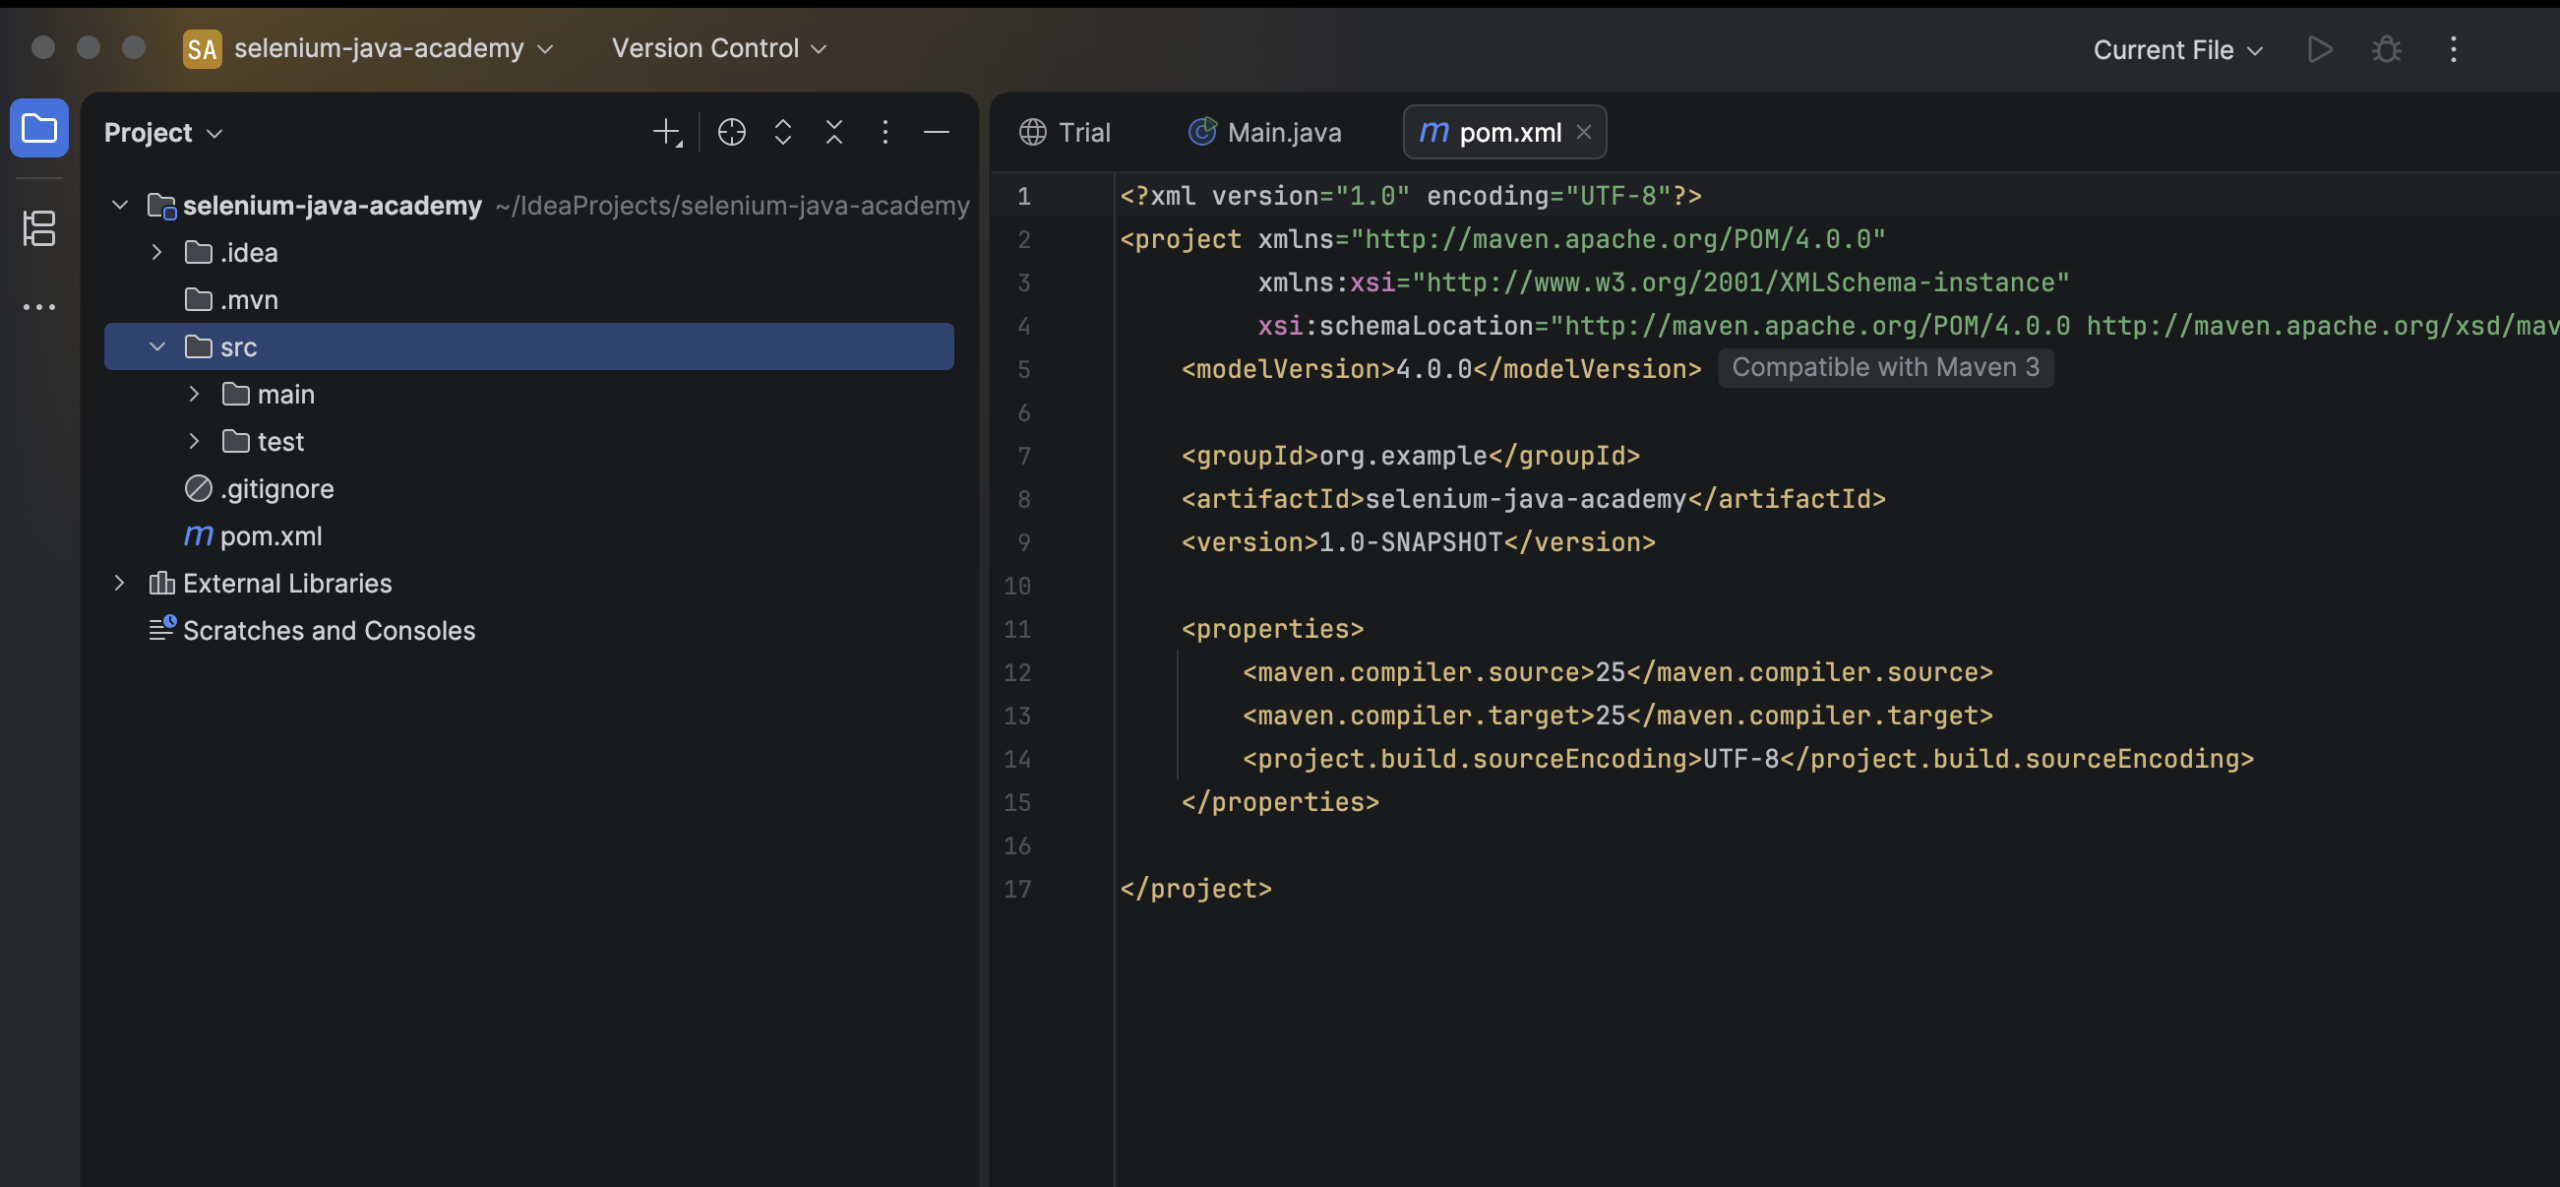
Your pom.xml → Maven downloads jars → IntelliJ classpath ready → your test can import Selenium and TestNGIf IntelliJ shows a Maven sync banner after you edit pom.xml, accept it. Until sync finishes, imports may stay red even when the XML is correct.
Add Selenium and TestNG
Add the starter pom.xml
Open pom.xml and use this starter. Versions move over time, so check Maven Central or the Selenium downloads page when you update later.
<?xml version="1.0" encoding="UTF-8"?>
<project xmlns="http://maven.apache.org/POM/4.0.0"
         xmlns:xsi="http://www.w3.org/2001/XMLSchema-instance"
         xsi:schemaLocation="http://maven.apache.org/POM/4.0.0 https://maven.apache.org/xsd/maven-4.0.0.xsd">
    <modelVersion>4.0.0</modelVersion>

    <groupId>com.codekru</groupId>
    <artifactId>selenium-java-academy</artifactId>
    <version>1.0-SNAPSHOT</version>

    <properties>
        <maven.compiler.release>17</maven.compiler.release>
        <project.build.sourceEncoding>UTF-8</project.build.sourceEncoding>
        <selenium.version>4.46.0</selenium.version>
        <testng.version>7.12.0</testng.version>
    </properties>

    <dependencies>
        <dependency>
            <groupId>org.seleniumhq.selenium</groupId>
            <artifactId>selenium-java</artifactId>
            <version>${selenium.version}</version>
        </dependency>

        <dependency>
            <groupId>org.testng</groupId>
            <artifactId>testng</artifactId>
            <version>${testng.version}</version>
            <scope>test</scope>
        </dependency>
    </dependencies>
</project>
Understand the dependencies
selenium-java: Official Selenium Java bindings. Selenium Manager ships with modern releases, so you do not add a separate Manager dependency.testng: Annotations such as@Testand assertions such asAssert.assertTrue(...).maven.compiler.release: Compile for Java 17.<scope>test</scope>on TestNG: Normal for test libraries. It means TestNG is for tests, not for production app code.- Version properties: One place to bump Selenium or TestNG later.
Reload Maven
- Save
pom.xml. - If IntelliJ shows a floating banner such as Load Maven Project or a reload icon on the Maven tool window, click it.
- You can also open View → Tool Windows → Maven, then click the refresh icon.
- Wait until sync finishes. In
FirstSeleniumTest(after you create it), imports such asorg.openqa.selenium.WebDriverandorg.testng.annotations.Testshould no longer stay red.
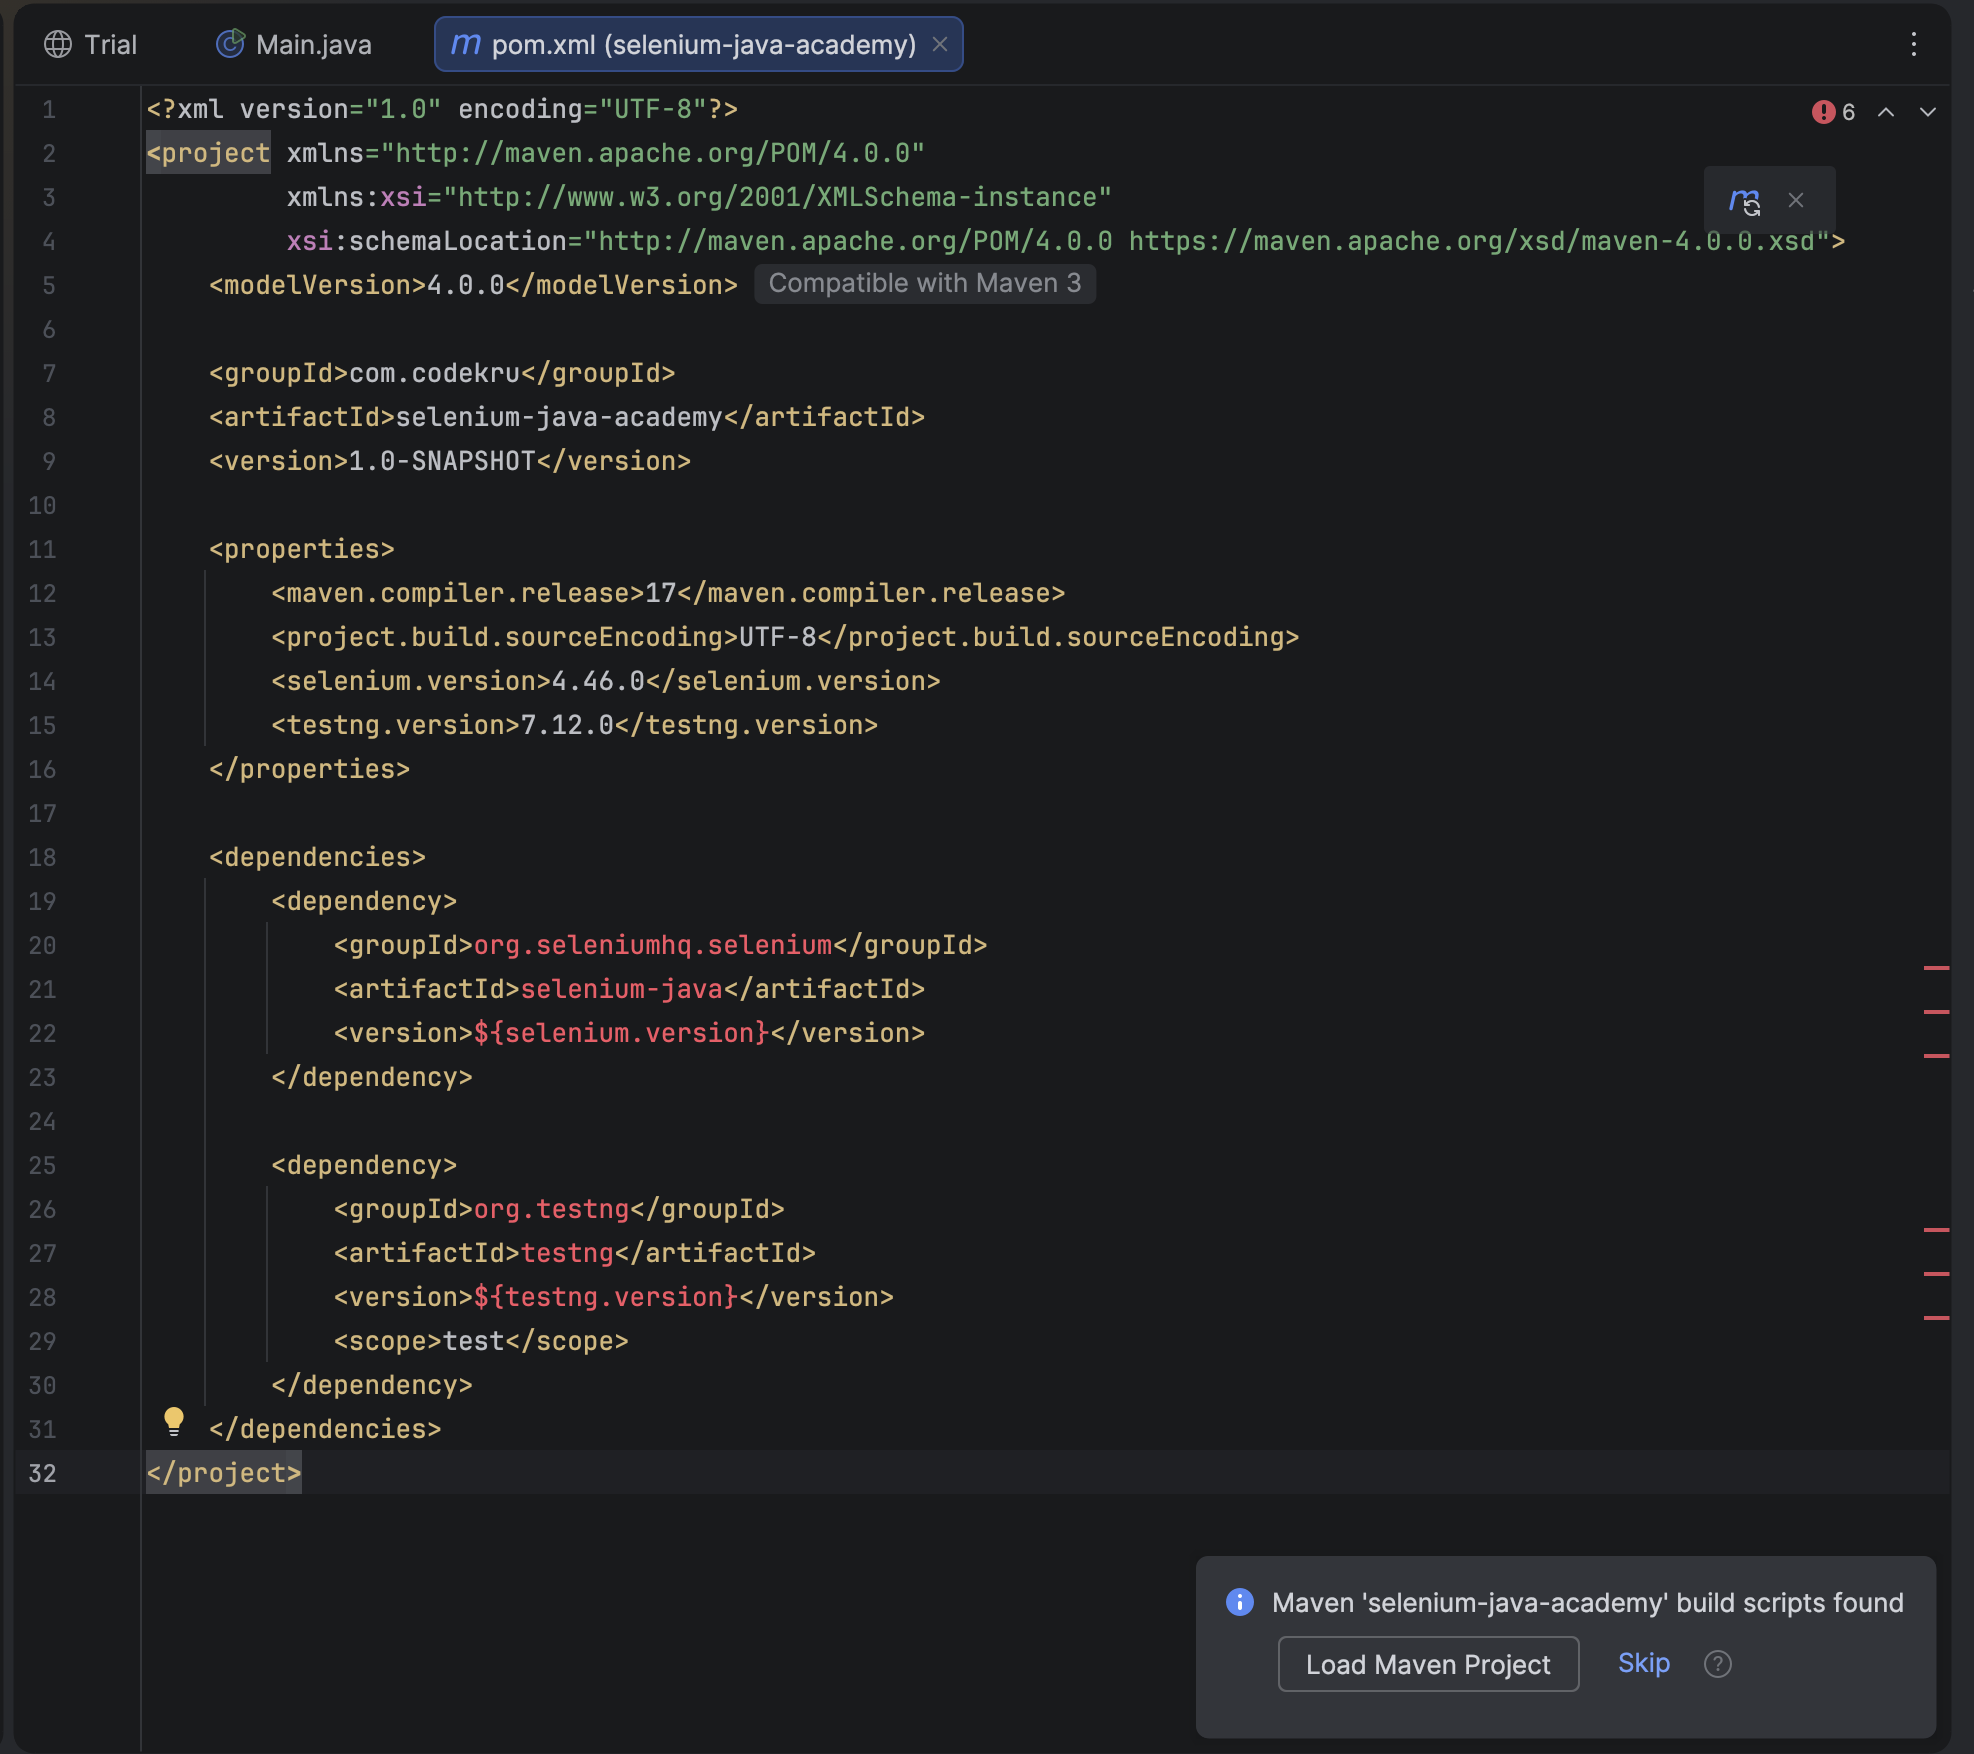
At the time of writing, Selenium’s downloads page lists Java bindings 4.46.0 as stable.
Let Selenium Manager handle ChromeDriver
Why you do not need a manual driver download
Older tutorials required downloading chromedriver, matching it to Chrome, and setting webdriver.chrome.driver. That broke when Chrome auto-updated.
Since Selenium 4.6, Selenium Manager ships with Selenium. Official docs describe it as the built-in helper that can discover, download, and cache a compatible browser driver when one is not already available. Official docs still label it as Beta, but it is the default helper path for common local setups.
What happens when Chrome starts
WebDriver driver = new ChromeDriver();
Behind that line: Selenium looks for a usable ChromeDriver, Selenium Manager can resolve one that matches your Chrome if needed, ChromeDriver starts a WebDriver session, and later commands travel to that session. The first fetch may need network access. Drivers are typically reused from a local cache (often ~/.cache/selenium on macOS/Linux).
Install Google Chrome for this lesson if it is not already on your machine. First-time setup is smoother when Chrome is already present.
Write and run your first Selenium test
Create the test file in IntelliJ
- In the Project tool window, expand
src→test. - Right-click the
javafolder undertest. - Choose New → Package and name it
com.codekru.academy. - Right-click the new package and choose New → Java Class.
- Name the class
FirstSeleniumTestand press Enter. - Replace the generated class contents with the code below.
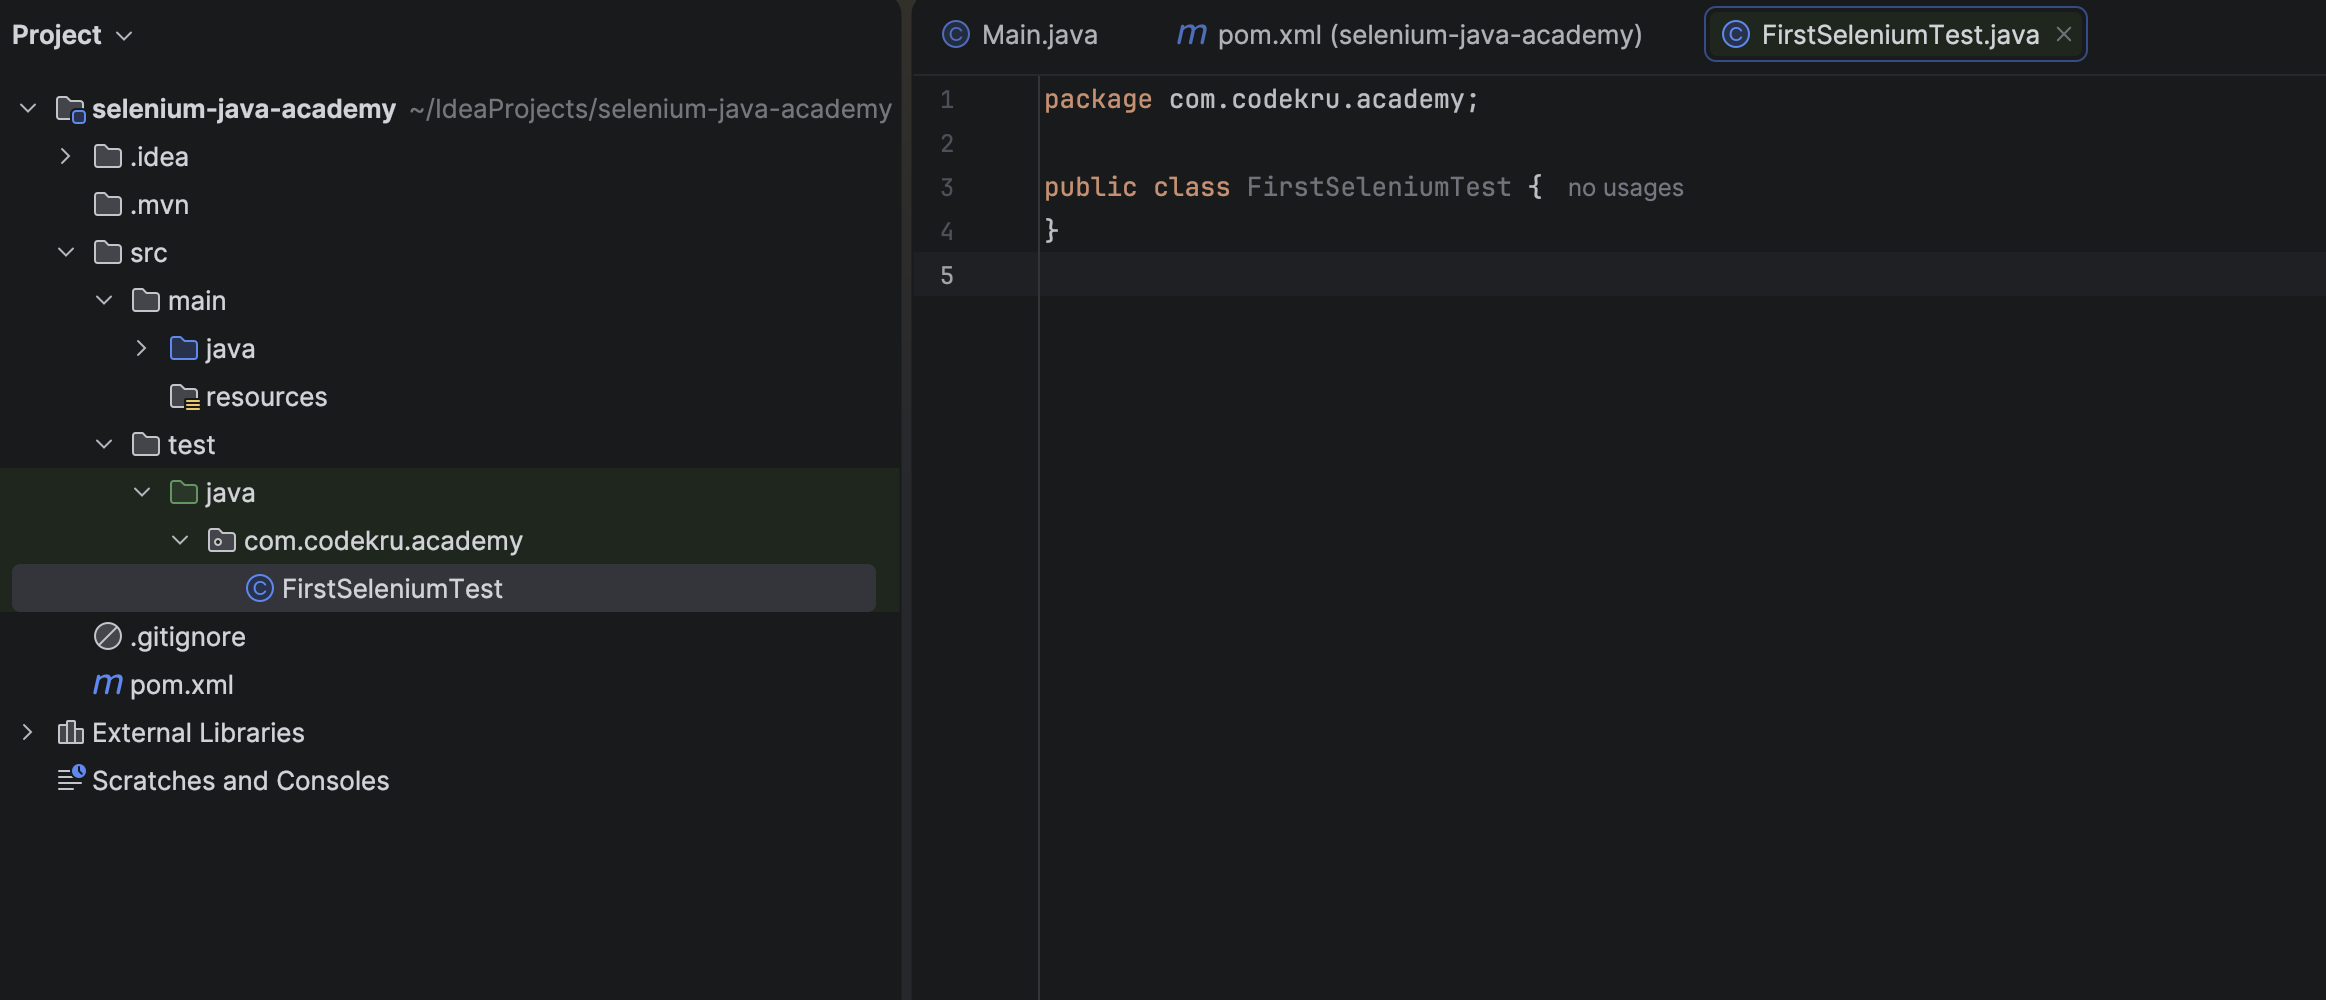
Final path: src/test/java/com/codekru/academy/FirstSeleniumTest.java
Demo URL: https://testkru.com/Elements/TextFields (page title: Text Fields)
package com.codekru.academy;

import org.openqa.selenium.WebDriver;
import org.openqa.selenium.chrome.ChromeDriver;
import org.testng.Assert;
import org.testng.annotations.AfterMethod;
import org.testng.annotations.BeforeMethod;
import org.testng.annotations.Test;

public class FirstSeleniumTest {

    private WebDriver driver;

    @BeforeMethod
    public void setUp() {
        driver = new ChromeDriver();
    }

    @Test
    public void openTestKruTextFieldsPage() {
        driver.get("https://testkru.com/Elements/TextFields");

        String title = driver.getTitle();
        Assert.assertTrue(
                title.contains("Text Fields"),
                "Expected title to contain 'Text Fields' but was: " + title
        );
    }

    @AfterMethod
    public void tearDown() {
        if (driver != null) {
            driver.quit();
        }
    }
}
Line-by-line in plain English
package com.codekru.academy;places the class undersrc/test/java.- Imports bring in WebDriver, ChromeDriver, TestNG annotations, and Assert.
private WebDriver driver;holds the browser session.@BeforeMethod setUp()starts Chrome before each@Test. Selenium Manager can resolve ChromeDriver if needed.driver.get(...)opens the TestKru Text Fields page.driver.getTitle()reads the browser tab title.Assert.assertTrue(...)fails if the title does not containText Fields.@AfterMethod tearDown()callsquit()so the session closes even after a failure.
@BeforeMethod / @AfterMethod keep setup and cleanup consistent when you add more tests. Module 1 covers that lifecycle in more depth.
Before you click Run
java -versionandjavac -versionboth show 11+.- IntelliJ Project SDK matches that JDK.
- Maven sync finished with no red dependency errors.
- Chrome is installed.
- The test class is under
src/test/java. - You can open https://testkru.com/Elements/TextFields in a normal browser.
How to run it
- Save the file (
Cmd+Son macOS orCtrl+Son Windows). - In the editor gutter next to the class name
FirstSeleniumTest, or next to theopenTestKruTextFieldsPagemethod, click the green run icon. - Choose Run ‘FirstSeleniumTest’ / Run ‘openTestKruTextFieldsPage()’ using the TestNG runner.
- If IntelliJ offers more than one run configuration type, pick TestNG, not Application and not a plain
mainmethod runner. - Watch the Run tool window at the bottom for pass/fail results.
What success looks like
Chrome opens, the Text Fields page loads, TestNG shows green/passed, and Chrome closes because quit() ran. If the assertion fails, confirm the exact URL and inspect driver.getTitle().
Optional: from the project root, mvn test also works if Maven is on your PATH. IntelliJ is enough for this lesson.
Common setup problems and fixes
| Problem | Likely cause | What to try |
|---|---|---|
javac not found | JDK missing or not on PATH | Install JDK 17+, reopen terminal |
| Red imports in IntelliJ | Maven not synced | Reload Maven; check pom.xml |
| Browser never opens | Chrome missing or offline first run | Install Chrome; allow network for Selenium Manager |
| ChromeDriver version errors | Old manual driver on PATH | Prefer Selenium Manager; remove stale driver paths |
| Chrome stays open | Forgot quit() | Keep @AfterMethod cleanup |
| Wrong title assertion | Wrong URL | Use the Text Fields URL above |
| TestNG run option missing | Wrong folder or missing dependency | Put class under src/test/java; re-sync Maven |
Fix Java first, then Maven sync, then browser launch, then the assertion.
Summary
- Install a JDK 11+ (17 recommended) on macOS or Windows.
- Use IntelliJ IDEA (free core is enough) as your editor and runner.
- Create a Maven project and declare selenium-java plus TestNG in
pom.xml. - Let Selenium Manager help with browser drivers instead of hand-managing ChromeDriver.
- Run a TestNG test that opens TestKru, asserts the title, and closes the browser with
quit().
You now have a working Selenium Java lab. Everything ahead builds on this foundation.
Assignment
Create a second test method in the same class (or a new class) that:
- Opens https://testkru.com instead of the Text Fields page.
- Asserts that
driver.getTitle()equalsTestKru(exact homepage title). - Still uses
@BeforeMethod/@AfterMethodso Chrome always closes.
Do not paste a finished solution here. Run it yourself and confirm both tests can pass one after another.
Continue practicing: Your First Selenium Script
What is next
Next article: WebDriver, WebElement, and the Test Lifecycle. You will go deeper into the objects behind today’s test: what a WebDriver session is, what a WebElement represents, and how setup and teardown stay reliable as tests grow.
FAQ
1. Do I need Java 17 specifically? No. Current Selenium Java needs Java 11 or newer. Java 17 is a practical academy baseline because Selenium’s own examples commonly use it.
2. How do I install Java on macOS vs Windows? On macOS, download the matching ARM64 or x64 DMG and run the .pkg. On Windows, run the x64 .exe as administrator, then open a new terminal. Verify with java -version and javac -version.
3. Is IntelliJ Ultimate required? No. Free IntelliJ core features (and older Community Edition) are enough for Java, Maven, and TestNG in this course.
4. Why Maven instead of downloading jars manually? Maven records exact library versions in pom.xml and downloads them for you, which is easier to share and update than loose jar files.
5. Do I still need to install ChromeDriver? Usually not for beginners on Selenium 4.6+. Selenium Manager can resolve a matching driver when one is not already available.
6. Why put tests under src/test/java? That is Maven’s standard test source folder. Test-scoped dependencies like TestNG belong with code in that tree.
7. Why call quit() instead of only closing a window? quit() ends the WebDriver session and closes related windows. It is the normal cleanup for a finished test session.
8. Can I use Firefox instead of Chrome? Yes later. For this first setup, Chrome keeps troubleshooting simpler. Firefox would use FirefoxDriver with the same Maven Selenium dependency.
9. Which Selenium version should I use? Prefer a current stable selenium-java release from Selenium’s downloads page or Maven Central. This lesson’s sample uses 4.46.0.
10. Why TestNG and not JUnit? This academy standardizes on TestNG for annotations, assertions, and later features such as groups and data providers. Both can drive Selenium; we stay consistent with TestNG.